
How to Edit wp-config.php in Cloud WordPress
There are many reasons to modify wp-config.php in Cloud WordPress. You may need to enable debugging, set development constants for JetPack, or define your website’s URL. Follow these instructions to learn how to change your wp-config.php in Cloud WordPress.
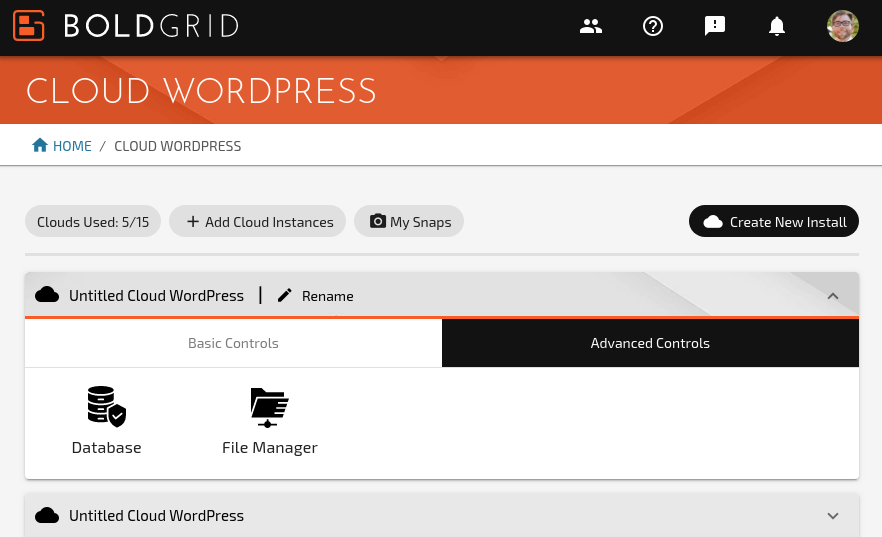
- Log into BoldGrid Central and navigate to Cloud WordPress
- Navigate to the Advanced Tools tab and click on File Manager

- Locate and click on the filename for wp-config.php
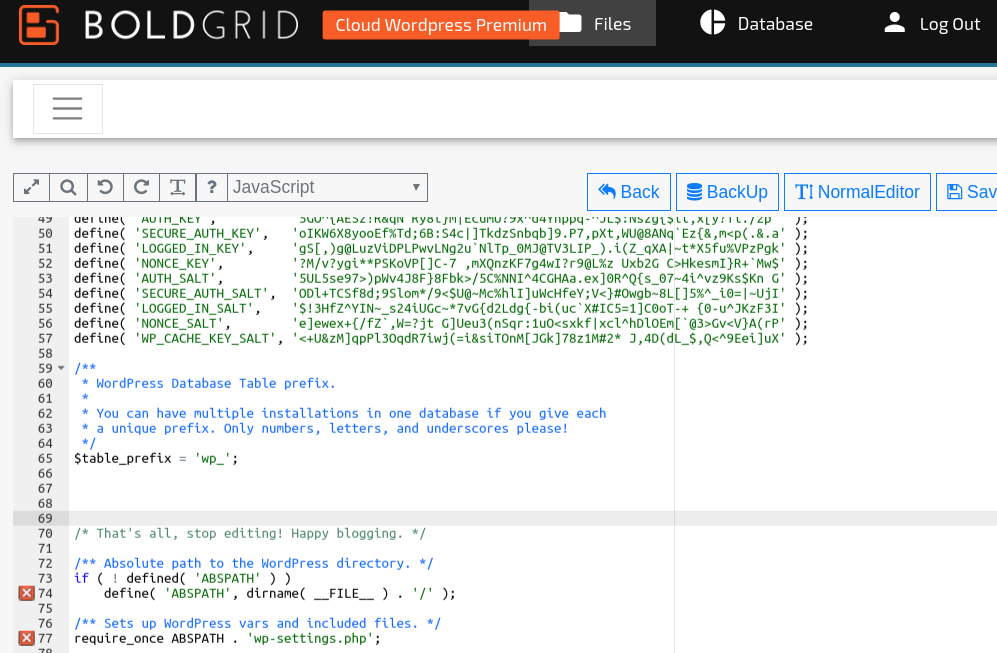
- You’ll see a read-only copy of your config file. Click on Edit or AdvancedEditor
- Scroll down to the line:
/* That's all, stop editing! Happy blogging. */

- Above this line, add any additional constants or flags you need for your Cloud WordPress installations.
Next Steps
Now that you know how to modify your wp-config.php file in Cloud WordPress, read up on how to enable Debugging in Cloud WordPress, how to enable JetPack development mode in Cloud WordPress, or how to define a temporary SiteURL for your development site.
SIGNUP FOR
BOLDGRID CENTRAL
200+ Design Templates + 1 Kick-ass SuperTheme
6 WordPress Plugins + 2 Essential Services
Everything you need to build and manage WordPress websites in one Central place.