
Cloud WordPress is a great tool for testing out new Plugins, Themes, and custom code without risking your live website. If you’re testing out new website features and you need to enable debugging in WordPress, follow these steps.
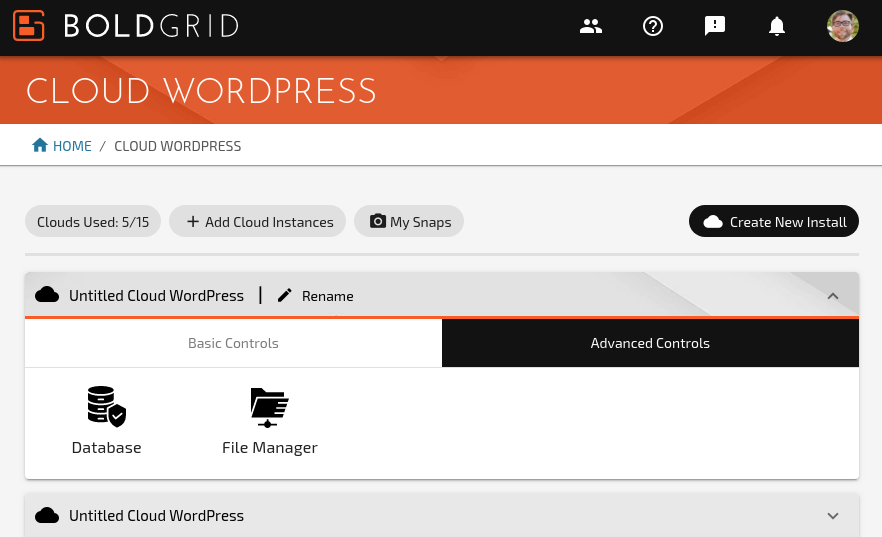
- Log into BoldGrid Central and navigate to Cloud WordPress
- Navigate to the Advanced Tools tab and click on File Manager

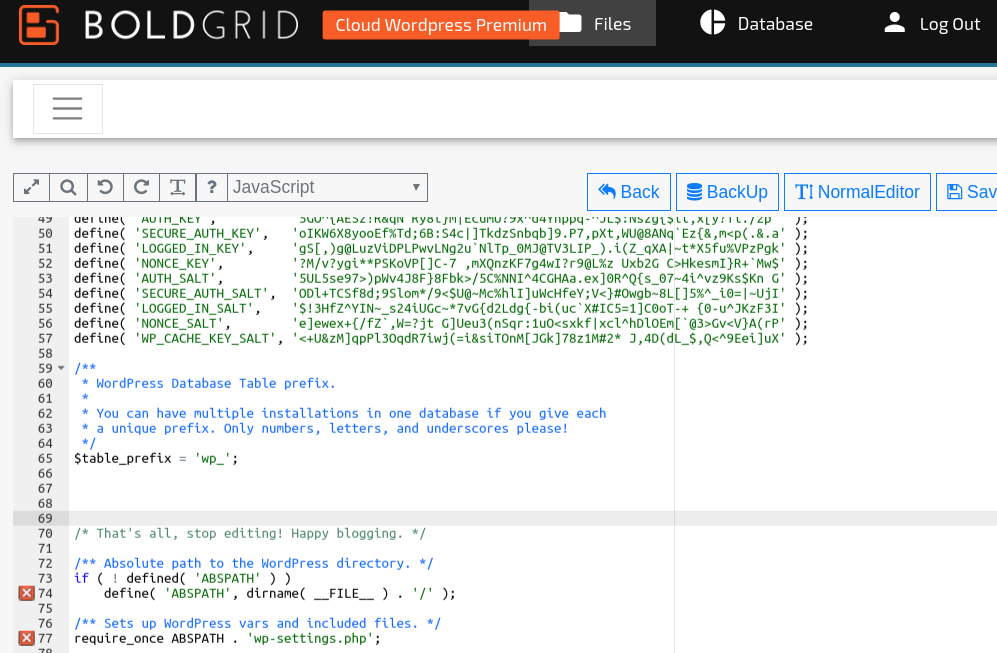
- Locate and click on the filename for wp-config.php
- You’ll see a read-only copy of your config file. Click on Edit or AdvancedEditor
- Scroll down to the line:
/* That's all, stop editing! Happy blogging. */

- Above this line, add the following lines of code:
define( 'WP_DEBUG', true ); //Enable WordPress Debugging
define( 'WP_DEBUG_LOG', true ); //Log errors to wp-content/debug.log
define( 'WP_DEBUG_DISPLAY', true ); //Display WordPress errors when viewing the website
@ini_set( 'display_errors', 1 ); //Display PHP errors when viewing the website
- These settings will display errors when viewing your website, as well as store all errors to a file in wp-content called debug.log
Next Steps
Now that you have debugging enabled, you may want to learn how to view your error log or learn how to interpret WordPress errors.
SIGNUP FOR
BOLDGRID CENTRAL
200+ Design Templates + 1 Kick-ass SuperTheme
6 WordPress Plugins + 2 Essential Services
Everything you need to build and manage WordPress websites in one Central place.