To add BoldGrid Premium Connect Keys to your customer accounts, you can update or create a new Service Plan to apply to the customer subscription of your choice. The following guide will explain how to create a Service Plan that has a set number of Premium Connect Keys as well as walk through the steps to apply that Service Plan to a subscription.
Creating a Service Plan with Premium Connect Keys
 Login to your Plesk Administration Panel as the root user
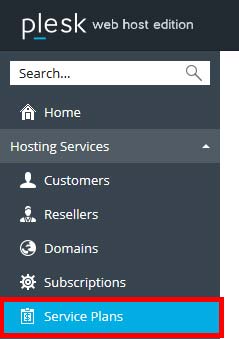
  Under the Hosting Services Section, select Service Plans
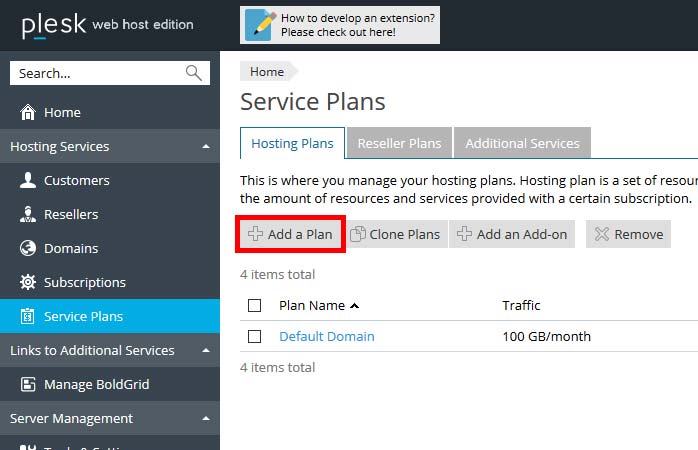
  Select Add A Plan
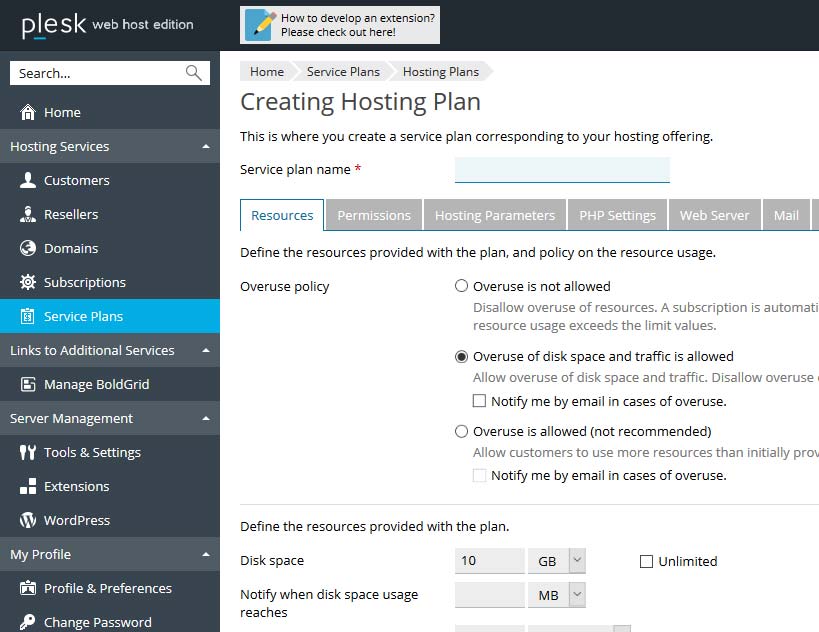
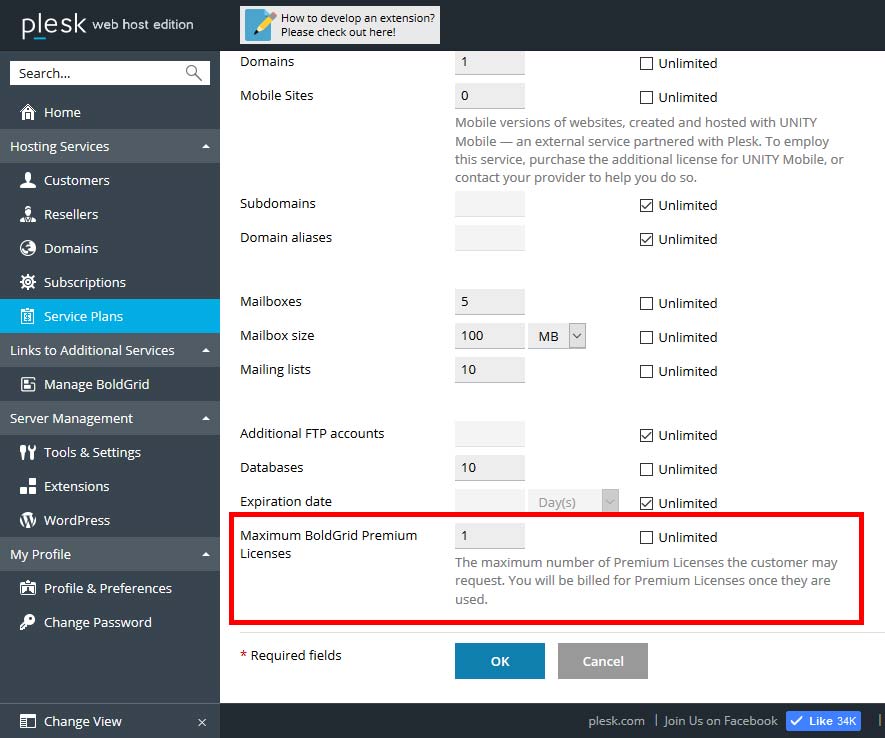
  Fill out the form to set your resource limits for the Service Plan.
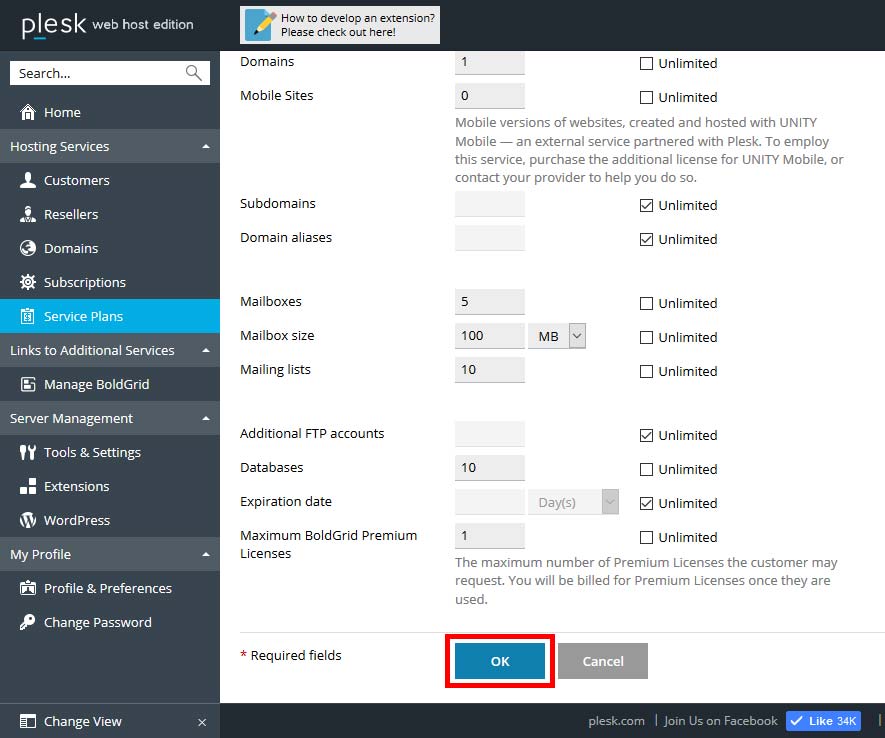
  At the bottom of the form, you will see Maximum BoldGrid Premium Licenses, Create the appropriate number of licenses to add per Customer, or select Unlimited.
 - Select OK
Congratulations! You now know how to add a BoldGrid license to a Service Plan, which you can then apply to your subscriptions directly. This will allow you to set the customers that can use your BoldGrid Premium Connect Keys specifically. The following steps will outline adding that Service Plan to a subscription to complete the process.
Adding the Service Plan to a Subscription
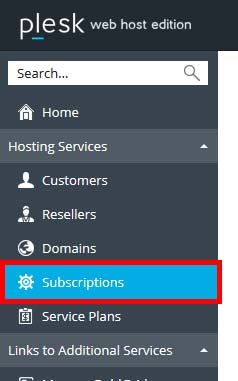
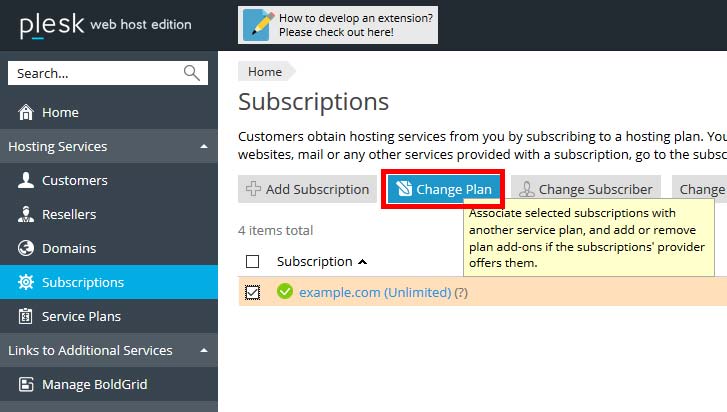
 Under the Hosting Services Section, select Subscriptions
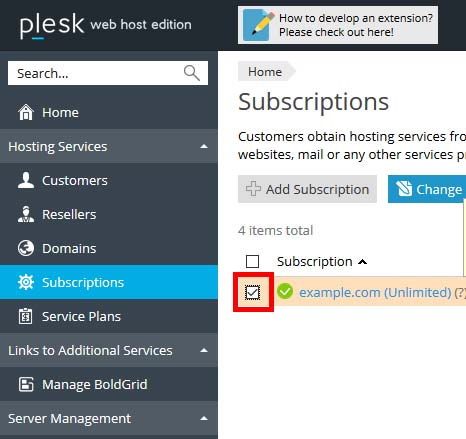
  Select the Subscription you wish to add your new Service Plan to
  Select Change Plan
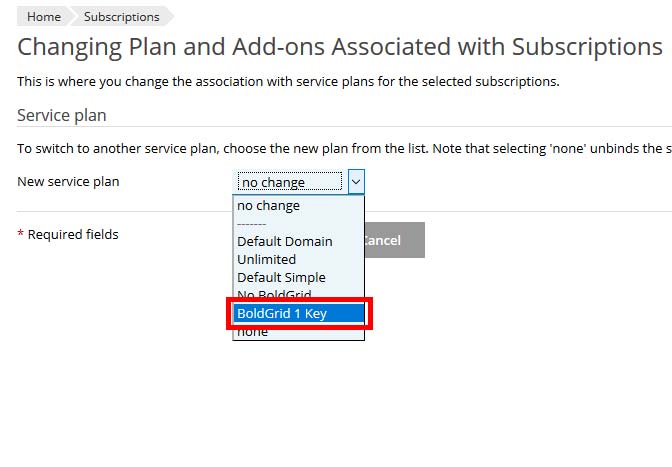
  From the dropdown menu, select the Service Plan we created earlier
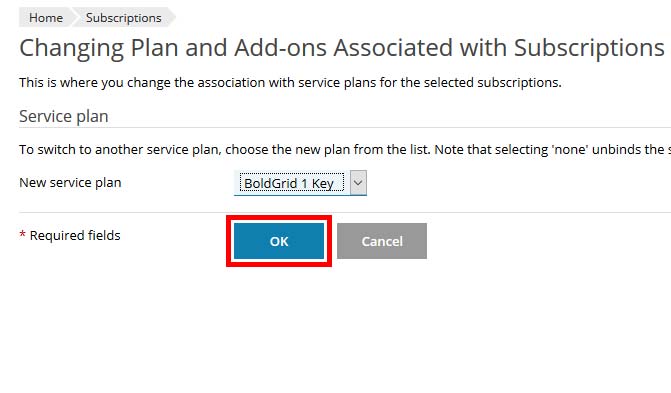
  Select OK
Congratulations! You now know how to add a Service Plan in Plesk to a customer’s subscription so they can use BoldGrid Premium Connect Keys. For a more in depth description of Hosting Plans and Subscriptions, you can review the Plesk documentation.
SIGNUP FOR
BOLDGRID CENTRAL
200+ Design Templates + 1 Kick-ass SuperTheme
6 WordPress Plugins + 2 Essential Services
Everything you need to build and manage WordPress websites in one Central place.