BoldGrid can be installed on sites that already use WordPress. This installation will only add the plugins so you can use BoldGrid at any time. It will not overwrite any existing content or themes on the WordPress site. In this guide, we show how to add BoldGrid to a site via the Plesk Onyx 17 Web Host.
Adding BoldGrid to WordPress in Onyx 17 Web Host
- Log into your Plesk Web Host interface.
 Click on the Manage BoldGrid option from the left-hand menu.
  Next, click on the Install BoldGrid Tab.
  Click on the Add BoldGrid button on the “I Have an Existing WordPress Site” option.
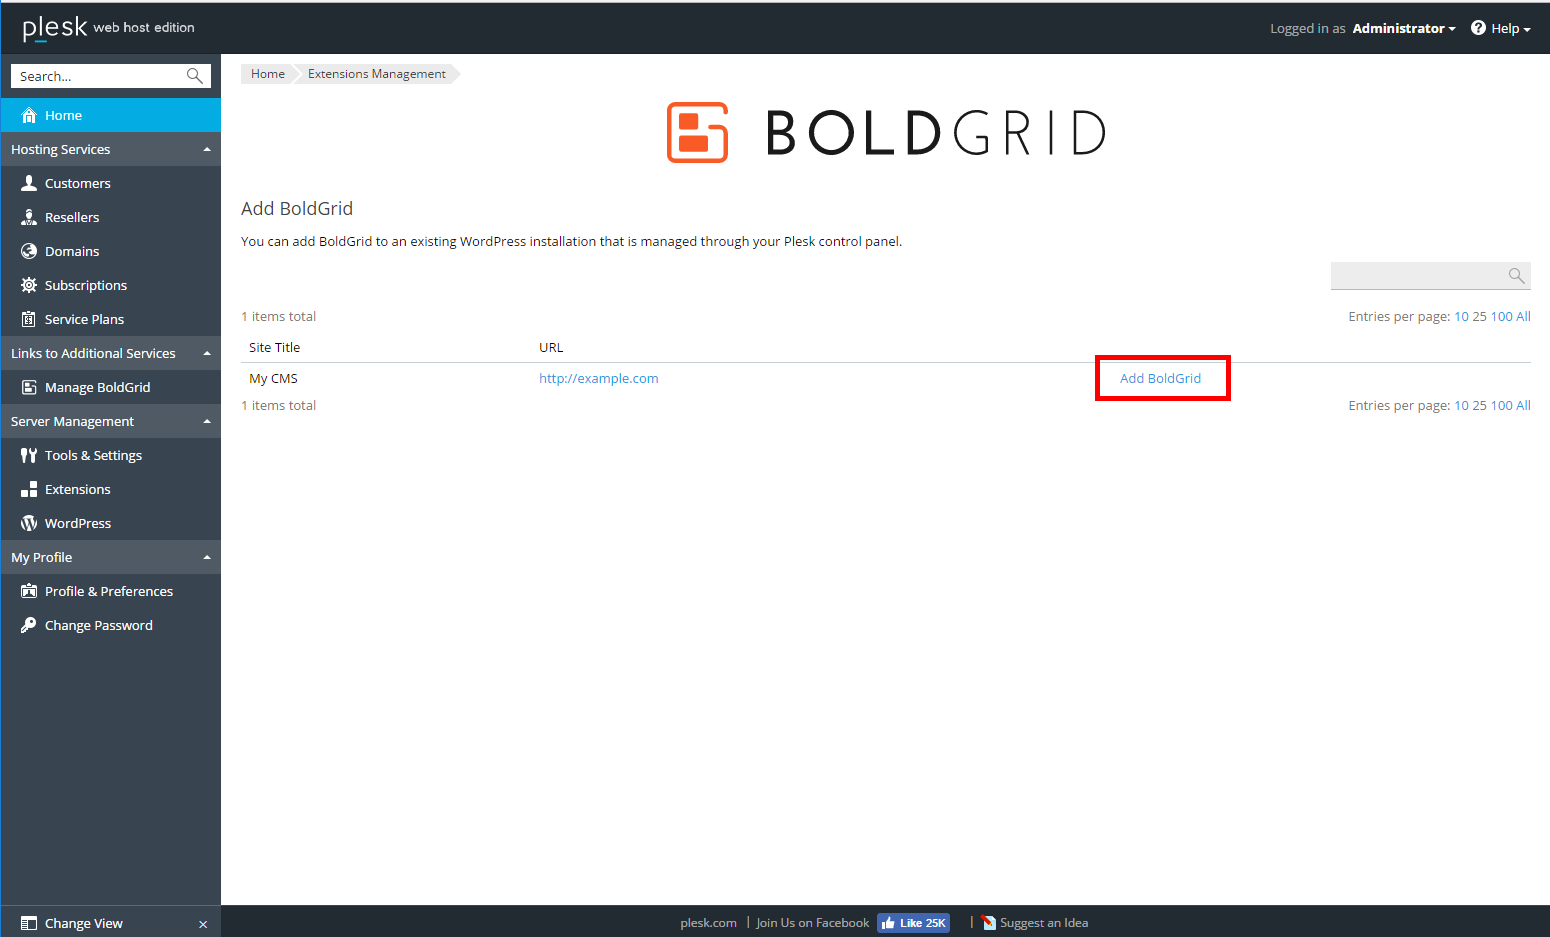
 - Locate the site you want to work on and click on the Add BoldGrid link.
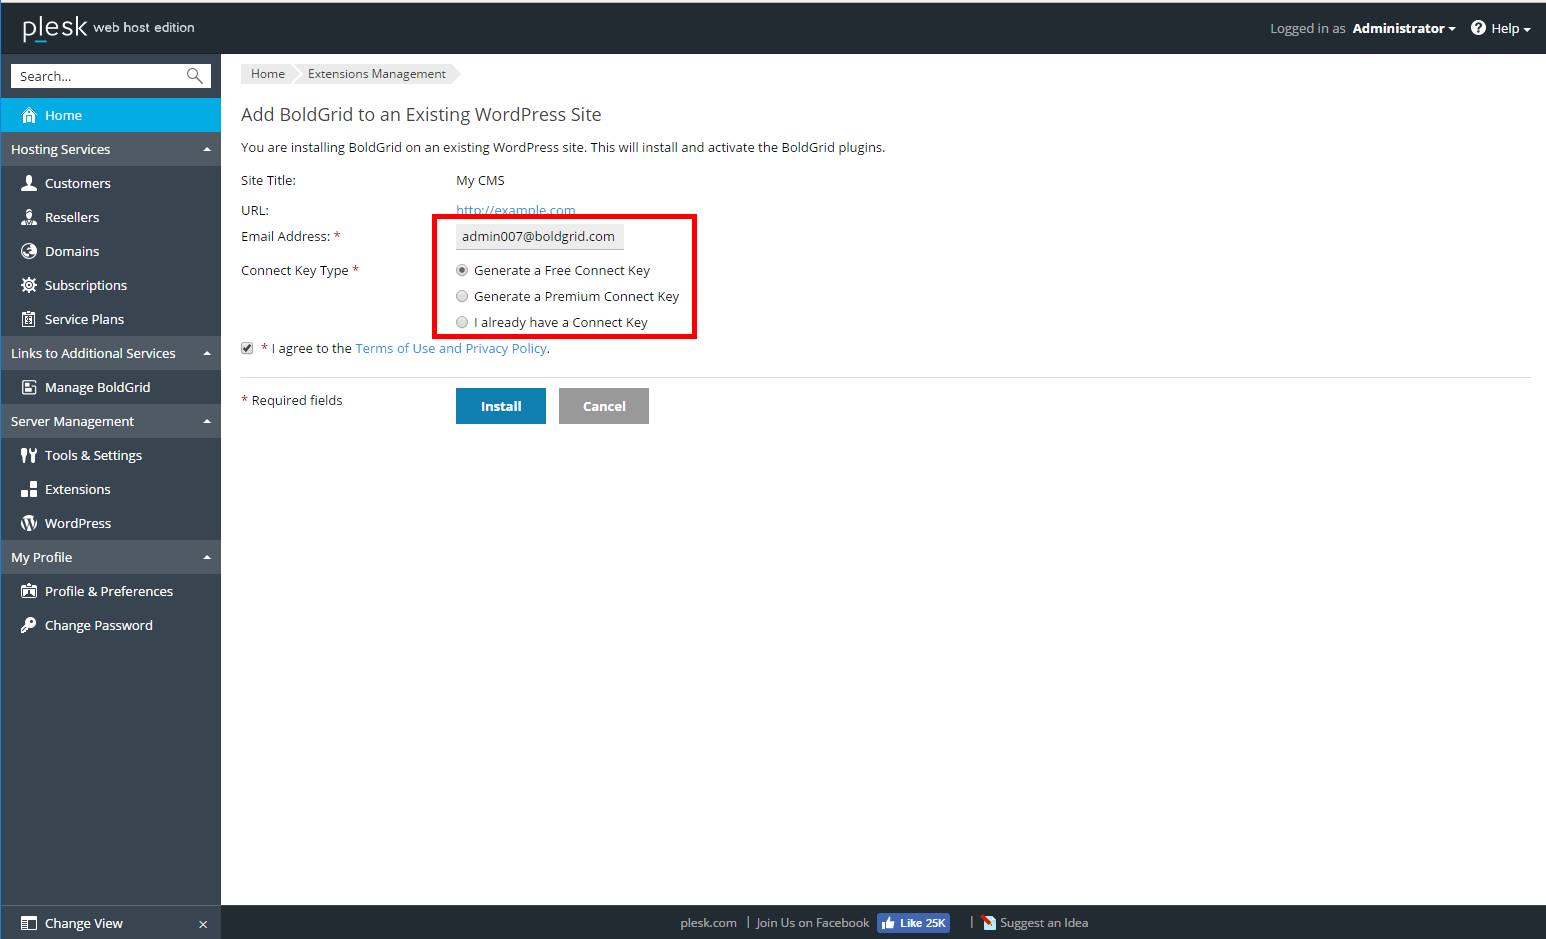
 Enter an email address and select your key type.
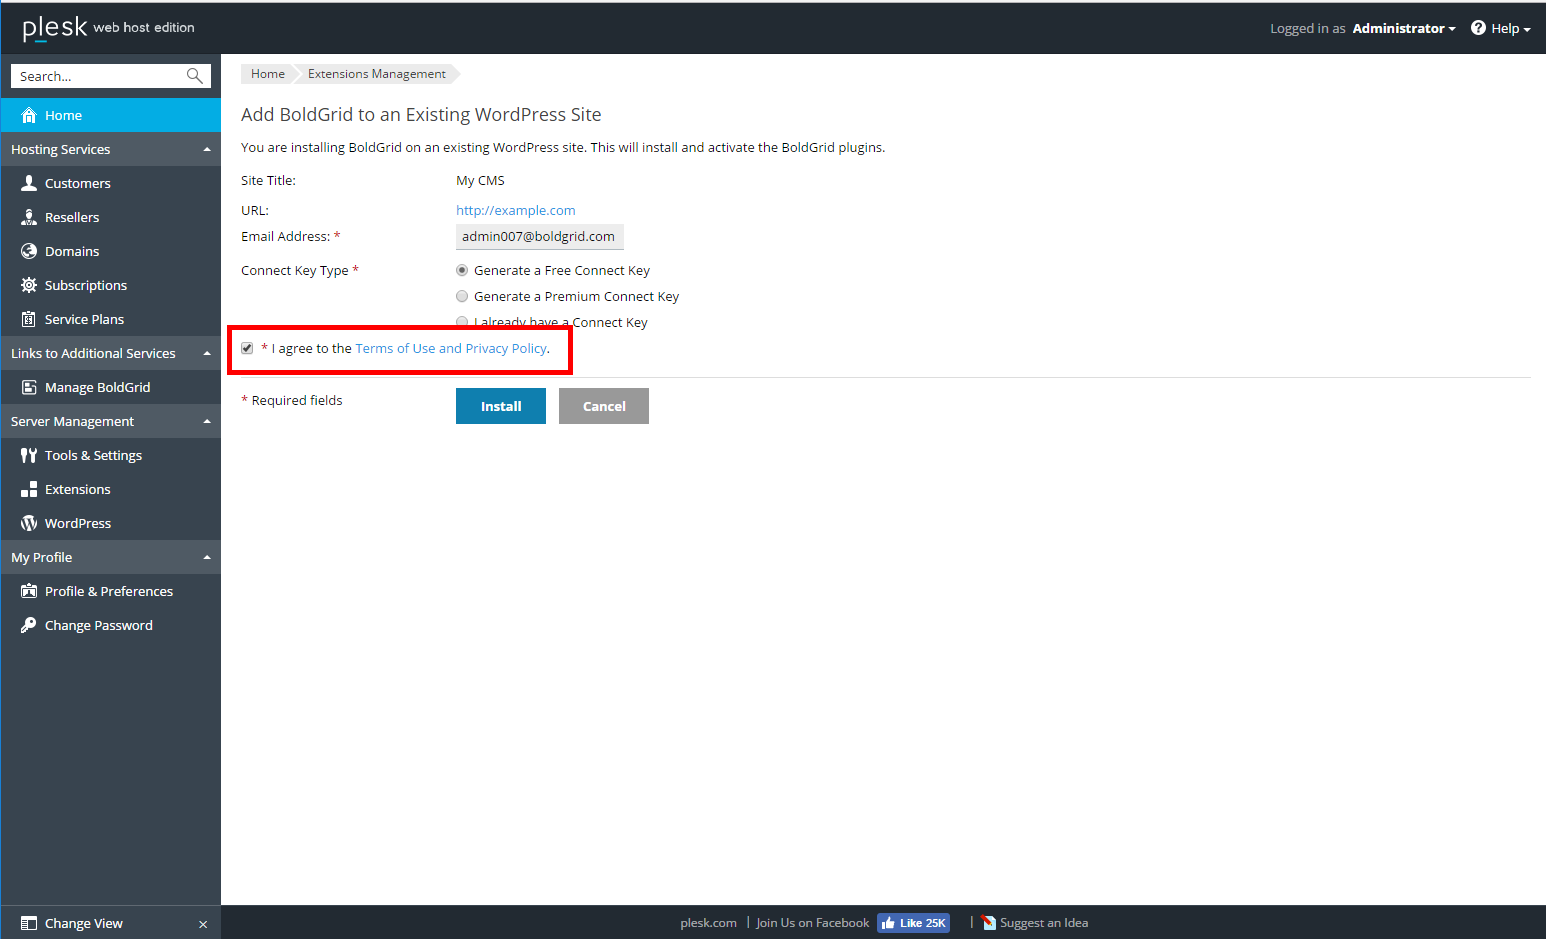
 - Click the checkbox to agree to the Terms of Use.
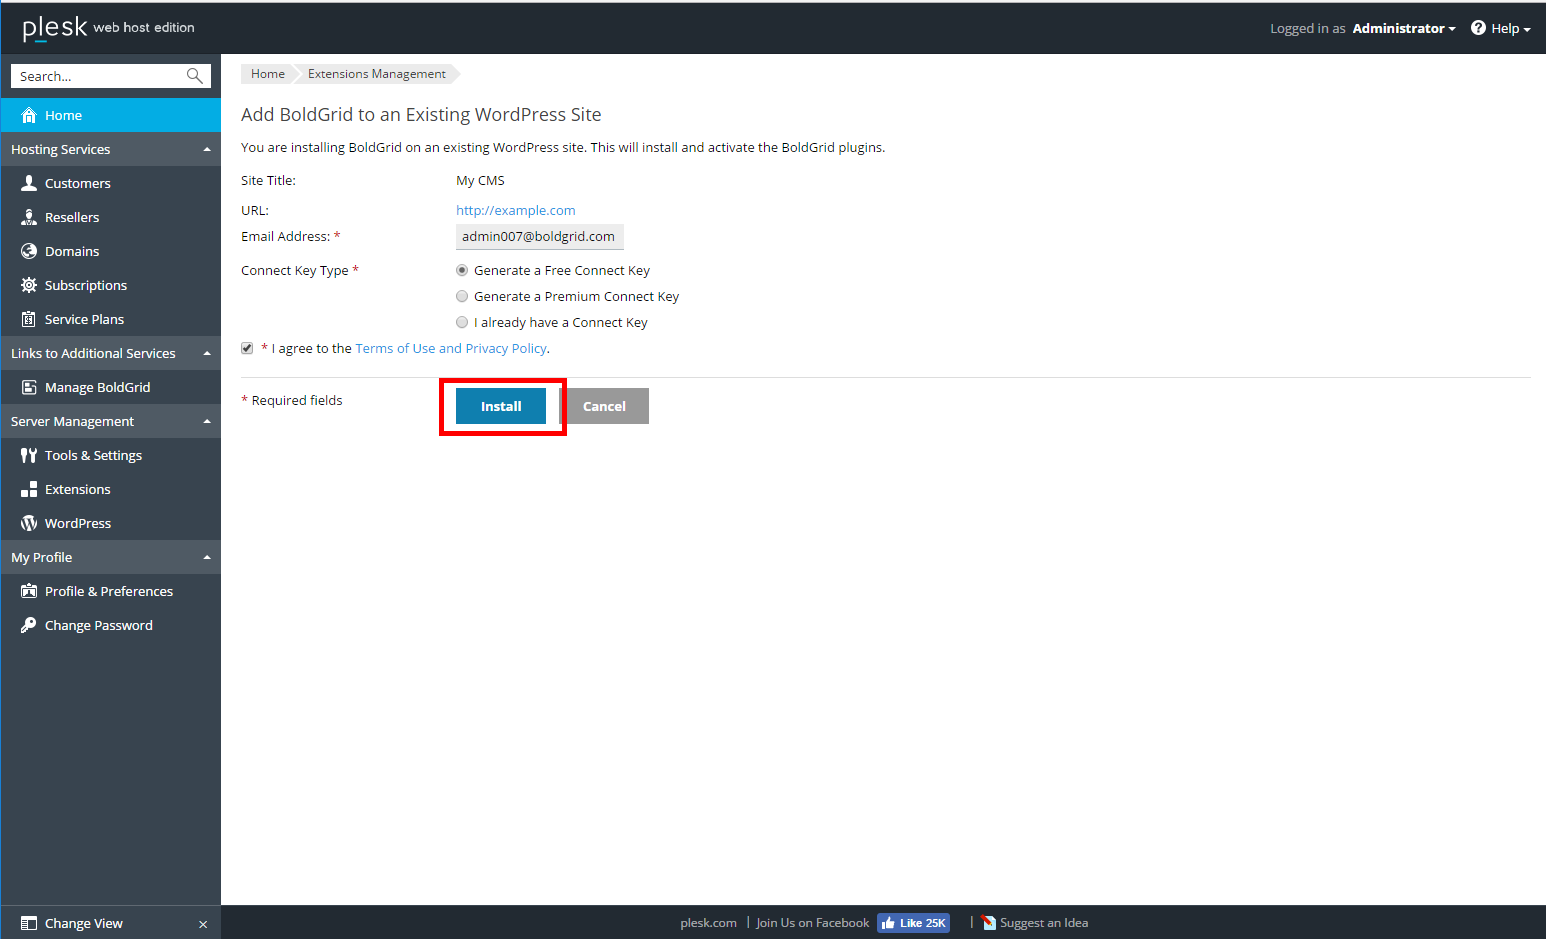
- Click on the Install button.


SIGNUP FOR
BOLDGRID CENTRAL
200+ Design Templates + 1 Kick-ass SuperTheme
6 WordPress Plugins + 2 Essential Services
Everything you need to build and manage WordPress websites in one Central place.