If you are using WooCommerce as your e-commerce solution, then you should be using the Automated Taxes option. This option automatically calculates sales taxes for your customers when they go through the checkout process. Having the taxes automatically processed for you is a huge timesaver, but there may be exceptions that you need to specify. In order to do this, you can create Additional Tax Classes through the WooCommerce interface.
NOTE: The instructions in this article require that the Enable Taxes option is selected and active. The Enable Taxes option can be found in WooCommerce Settings under the General Tab.
Adding Additional Tax Classes in the Taxes Section
Understanding Tax Classes
When the Automated Taxes option is enabled, then all sales taxes are automatically calculated for your customer during checkout. However, if you need to change the taxes for a specific region, then you can do so by adding an additional tax class. Tax classes are based on location. You can apply a tax rate for everyone by assigning them to a single location (typically your shop address), or you can create geographic locations and then change the tax rate for that location(s). You can create spreadsheets of locations based on Post/Zip Code and then import them into WooCommerce using a CSV-formatted file. Creating tax classes can be extensive and you may be required to consult with a tax professional to properly account for a region’s required taxes.
Adding a Tax Class
When you add a tax class you will see it listed at the top of the Tax tab in the WooCommerce Settings. Follow the directions below to add a new tax class. Note that you can set up one tax class label per line.
- In the menu column at left, click on WooCommerce, then click on Settings
- Click on the Tax tab
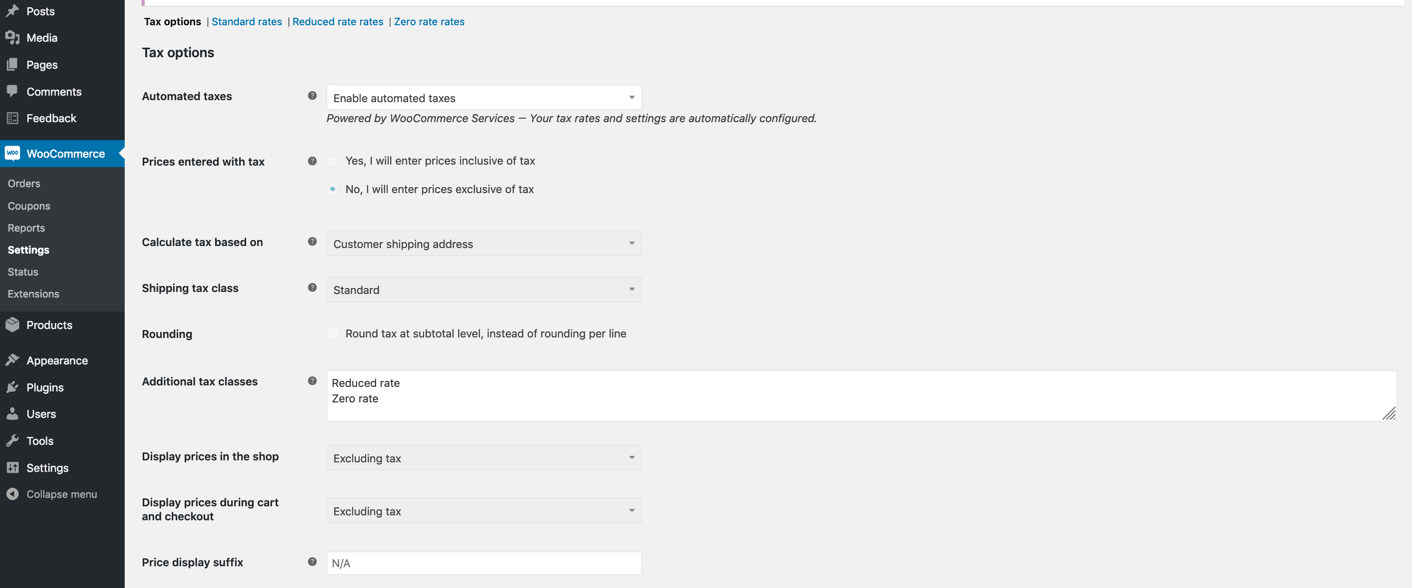
- Scroll down to where you see Additional tax classes
- By default, you will see Reduced rate and Zero rate. Click on the field you see these two rates. If you see the cursor at the end of the Zero rate entry, hit your enter key to go to the next line. You can only have one tax class defined per line. Type in the name for the tax class that you wish to add
- Once you have typed in your tax class name, scroll to the bottom and click on Save changes
- When the tax class has been added, Go to the top of the Tax tab and click on the link for your newly defined tax class.
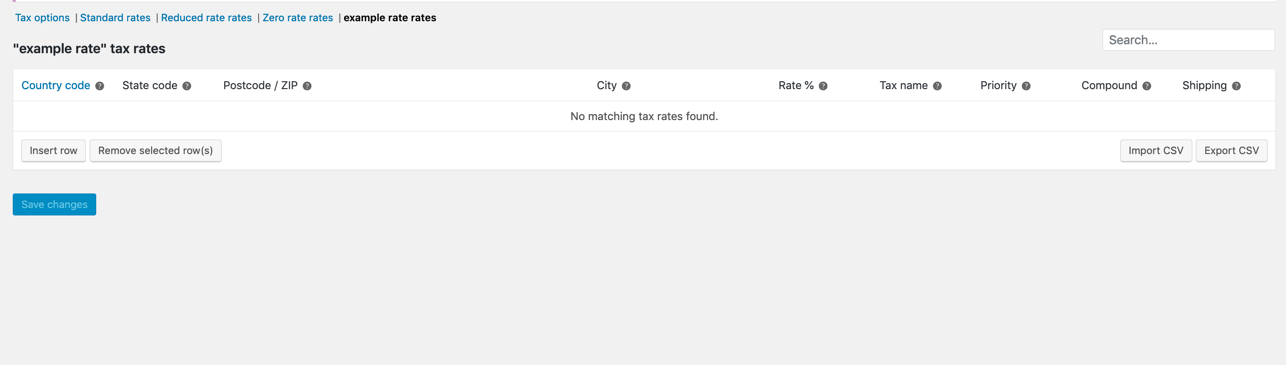
Here you can define your new tax class by clicking on Insert line. If you have a list of locations in a spreadsheet, make sure you are using the CSV format and then import the CSV file using the import option in the bottom right corner of the table. You can also export the table as a CSV file to edit if needed. Once you have completed adding the tax class definition, click on Save Changes at the bottom of the page.
Congratulations! You now know how to add new tax classes in WooCommerce! Check out our articles on using WooCommerce for your BoldGrid site
Don’t forget to take a peek ar our WordPress website builder – it is 100% compatible with WooCommerce and can help you get your store online in days, not weeks. Try it and see for yourself.
SIGNUP FOR
BOLDGRID CENTRAL
200+ Design Templates + 1 Kick-ass SuperTheme
6 WordPress Plugins + 2 Essential Services
Everything you need to build and manage WordPress websites in one Central place.
Amit says:
Thank you for clear instructions, it was difficult to find out that admin can type in Additonal Tax Class field.