The BoldGrid Theme Framework includes tons of functionality that can be used to create your own theme for BoldGrid with minimal effort. Using a child theme for the design will help ensure that your theme can receive updates without causing issues for you, or your website. The purpose of this guide is to walk you through a step by step install of both BoldGrid Prime and the provided Starter Child Theme to begin creating your own themes using the BoldGrid Theme Framework.
What is Prime?
Prime is the Parent BoldGrid theme that contains all the functionality that the BoldGrid Theme Framework has to offer. The Child Starter Theme is the Child Theme that contains configuration specific information, and works just like the standard child theme would in WordPress. This Child Theme does not have any styling and can be used to create your own theme very quickly. Both are actively maintained in our public GitHub account.
Downloading and Installing the Parent Theme
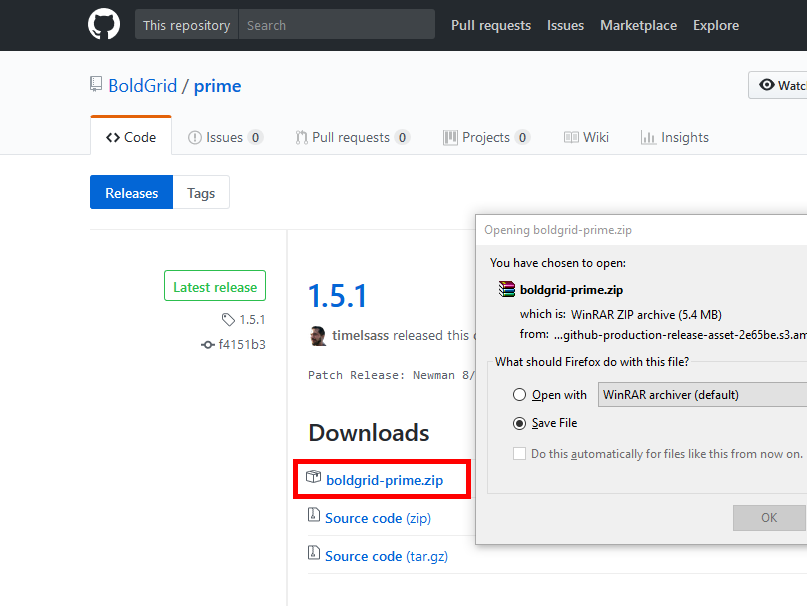
 Navigate to the release section of our BoldGrid Prime GitHub repository, and download the latest release
  Log into your BoldGrid Dashboard
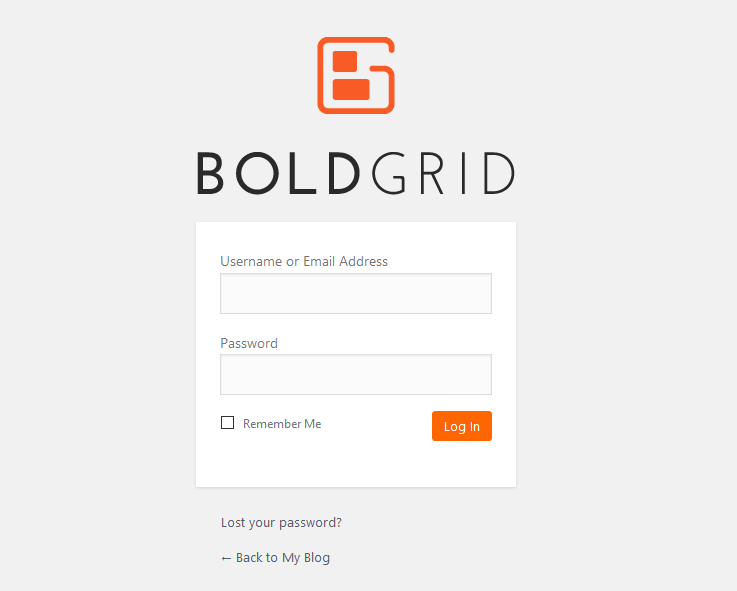
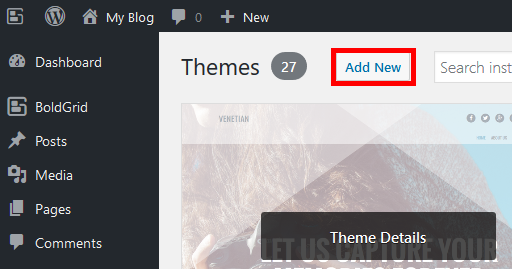
  Select Appearance
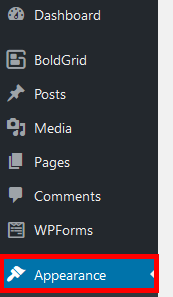
  Select Themes
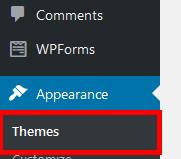
  Select Add New
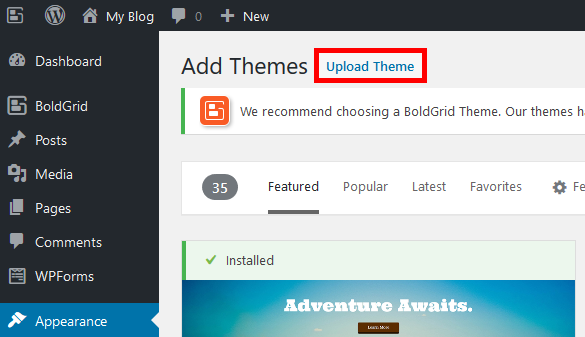
  Select Upload Theme
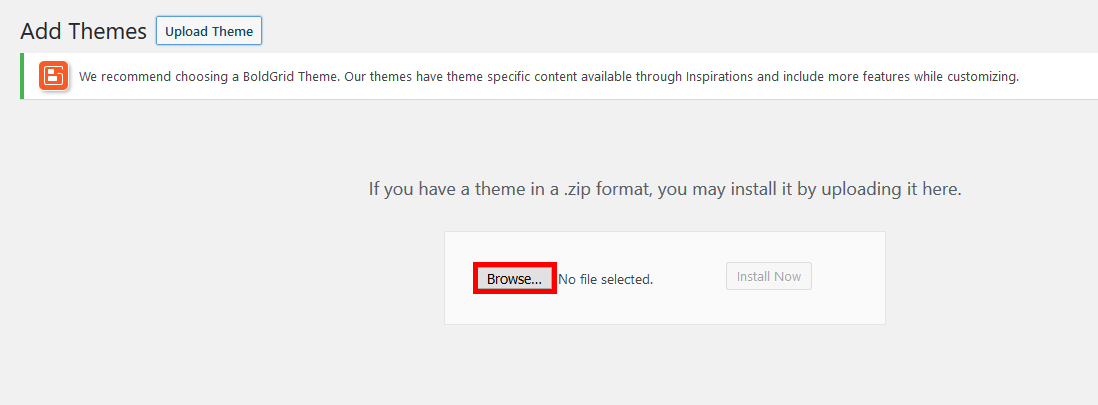
  Select Browse
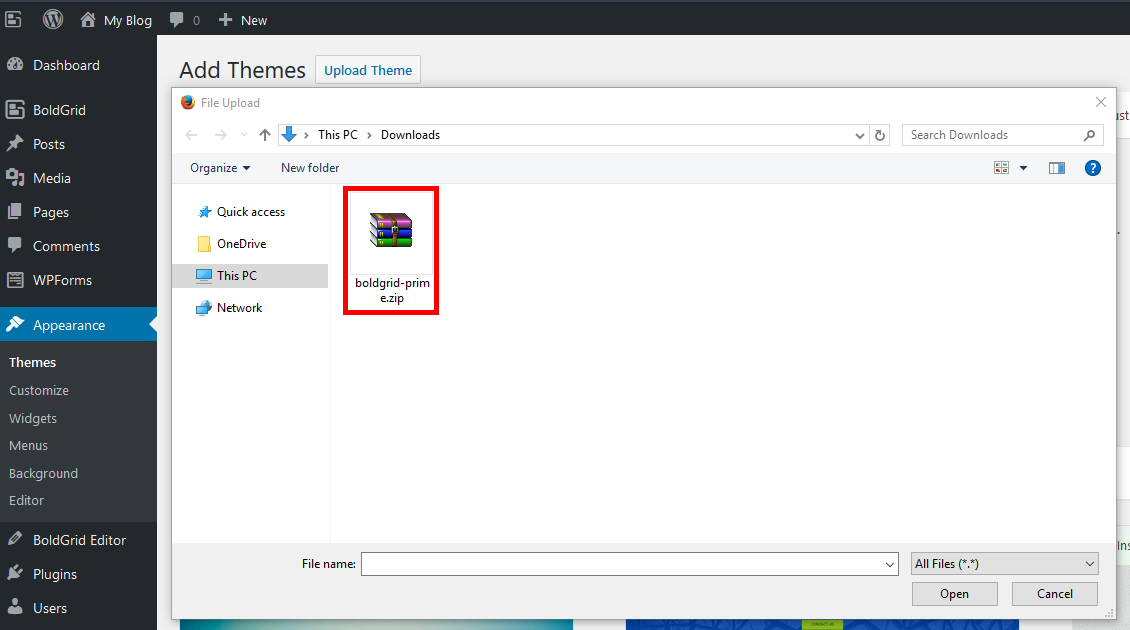
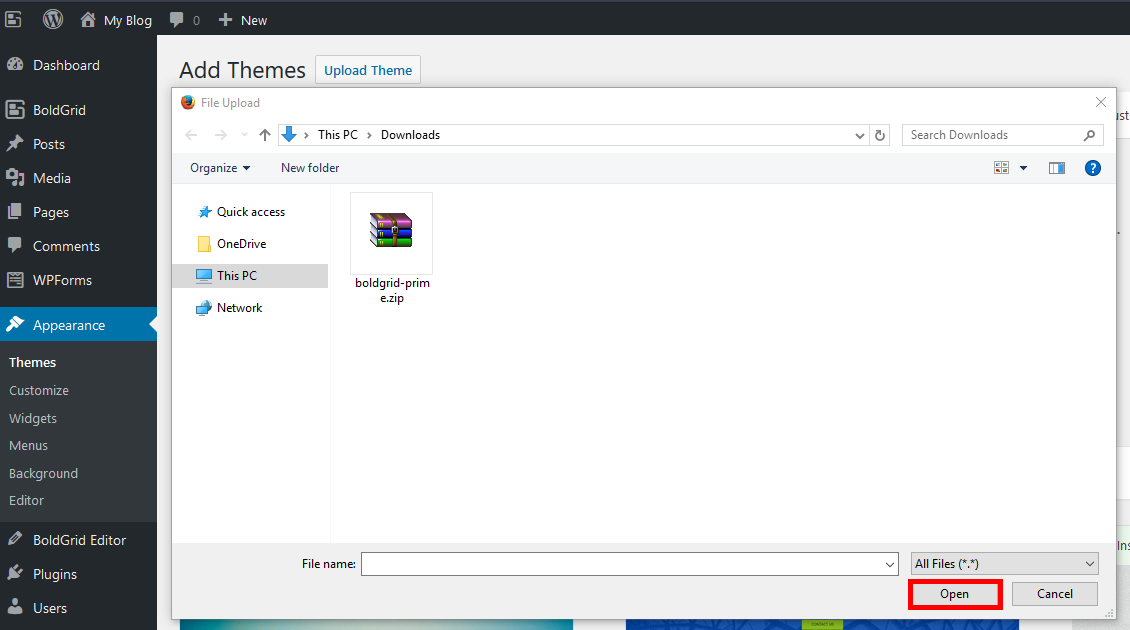
  Navigate to the file you downloaded earlier called boldgrid-prime.zip, and select it
 - Select Open
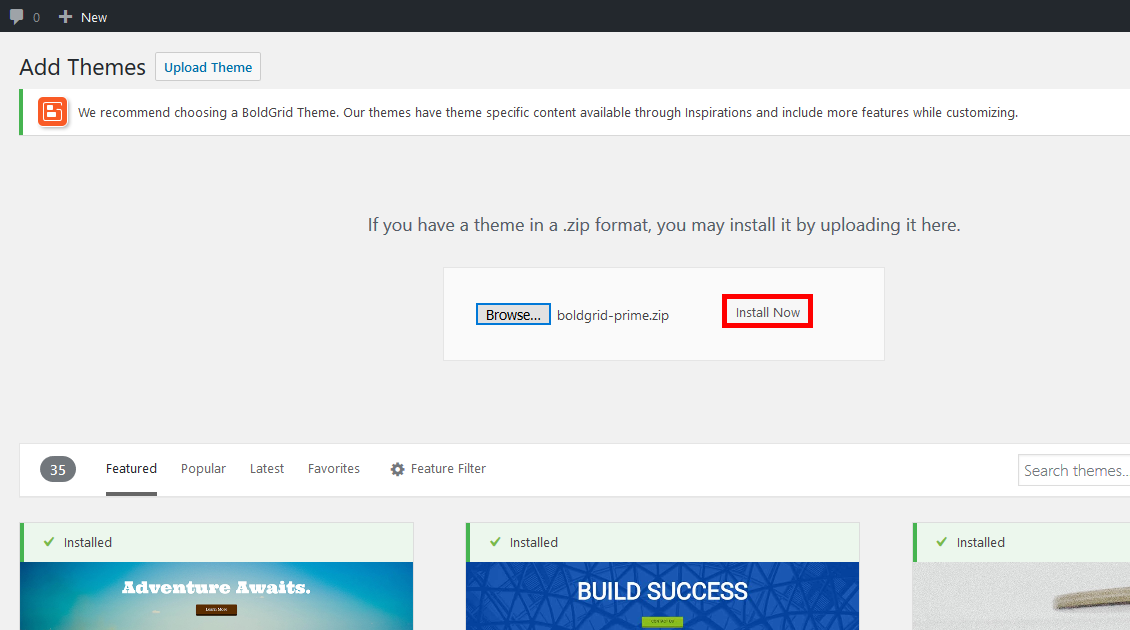
- Select Install Now
Congratulations! You now know how to download and install the parent theme that includes the BoldGrid Theme Framework, and the parent theme Prime. When using WordPress, a child theme usually consists of at least one directory (the child theme directory) and two files in that directory (style.css and functions.php). In addition, BoldGrid also requires a configuration file and a SCSS file to utilize the benefits it provides, both of which are included in the child Starter Theme to help you better understand the structure and syntax. The following tutorial will walk you through step by step installing the Starter Child Theme.
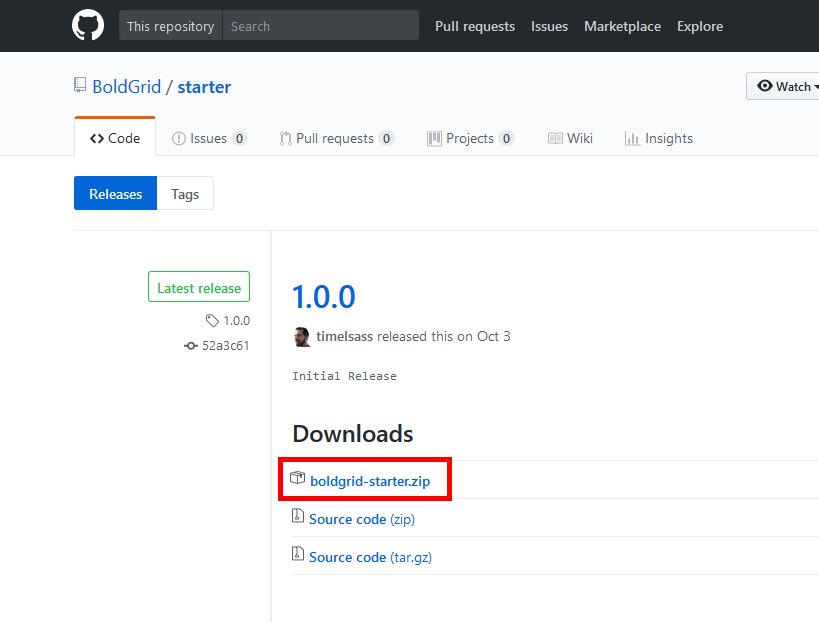
 Navigate to the release section of our BoldGrid Starter GitHub repository, and download the latest release
 - Select Appearance
- Select Themes
- Select Add New
- Select Upload Theme
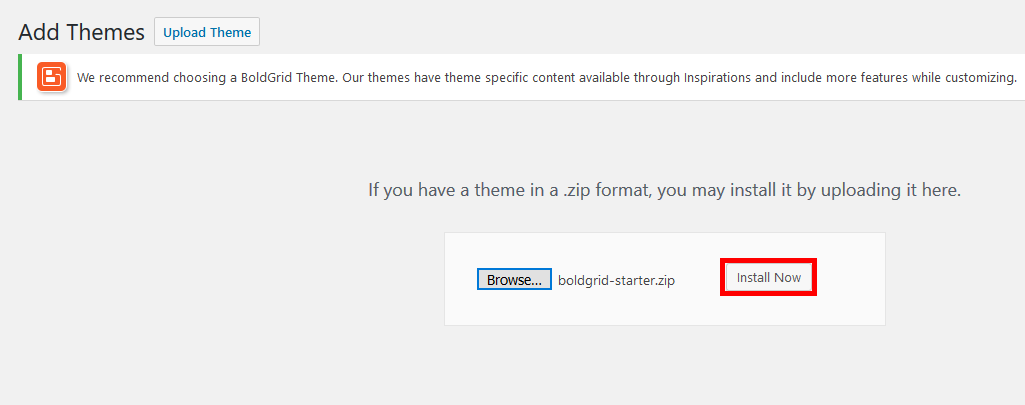
- Select Browse
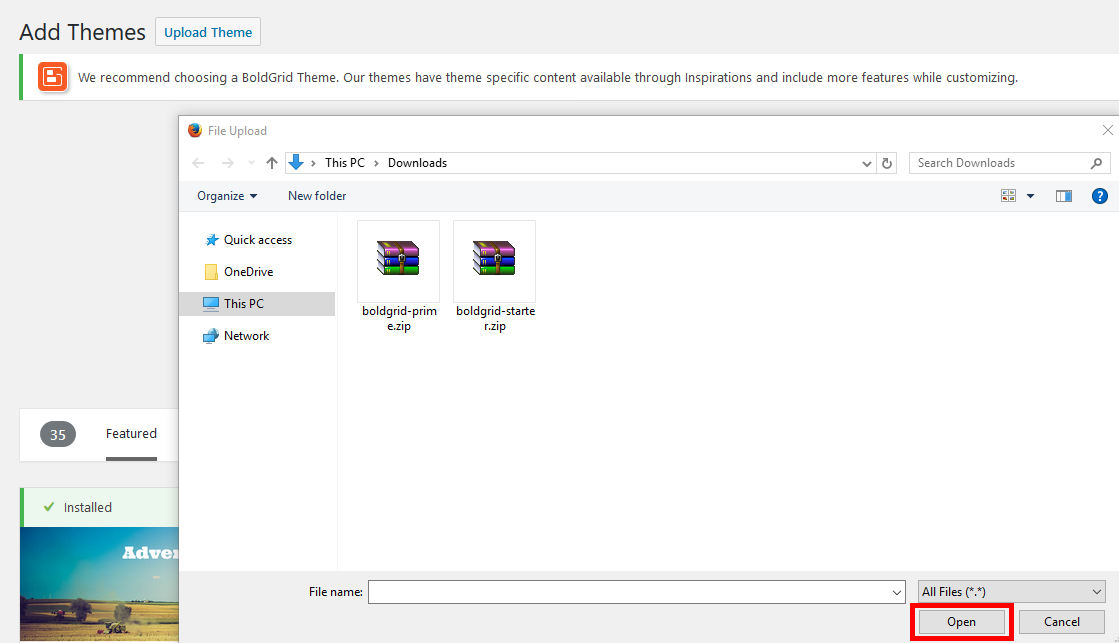
 Navigate to the file you downloaded called boldgrid-starter.zip, and select it
 - Select Open
 Select Install Now
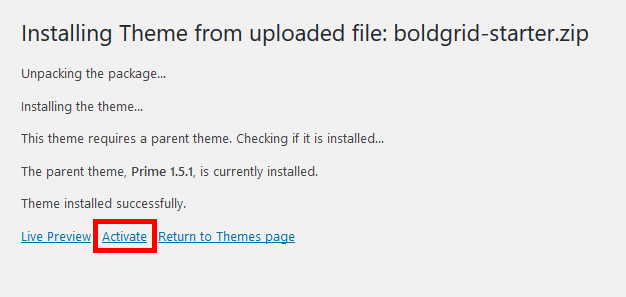
  Select Activate

Congratulations! You now know how to install Prime and the Starter Child Theme to begin building your own theme. For more information on configuring the BoldGrid Theme Framework options within your Child Theme, you can review our technical documentation.
SIGNUP FOR
BOLDGRID CENTRAL
200+ Design Templates + 1 Kick-ass SuperTheme
6 WordPress Plugins + 2 Essential Services
Everything you need to build and manage WordPress websites in one Central place.