WPForms utilizes a drag and drop interface to create forms for WordPress, very similar to that of BoldGrid’s WordPress Page Builder. This is to ensure the process of creating forms for your website is simple, and frustration free. These forms can also be configured to send submissions to a particular email address. You can do this from within an existing contact form’s settings. This guide will provide the steps needed for you to configure your contact form’s email notifications and also examines the alternative settings available for forms created using WPForms.
Customizing WPForms Form Settings
Notification Settings
Notification settings can be configured to customize how your submissions are handled. The steps below will configure full submissions to be sent to multiple email addresses. If you ever have an issue with your notifications in the future, this is where you want to start your troubleshooting.
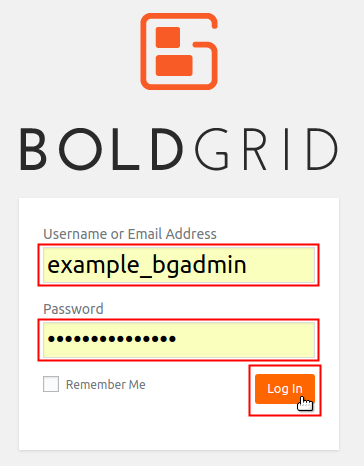
 Log into your BoldGrid Administrative Dashboard.
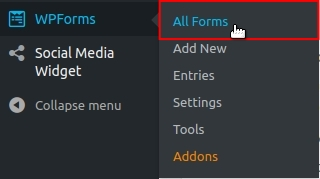
 - Hover over WPForms, from the menu on the left, and click All Forms.
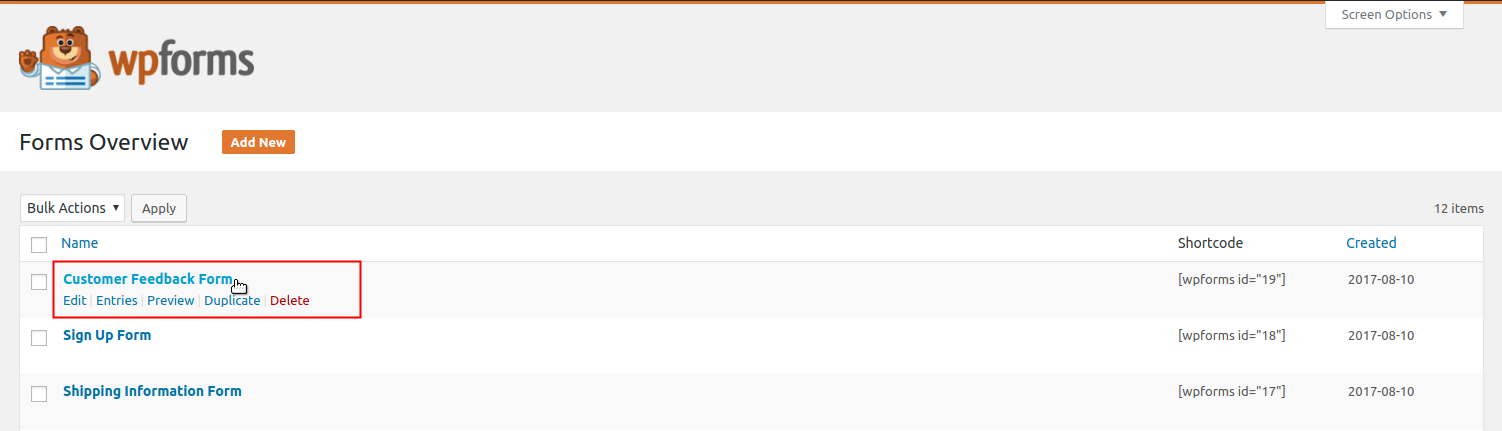
- Select the form you want to configure the email address for.
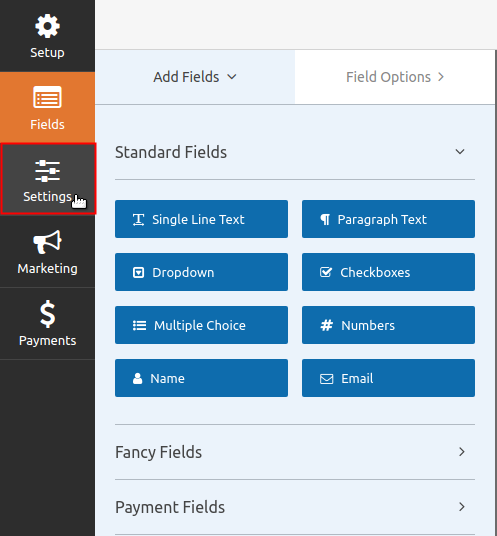
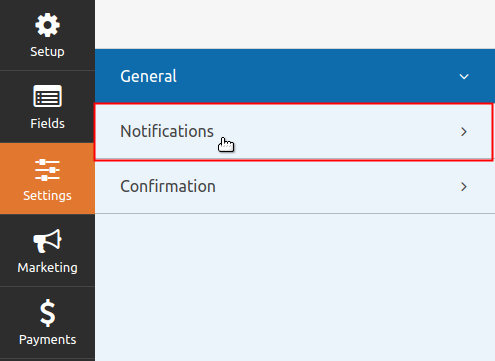
- Click on Settings from the menu to the left.
- Select Notifications.
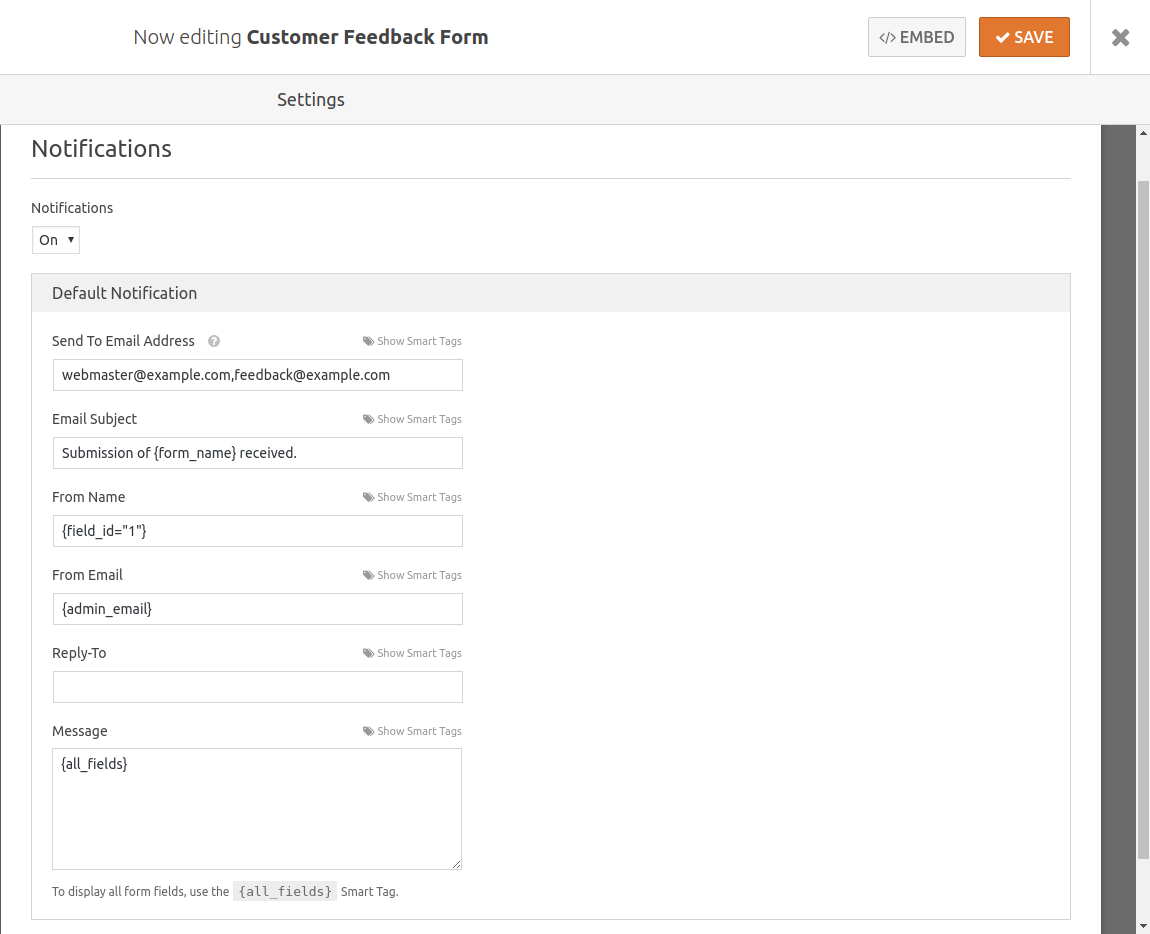
- The first setting is a drop-down menu to turn notifications on/off. Click the drop-down menu and select On, to turn on notifications.
- Under Default Notifications, there are a few fields you can fill in. The table below describes what each field would be used for and sample values.
Field Description Value Send To Email Address Email address(es) to send notifications to. Multiple email addresses can be configured by separating each email address with a comma. webmaster@example.com,feedback@example.com Email Subject Subject to use in the notification email. Using Smart Tags you can explicitly specify a variable into the field, like the name of the form. Submission of {form_name} received. From Name Name to appear as the sender of the notification email. Using Smart Tags you can explicitly specify a variable into the field, like their name. {field_id=”1″} From Email Email address the notification email is sent from. Using Smart Tags you can explicitly specify a variable into the field, like the BoldGrid admin user’s email address. {admin_email} Reply-To Email address that replies to the notification email will be sent to. No Value Message Customize the message received in the notification email. This generally just needs to be the responses/submission field values themselves. Using Smart Tags you can print all the values from the submission into the notification email message. {all_fields} - Configure your form by entering the values you want into each field.
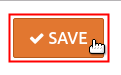
- Click the Save button at the top right to save your changes.

General Settings
A form’s General Settings will apply attributes to easily customize it to be more fluid with your WordPress website. The table below provides a description for each field and a sample value to help you understand what the form field would be used for.
| Field | Description | Value |
|---|---|---|
| Form Title | This field, by default, is filled in with the name of your form. | Customer Feedback Form |
| Form Description | Customize a message to describe the form. | Please provide your feedback to us. We are always interested in how we can improve and appreciate your insight! |
| Checkbox – Hide form title and description area | When this box is checked, the form title and description will not be included in displaying the form. | Unchecked |
| Form CSS Class | Enter CSS class names for the form wrapper. Multiple class names can be entered and must be separated by spaces. | No Value |
| Submit Button Text | Customize the text displayed in the Submit Button | Submit |
| Submit Button Processing Text | Customize the text displayed while the form submission is processing. | Sending… |
| Submit Button CSS Class | Enter CSS class names for the form submit button. Multiple names can be entered and must be separated by spaces. | No Value |
| Checkbox – Enable anti-spam honeypot | This setting enables an additional hidden field that a spambot would fill in and thus their submissions can be prevented. | Checked |
Confirmation Settings
The Confirmation Settings can control the end-user’s experience once they submit the form. The table below describes the available options and sample values.
| Field | Description | Value |
|---|---|---|
| Message | Display a customizable confirmation message upon successful submission of the form. | Thank you for getting in touch with us! We will try our best to respond back to you within 24 hours. |
| Show Page | Display a specific page upon successful submission of the form. This page should already be created in order for it to appear in the drop-down menu. | Services |
| Go to URL (Redirect) | Redirect to a specific URL upon successful submission of the form. | https://www.example.com/thanks |
Congrats! You now know how to better customize your WPForms settings, and are on your way to becoming a WordPress Superstar. Now that you have learned how to customize your WPForms settings, you may want to learn more about our WordPress website builder. It is compatible with WPForms, and can make creating a website one of the easiest things your business has to do!
SIGNUP FOR
BOLDGRID CENTRAL
200+ Design Templates + 1 Kick-ass SuperTheme
6 WordPress Plugins + 2 Essential Services
Everything you need to build and manage WordPress websites in one Central place.