BoldGrid is a suite of plugins that enable you to create WordPress websites faster and easier than ever before. In this guide, we will demonstrate how to install BoldGrid from within your Plesk Onyx 17 Web Admin interface.
Installing BoldGrid in the Plesk Onyx 17 Web Admin
- Log into your Plesk Onyx 17 Web Admin dashboard.
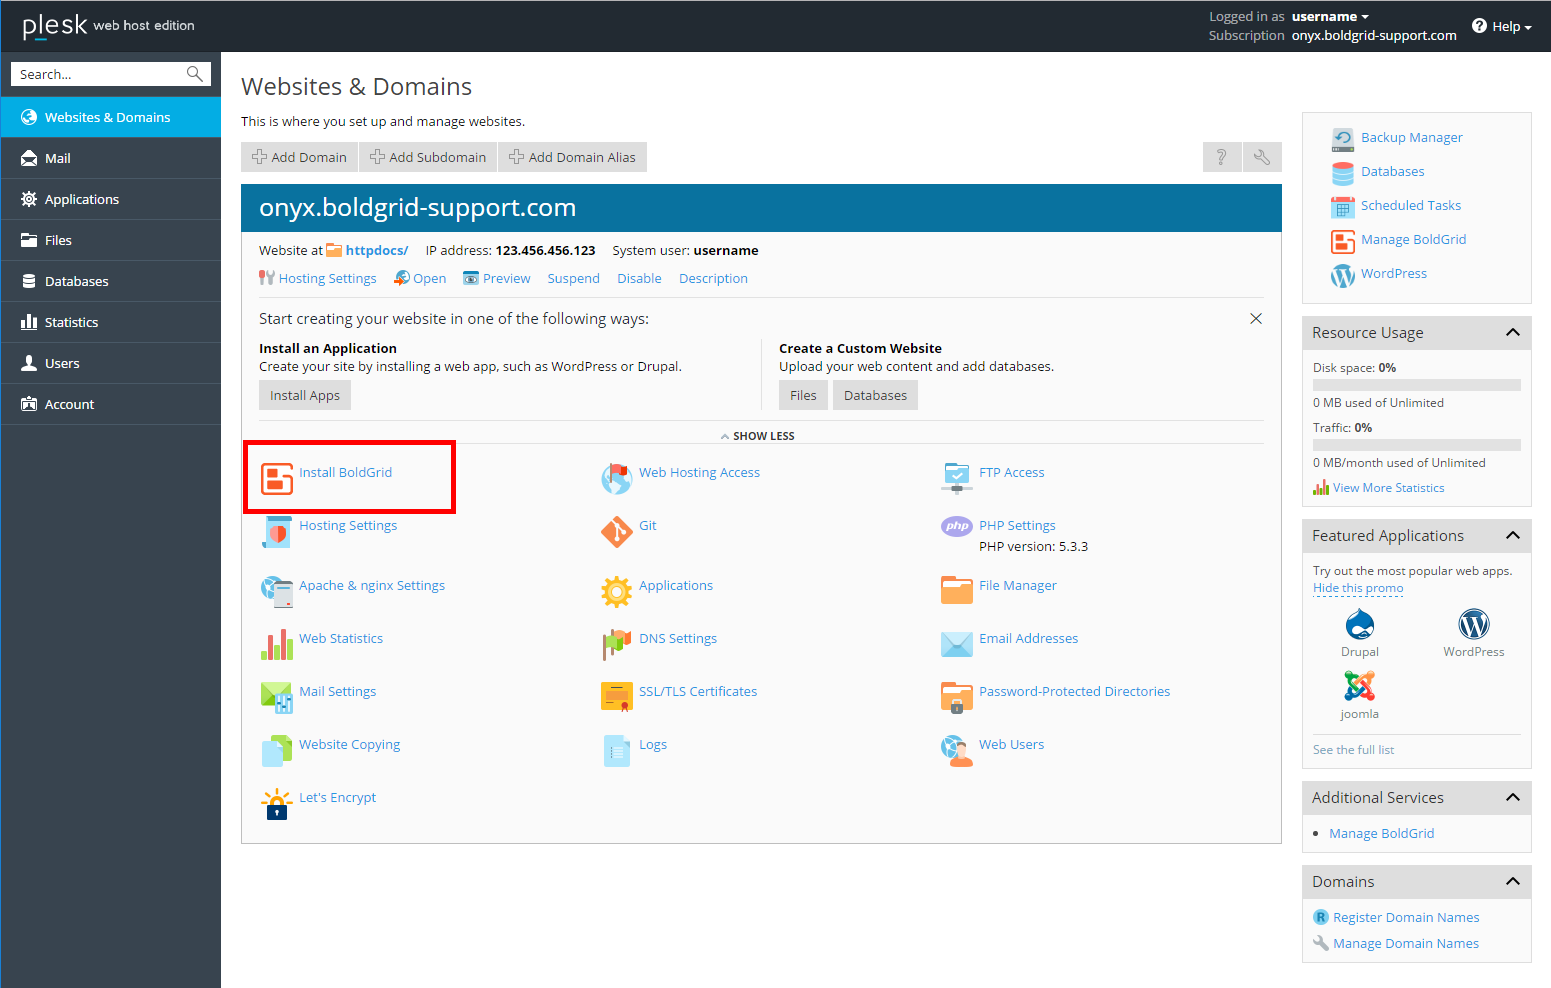
 Next, click on the Install BoldGrid icon.
  Now you must complete the installation settings form.
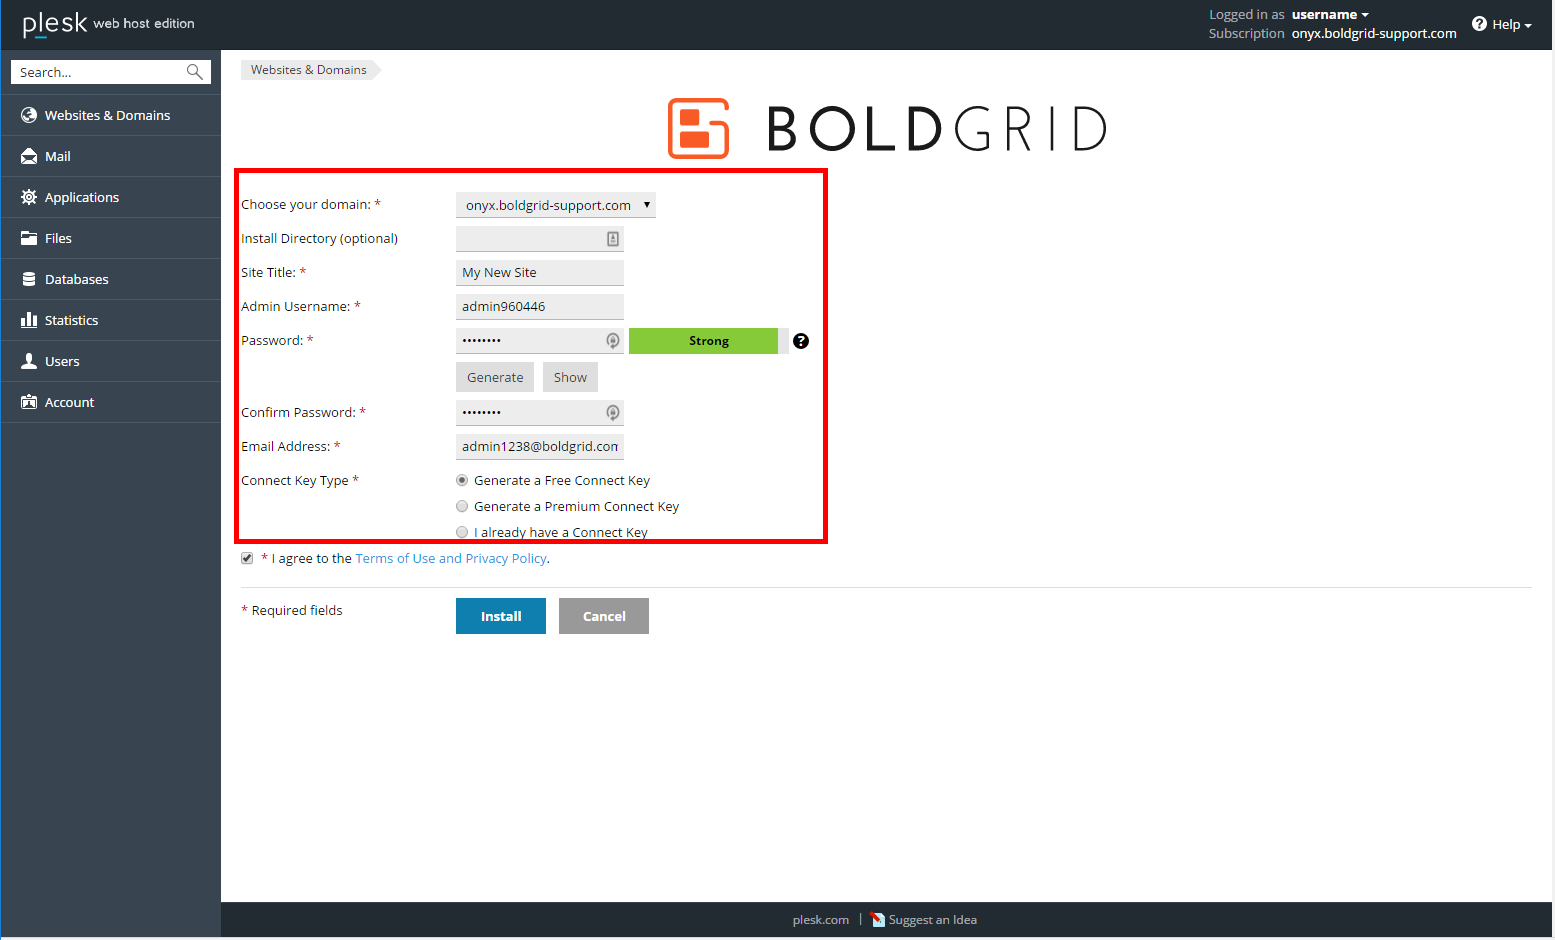
Choose your domain Select the target domain from the dropdown. Install Directory (optional) This field is only used if you want to install BoldGrid into a subfolder. In that case, enter the subfolder name here. If you want to install BoldGrid on the domain itself, just leave it blank. Site Title Give your site a name. Admin Username An default admin name is created here for you. You can either keep it or replace it with your own. Password Create a strong password. You can either enter your own or have one created by clicking the Generate button. Confirm Password Enter the same password as you created above. Email Address Enter an email address. This is where any notifications from the server will be sent. Connect Key Type Select your Connect key type. - Next, click the checkbox to agree to the Terms of Use.
- Last, click on the Install button.

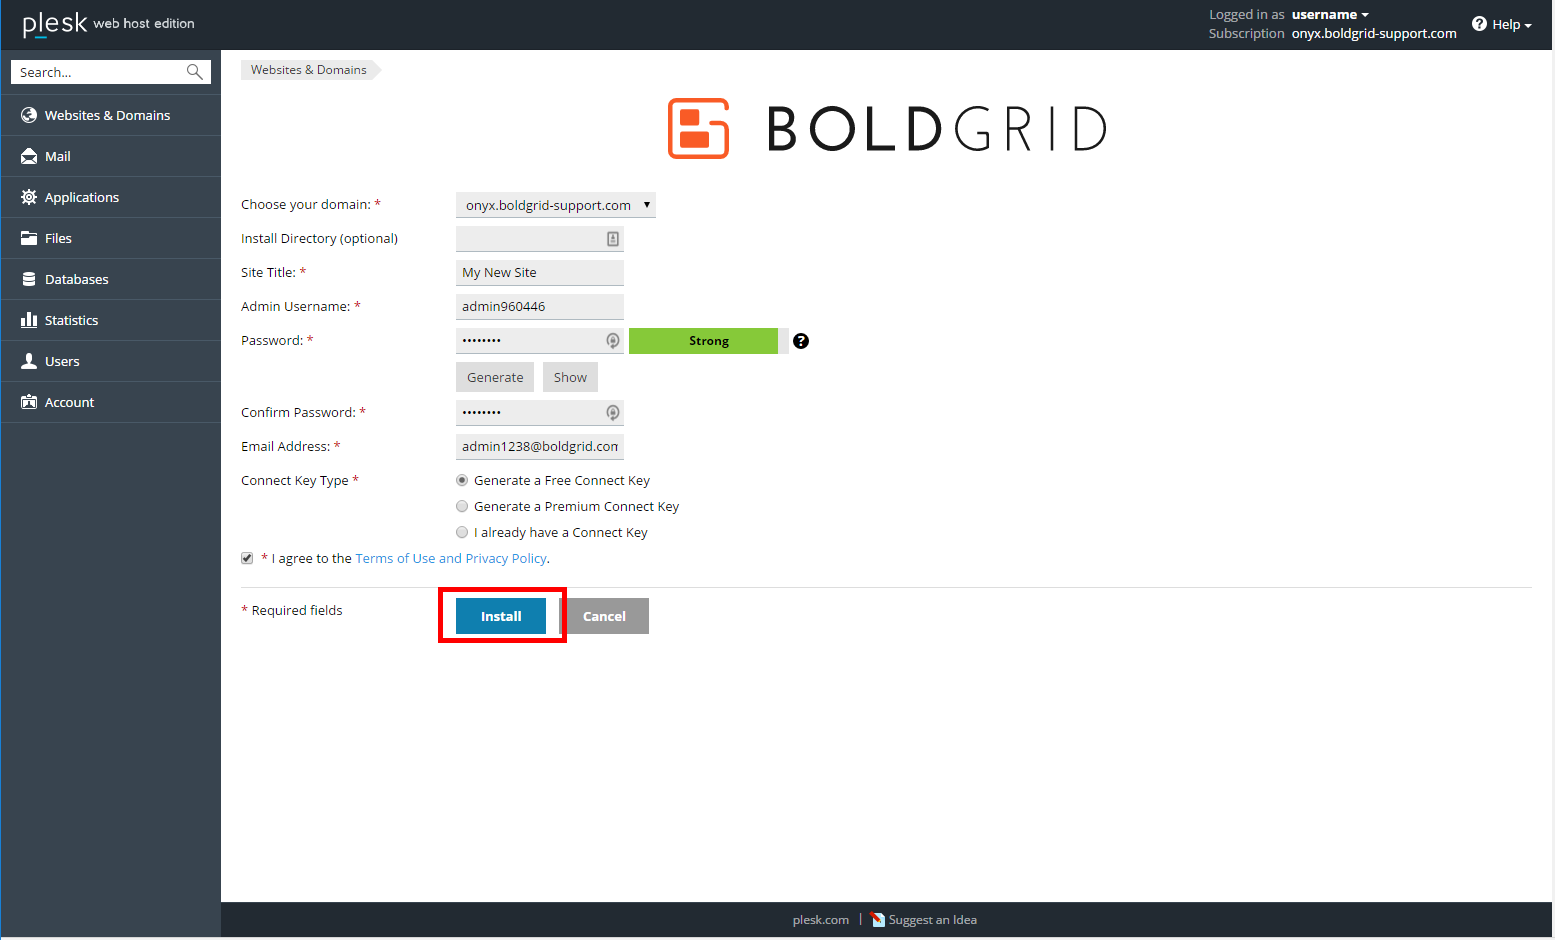
BoldGrid will then install onto your account. Once you receive the successful install message, you are ready to log in and begin creating your site.
SIGNUP FOR
BOLDGRID CENTRAL
200+ Design Templates + 1 Kick-ass SuperTheme
6 WordPress Plugins + 2 Essential Services
Everything you need to build and manage WordPress websites in one Central place.