
The Total Upkeep plugin has configuration options for setting the backup directory, which allows you to choose where your WordPress backups are stored on your web server. The following guide will provide you with information on configuring this location in your WordPress Dashboard.
Setting your WordPress Backup Directory
- In the Dashboard, navigate to Total Upkeep → Settings
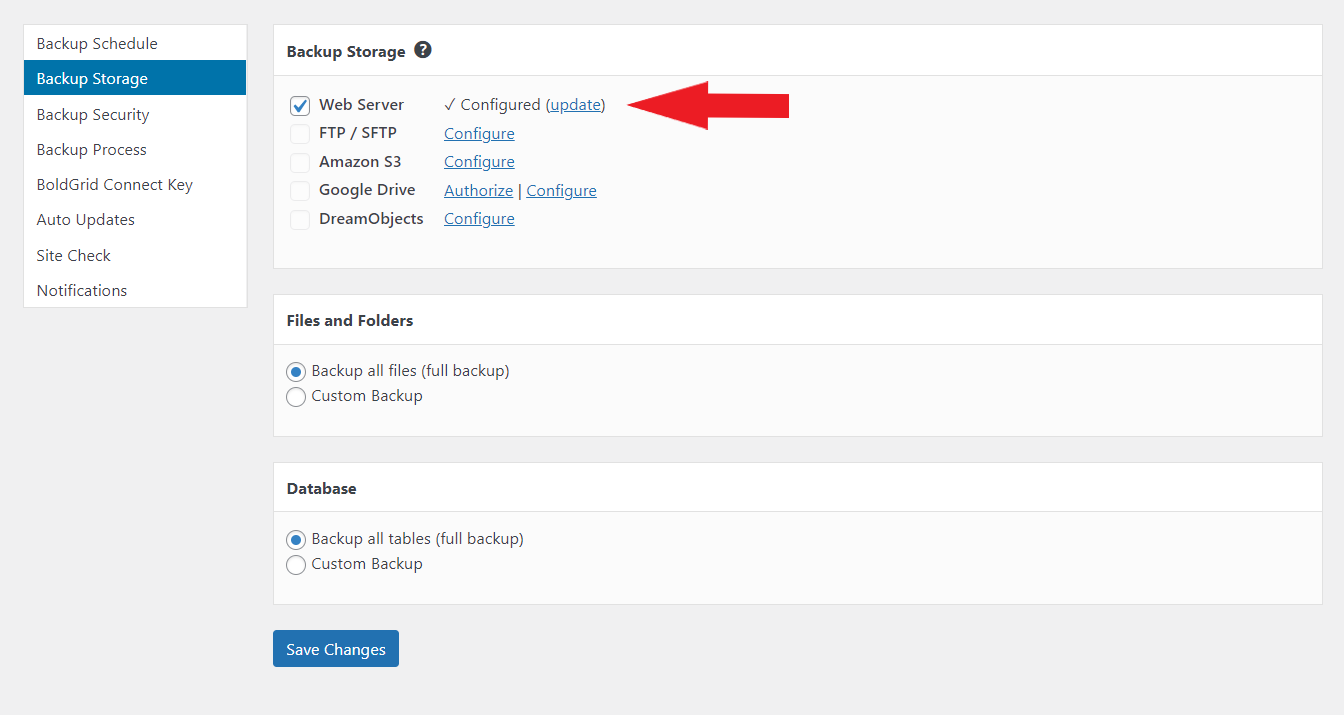
- Using the left hand navigation menu, select Backup Storage
- Select and Configure the Backup Directory you wish to use for storing backups
- Click Save Changes
Congratulations! You now know how to set up your backup directory in Total Upkeep. Next, you may want to configure scheduled backups or even learn how to configure automatic upgrades for Plugins and Themes.
SIGNUP FOR
BOLDGRID CENTRAL
200+ Design Templates + 1 Kick-ass SuperTheme
6 WordPress Plugins + 2 Essential Services
Everything you need to build and manage WordPress websites in one Central place.
Allison says:
How do you change the google drive backup destination to another google account?
Brandon says:
Hi Allison,
Thanks for reaching out, in order to change your Google Drive backup destination you must first remove the current one. Navigate to the Total Upkeep tab from your WordPress dashboard click Settings then Backup Storage from the right panel. Find Google Drive under the Backup Storage settings and click Update. Scroll down and click “Delete settings” to remove your current destination. Exit the window and restart the configuration process.
I hope this helps!
Janice says:
How do you delete the web server backup once configured if your host has asked you to change this? (changed to google drive)
Brandon says:
Hi Janice, Thanks so much for reaching out!
You can remove web server backups from the Total Upkeep Backup Archives section of your WordPress dashboard. Find the backup you need to remove and click “Details” to the right of it. It will take you to the specific backups info page and in the right hand sidebar you’ll see a red “Delete Backup” link.
I hope this helps!
Howard says:
No such choice under Settings for Backup Directory. Total Upkeep Premium V 1.5.9 (7-20-2022)
Brandon says:
Hi Howard,
My apologies this article seemed to have been a bit out of date. We just went ahead and updated it with the correct instructions. Please don’t hesitate to reach back out to us if you require further assistance with this!