BoldGrid is completely customizable and allows you to change the style of elements used on your website. The proper way to make these custom CSS changes is to use the Custom CSS Editor. This guide will show you how to use the Advanced tools within the Customizer for adding Custom CSS to change the style of elements on your BoldGrid website. To illustrate this, we will be adding a stroke and a text shadow to the Home page’s Call to Action’s heading.
How to use the Custom CSS Editor
 Login to your BoldGrid site
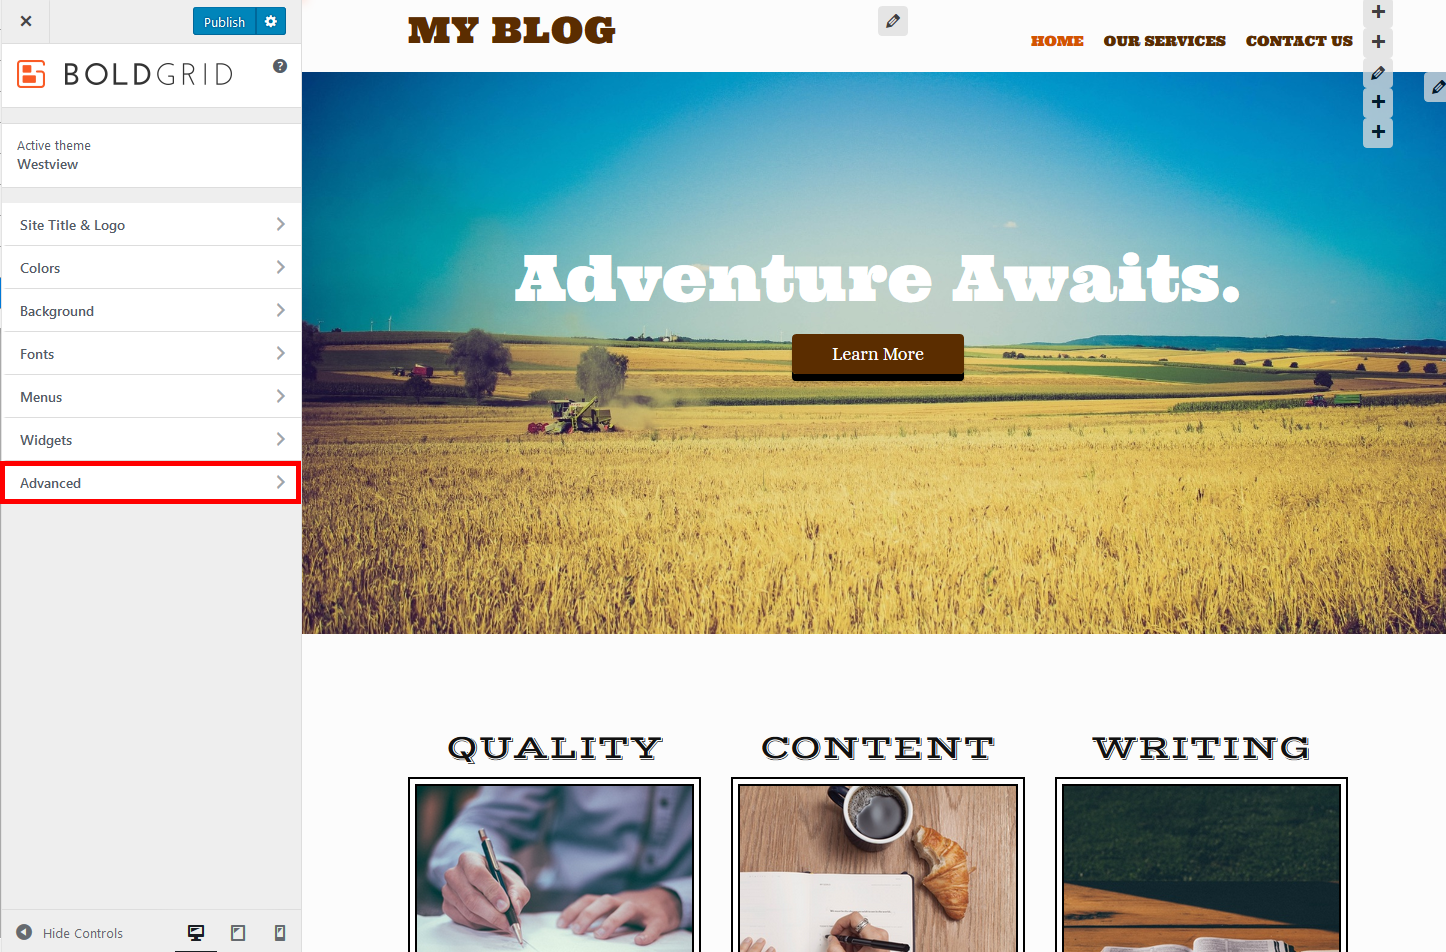
 - Select Customize
 Select Advanced
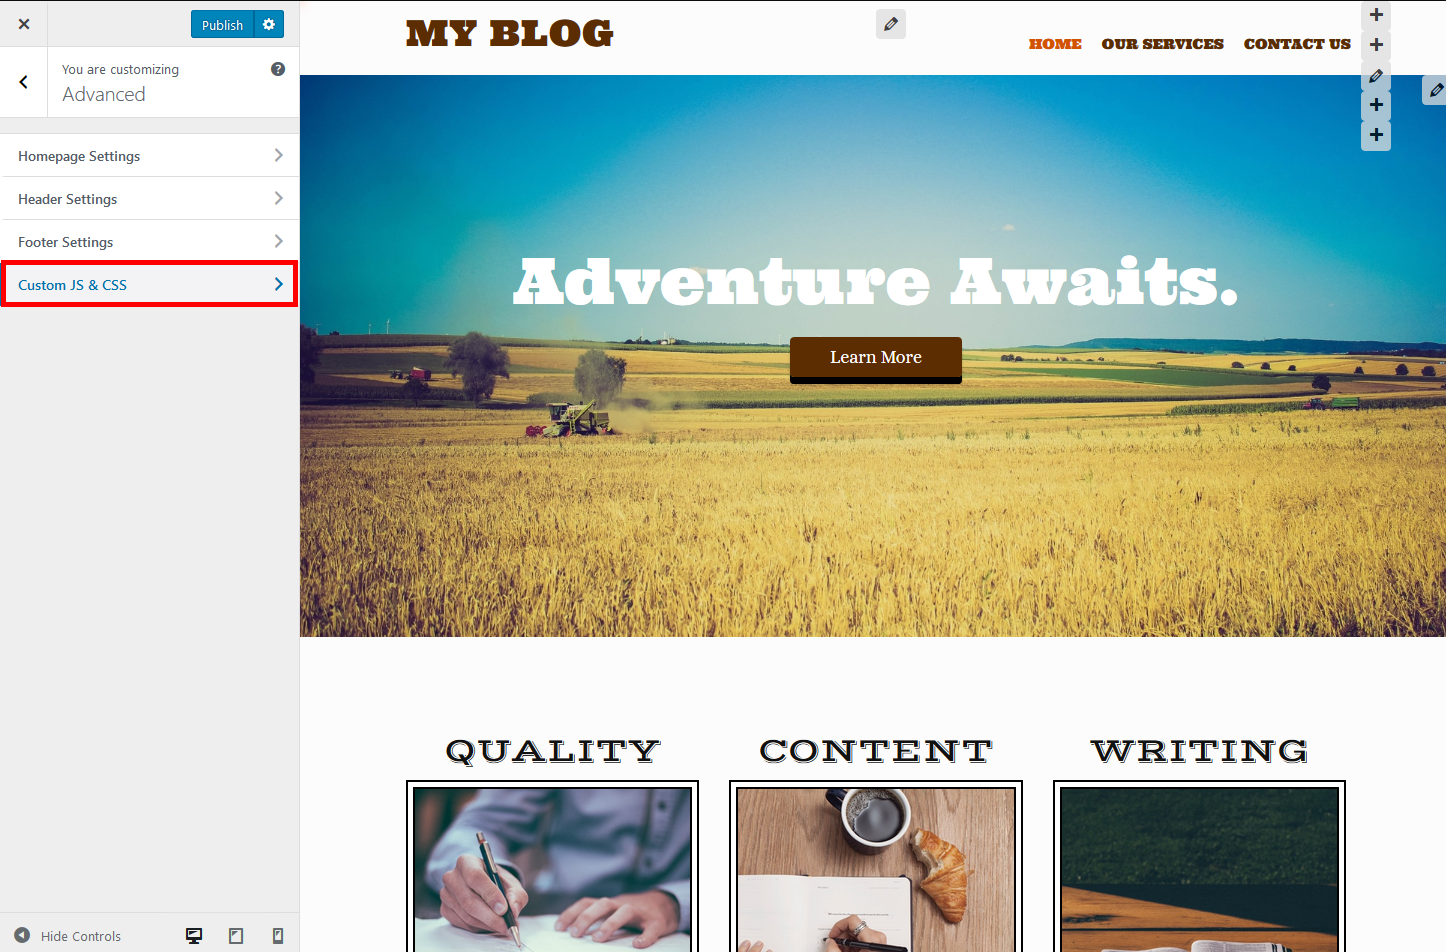
 - Select Custom JS & CSS
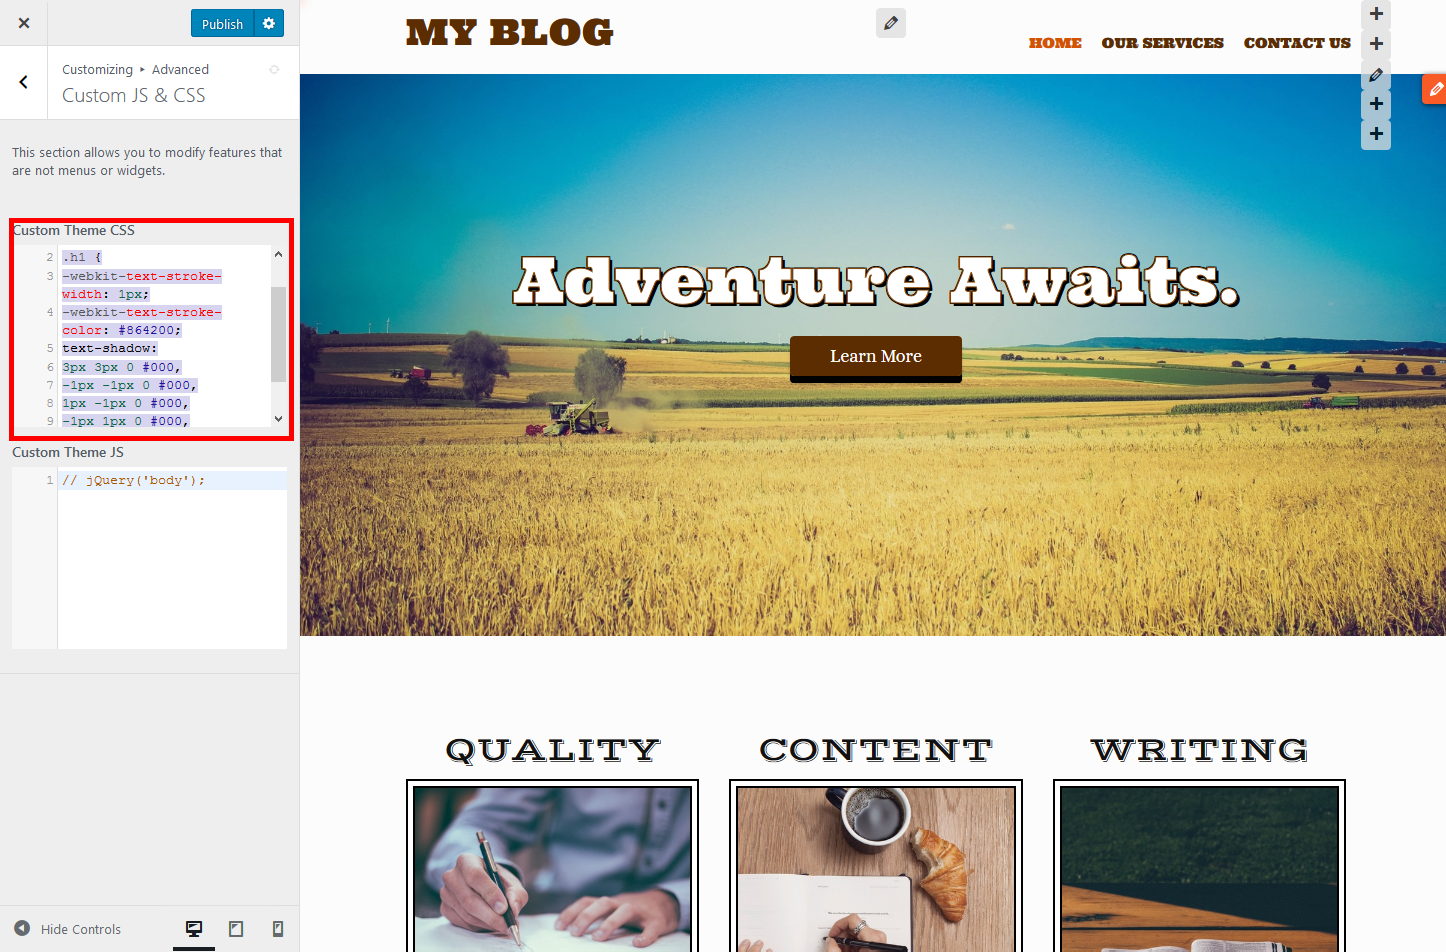
- In the CSS Editor, add your Custom Style. For this example, we are customizing the “h1” class for the home page’s Call To Action heading by adding a text stroke and shadow.
.h1 { -webkit-text-stroke-width: 1px; -webkit-text-stroke-color: #864200; text-shadow: 3px 3px 0 #000, -1px -1px 0 #000, 1px -1px 0 #000, -1px 1px 0 #000, 1px 1px 0 #000; } - Select Publish


Congratulations! You now know how to change the style of elements using the Custom CSS Editor in the Advanced Customizer Tools. This method can be used to style, or override existing styles on any element within your BoldGrid website.
SIGNUP FOR
BOLDGRID CENTRAL
200+ Design Templates + 1 Kick-ass SuperTheme
6 WordPress Plugins + 2 Essential Services
Everything you need to build and manage WordPress websites in one Central place.