After selecting a theme, the next step is installing WordPress plugins. While you can use WordPress without installing a single plugin, you will have a limited feature set.
WordPress plugins are add-ons that extend the default functionality of WordPress. They add additional features to your website, like an e-commerce store, contact form, or added security.
There are currently over 50,000 plugins available for free directly from WordPress, and countless more from paid developers. In this tutorial we will go over several ways to install WordPress plugins, ranging from beginner to advanced.
Getting Started
Unfortunately free websites hosted on WordPress.com do not have the benefit of adding plugins. If you’d like to add plugins to your WordPress.com hosted website, you will need to upgrade to a paid plan.
If you want to use plugins on your website, your website needs to be on your personal WordPress hosting plan with a domain name. Self hosted websites can add any plugin immediately after installing WordPress. Keep in mind there are important differences between WordPress.com and WordPress.org.
How to Install a WordPress Plugin
This step by step guide will show you three ways to install a WordPress plugin:
- Add directly from the WordPress Admin Dashboard – Easiest Method
- Upload plugin zip from local computer
- Use FTP to manually install
Install WordPress Plugins from the WordPress Admin Dashboard
The fastest way for beginners to install a WordPress plugin is to add it directly from the WordPress Admin Dashboard. The plugins found here are all free and have passed a code review by WordPress core developers.
It’s important to note that WordPress plugins can conflict with each other, so be careful how many you add. Click here to more here.
Start by navigating to Plugins > Add New. Your screen should look like this:
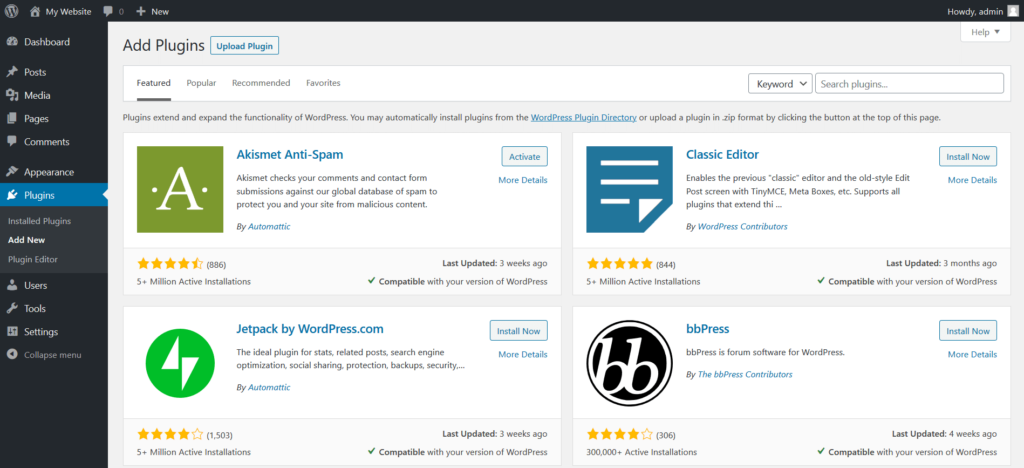
From here you can start adding plugins, and there are several ways to find the plugin you need.
You can immediately toggle between the Featured WordPress Plugins, Popular WordPress Plugins, and Recommended WordPress Plugins links at the top of the screen to see WordPress core chosen plugins. Favorites is for advanced users so we recommend ignoring that for now.
The easiest way to find what you need is by using the search function. You can type a plugin name, the type of functionality you’re looking for, or a specific developer. The screenshot below shows the search results for “SEO”, which stands for Search Engine Optimization, something every new website owner will need to consider before writing content.
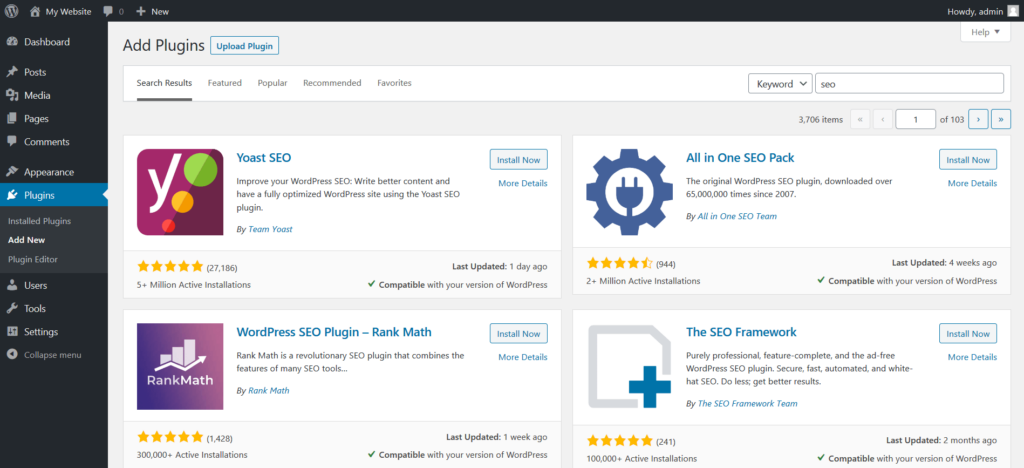
Once you have found your plugin, click the gray Install Now button. This button will change to a blue Activate button once WordPress is done installing the plugin. Make sure you click the Activate button. Simply installing the plugin isn’t enough, a plugin needs to be active in order to use the plugin’s features on your website. Learn more.
If you would like to learn more about a plugin before installing, simply click the More Details link under the Install Now button.
Congratulations! You now have a plugin on your website.
Upload a Zip File from Your Computer
There are many more plugins than those listed in the WordPress Admin Dashboard. For example, developers can directly give you a plugin zip file for you to install yourself. This is easier than it sounds! Both free and paid plugins can be installed this way.
Make sure the plugin is from a trusted source!
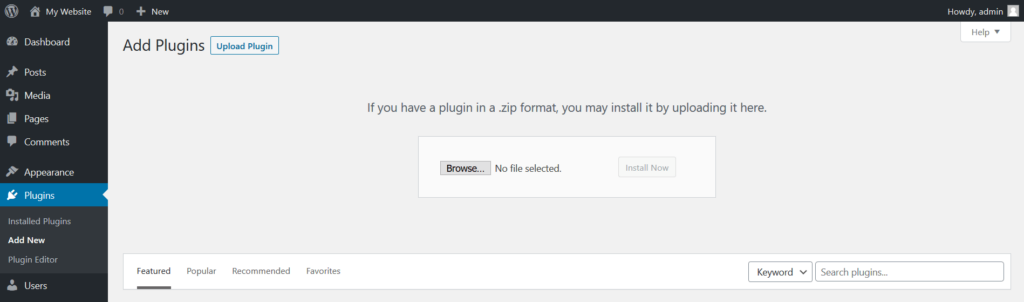
First navigate to Plugins > Add New, then click the Upload Plugin button at the top of the screen. A panel will open with a Browse button. Click the button, select the zip file from your computer, and then click Install Now.
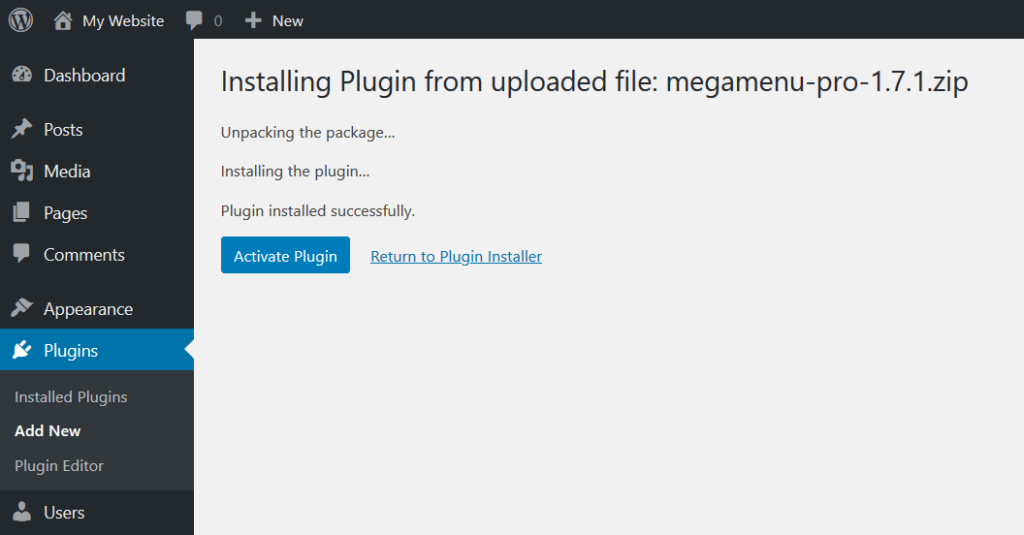
While WordPress is installing your plugin, you will see a screen similar to the one shown below. Once the plugin has been successfully installed, there will be a blue Activate Plugin button. Don’t forget to click this button! Even if a plugin is installed, it’s features will not be available unless it is active. Learn more.
Install WordPress Plugins Manually with FTP
Advanced users may need to use FTP to manually install a WordPress plugin from their computer. FTP clients allow you to connect your local computer to your web hosting server. If you need to download an FTP client, we recommend Filezilla.
We strongly suggest using a WordPress backup plugin to backup your site before using FTP.
Before you begin, make sure you have your FTP username and password. These are different from your WordPress Admin Dashboard username and password. If you need help with this, please reach out to your web host.
First you will need to extract the files in the plugin zip. This new folder needs to have the same name as the original zip file This is the folder you will upload in a later step.
Next open your FTP client and connect to your website using the FTP username and password provided by your web host. Navigate to the /wp-content/plugins/ folder.
From the Local Site section of your FTP client, navigate to the plugin folder you created in Step 1 and upload the entire folder (right click on the folder to bring up options). This process could take a few minutes, depending on the size of the plugin and your connection speed. Please be patient!
When all the files have been uploaded you will see a folder on the Remote Site side of your FTP client that exactly matches the folder you uploaded. The folder from your computer is not removed after being uploaded. To free up storage on your computer, we recommend deleting the unzipped folder, but keep the original zip file in case you need to do this again.
After the upload is complete, you will need to login to your WordPress Admin Dashboard to activate the plugin. Navigate to Plugins > Installed Plugins and click Activate under the plugin’s name. By default installed plugins are NOT active. Learn more.
I’ve Installed a WordPress Plugin – What Now?
Now that your plugin is installed and activated, it’s time to set it up to enable the desired features. Each plugin can have links under the plugin name on Plugins > Installed Plugins, and add sections or links to the WordPress Admin Dashboard side navigation.
We recommend reading the documentation or setup guide specific to each plugin active on your website. Since each plugin varies so greatly, we cannot cover specific plugin configurations in this guide.
How to Install WordPress Plugins – FAQs
Looking for more information about WordPress plugins? Listed below are some of the common questions we get.
How do I know I’ve selected a good plugin?
Since there are over 55,000 plugins available directly from WordPress, and many more direct from developers, choosing a plugin can be very overwhelming. There are several things to consider when choosing a plugin.
Let’s start by reviewing a WordPress Admin Dashboard plugin search results page. Each plugin in the list has its own panel with helpful information.
First, look at the lower left of each panel. How many Active Installations does it have? What is the average Reviews rating? If only a few people are using it, or it has poor reviews, it likely means there are better options available
Second, look at the lower right of each panel. When was it Last Updated? If it seems like a long time compared to similar plugins, it might contain outdated code. Is there a green checkmark next to the text Compatible? If so if the developer officially tested it with your version of WordPress, increasing the likelihood of success.

We also recommend reviewing the official documentation to make sure it seems complete and up to date.
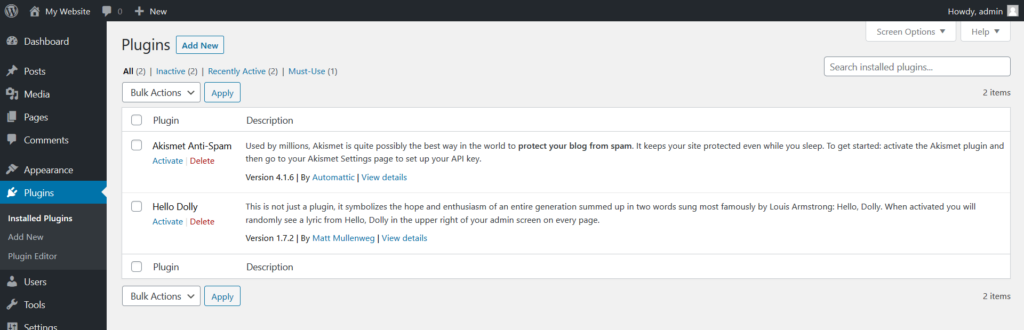
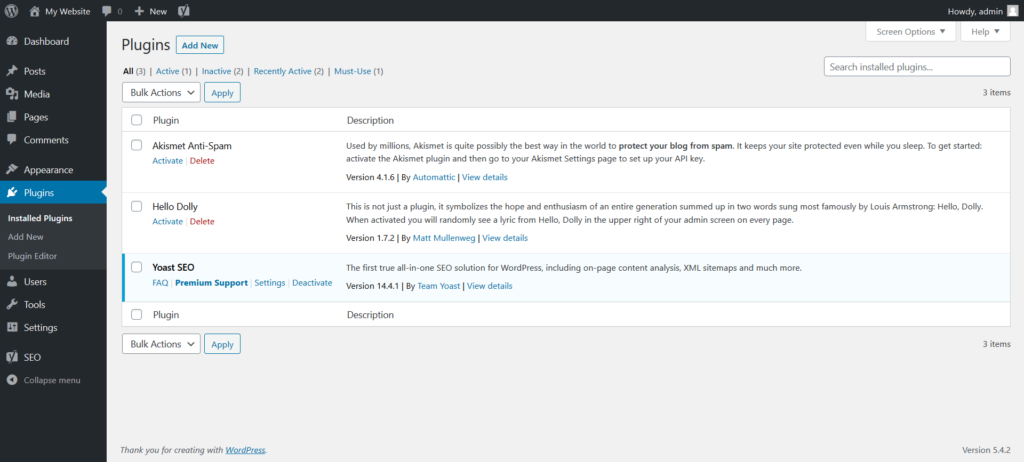
What is the difference between active and inactive plugins?
By default, when you install a WordPress plugin on your site, it will be inactive. You can tell which plugins are active and inactive from Plugins > Installed Plugins. Active plugins have a blue background and inactive plugins have a white background.
Do all plugins need to be active?
No. Sometimes you will have plugins installed on your website that you do not want active for one reason or another.
For example, if you’re trying a few plugins that add the same basic functionality, only one should be active at a time. Or if you want to temporarily disable a feature, deactivating the plugin will remove that plugin’s functionality from the website.
What should I do with plugins I don’t want?
If you want to take a break from the plugin and anticipate using it again in the near future, simply deactivating it is enough.
If you are permanently done with a plugin, for security reasons it should be deactivated and deleted. Navigate to Plugins > Installed Plugins to see your plugin list. First you will need to Deactivate the plugin, as you cannot delete an active plugin. Once the panel changes to a white background you will see a red Delete link. After confirming in the popup, the plugin will be removed entirely from your website.
How many plugins can I install?
While there is technically no limit on how many plugins you can install, you need to be careful how each one affects your website overall. Too many plugins can cause your website to load slower, or generate errors if plugins conflict with each other.
Generally speaking, the average business website can have 20-30 plugins.
Congratulations! You now know how to install a WordPress plugin!
SIGNUP FOR
BOLDGRID CENTRAL
200+ Design Templates + 1 Kick-ass SuperTheme
6 WordPress Plugins + 2 Essential Services
Everything you need to build and manage WordPress websites in one Central place.