
With BoldGrid Crio you can easily create and modify menus from the Customizer. It comes with 5 unique menu locations you can use in your design: Main Menu, Secondary Menu, Tertiary Menu, Quaternary Menu, and Social Icons.
- In the Dashboard navigate to Appearance → Customize → Menus
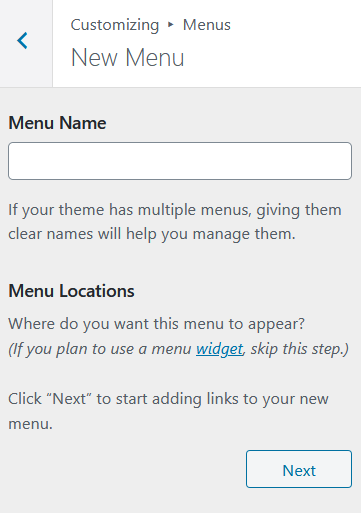
- Click Create New Menu
- Enter your new Menu name
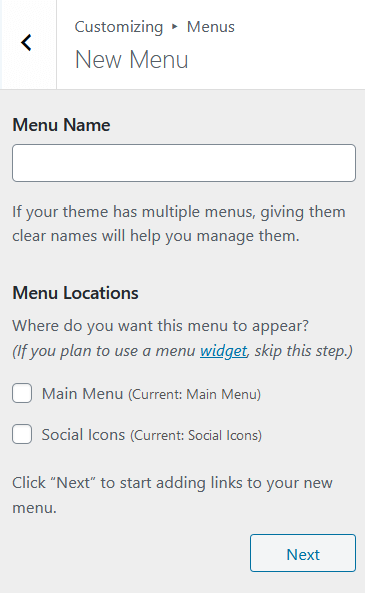
- Select the Location this menu will be displayed in
- Click Next to begin adding Menu Items
Working with Menu Locations in the Header and Footer
The starting layout of Crio has a Main Menu in the Header and the Social Menu either in the Header or Footer. If you want a third menu, or if these two locations no longer exist, you will need to add a Menu Location to the Header or Footer layout. Otherwise when you create the menu you will see no locations available for one of two reasons.
If your screen looks like this, there are no Menu Locations anywhere in the theme.
If your screen looks like this, all of the currently available Menu Locations have a menu assigned.
Either way, you will need to add a Menu Location to the header or footer layout first.
How to Add Menu Items
- Click Add Items
- Choose the type of menu item you want to add by selecting it
- Click the Item to add it to the Menu
- Click Publish to save your changes
Types of Menu Links
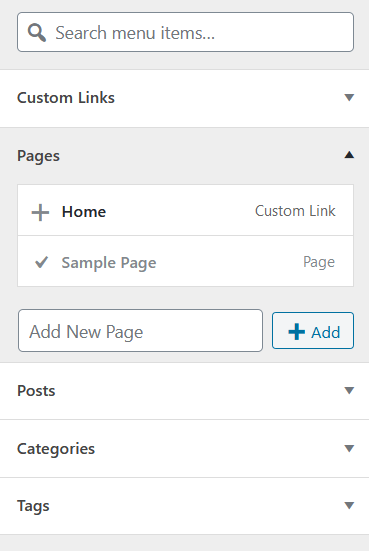
There are 5 types of links you can add by default, but based on the plugins active you may have others. They are Custom Links, Pages, Posts, Categories, and Tags.
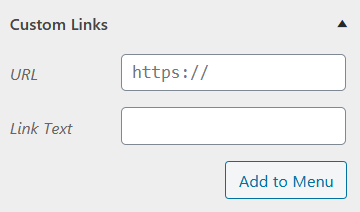
Custom Links are links that go somewhere other than to a page, post, category, or tag on your website. The URL is where the user should go after clicking the link. The Link Text is what word(s) show in your navigation menu for this link. Don’t forget to include the http:// at the beginning!
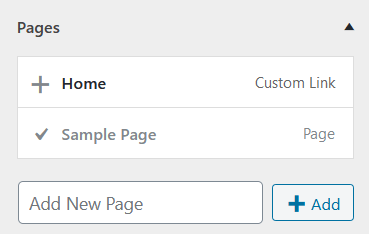
Pages will show you a list of every page on your website with a + icon next to it. If that page has already been added to the menu, it will have a check mark and the text will be gray. In the example below, Sample Page is in the menu and Home is not. You can add a new page using the textbox below the page list. Simply enter the desired page name and click the + Add button. The page will be created in your dashboard and immediately added to the menu.
Posts are added the exact same way as Pages.
Categories and Tags each provide a list of each to add, with the same + and checkmark icons. The only difference is you cannot create a new category or tag from the Customizer.
Open a Menu Link in a New Tab
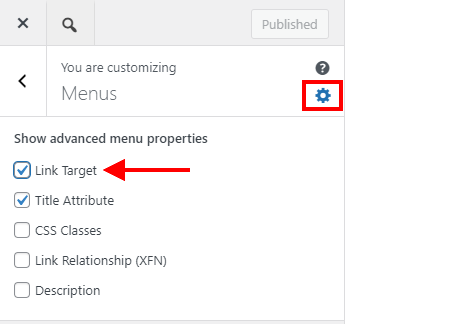
- Start by opening the Customizer, then clicking on Menus.
- Click the gear icon next to the Menu heading to open the Advanced Menu Properties.
- Check Link Target.
- Navigate to the menu that contains the link item you want to open in a new tab.
- Click the dropdown arrow next to that link item and enable Open link in a new tab.
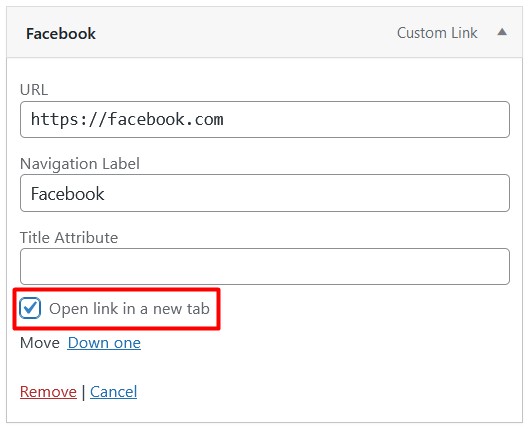
Save and close the Customizer and now your link should open in a new tab.
How to Use Text Links Instead of Social Media Icons
By default, social media links will turn into an icon when added to a menu. If you’d like to use the entered text instead of an icon, you can use a plugin like Code Snippets to add custom code like shown below. You can add additional unset lines as needed to include additional social media sites.
function bgsc_remove_social_icon($networks){
unset($networks['youtube.com']);
unset($networks['facebook.com']);
unset($networks['twitter.com']);
return $networks;
}
add_filter('boldgrid_social_icon_networks' , 'bgsc_remove_social_icon');
Add Custom Social Media Icons
BoldGrid Crio also allows you to add custom social media icons like TikTok that are not included out of the box. These instructions also cover how to make an email address in a menu turn into an envelope icon.
Working with Menu Locations
- Navigate to Customizer → Menus
- Scroll down to Menu Locations and click View All Locations
From here you can see all the menu locations in use and where your menus are currently assigned. Click on the drop-down arrow to select a different menu or click on the new menu link to create a new menu for that location.
Note: If you need more menu locations, please add one to the header or footer layout first.
To remove a menu, click the menu name and choose the “– Select –” option. Once the menu is removed from the location, you may want to remove the Menu Location from the header or footer layout as well.
Congratulations! You now have the information needed to work with menus in BoldGrid Crio! Next, you may want to work with menu fonts.
SIGNUP FOR
BOLDGRID CENTRAL
200+ Design Templates + 1 Kick-ass SuperTheme
6 WordPress Plugins + 2 Essential Services
Everything you need to build and manage WordPress websites in one Central place.
Jon says:
I am working with the Crio theme for my website and can’t seem to create a menu where the “Contact Us” is not a button. Even as a button, the text isn’t center aligned in the button resulting in the next being aligned right and overflowing the button. Can someone please guide me in the right direction on creating a menu without a “Contact Us” button but just a link, or helping me to fix the alignment of the text within the “Contact Us” button?
Brandon says:
Hi John,
We can most definitely help you out with this. You can add a “Contact Us” link as a menu item in your header and remove the button functionality altogether. We would like to inspect your site to see exactly what you’re working with as customer headers work a bit different than standard header menu items. If you can create a new forum topic and be sure to include the URL of your website site we’re happy to have a look and give you our best suggestions on how you should go about resolving this concern. Thanks John!
Luc says:
Is there a way to only show certain menu items for logged in users?
Brandon says:
Hi Luc, This functionality is not native to Crio, but I found a guide from WP Beginner that shows two different methods of setting this up. One being with the Conditional Menus plugin and the other is a more advanced custom code snippet. I hope this helps! Please let us know if you have any other questions for us.
Alex says:
Unable to arrange items in the main menu navigation. Not looking for a hamburger menu, but there is no ability to display items horizontally on the Crio theme
Brandon says:
Hi Alex, I think I understand what you’re trying to do here. You can incorporate a vertical mobile menu using the WordPress/Crio Customizer. To enable/disable the hamburger option navigate from your WordPress dashboard to Appearance > Customizer > Design > Menus and select the menu location you’d like to modify. Disable the hamburger menu should give you your desired functionality. Hope this helps! Let us know if you have any other questions.
Mike says:
So, I’m new to Crio and to WordPress, so everything is a learning experience for me. We have built our site basically, added the pages we initially want to appear, and built the menu. I figured out how to change the width of the side menu (primary). We have the pages listed, and links to the existing pages. It works fine in the editor. Once I go to view as a customer, none of the links work. Nothing happens when we link on it. I don’t know if there is something in an overlay preventing access, or if we have done something else wrong. Please help.
Brandon says:
Hi Mike! Thanks a lot for reaching reaching out although I’m sorry to hear you’re having issues. We can definitely take a look at this for you. Could you please start a new forum topic and link the URL of the page you’re having trouble with so we can inspect it using our browser tools?
We look forward to assisting you with this!
Mike says:
Thank you. Created a forum under Crio called Inoperable Menus.
Brandon says:
Thanks Mike! See you there!
Mike says:
Help! I just don’t get into the Customizer much. I’m trying to change where a menu item links to on our site – from one page to a different one. I am not finding that in the customizer or in the help page. TIA
Brandon says:
Hi Mike!
You should be able to access your “Menus’ section from the Appearance > Menus tab in your WordPress dashboard. Be sure to select your “primary” header menu and you can add new menu links or edit existing ones here.
I hope this helps!
Lonny says:
Is there a way to disable the hover effect on main menus?
Brandon says:
Hi Lonny,
Thanks for reaching out, yes this can be done from your WordPress Customizer “Menus” Design < Menus < Main Menu < Menu Items < Hover Style. Just switch the “Hover Effect” to the “Link Text Color Change setting” and set the color to match your current menu color.
I hope this helps! Please let us know if you have any other questions for us.
Gabe says:
Hello. I have a drop-down menu on my header and everything works fine except that with a certain block the menu shows behind the pictures and you can’t really read it.
It happens for example here https://www.cidep.online/actualidad/ when you pass the pointer over “Editorial” on the menu.
I didn’t see any option to fix this so I ask if you have any idea how it can be done.
Thanks in advance.
BoldGrid says:
Hi Gabe,
Thanks for using our WordPress theme Crio. Sorry you’re having a problem with the menu hiding behind the page content, we’re happy to help get this fixed. Please open the Customizer, go to the Custom CSS/JS panel, and paste this code in:
.site-header {z-index: 3!important;
}
That should pull the menu in front of the block content.
Gabe says:
Thank you very much for your kind help.