Images help to relay your message to visitors and it is recommended to include images in your website content. The Post and Page Builder has features that make working with images in WordPress painless, which we will outline for you in the following guide.
How to Add Images in WordPress
Images are a key part of web design and for SEO and visibility purposes it is important to have at least one image per page. Below are the steps to add a new image to a Block.
- Click in the column where the image will go
- Click the Enter button to add a new line
- Click the Add Media button below the Page Title box to open the Media Library modal
- From here you can select an image or click Upload Files to add a new one to the Media Library
- Click on your desired image to open the Image Details screen
- From here you can add a Caption, Alt Text, control Alignment, Links, Image Size, and more. All these options are discussed in detail later in this article
- When finished click Insert into Page to see your image in the Editor
How to Replace Images in WordPress
Replacing images in WordPress is easier than ever with the Post and Page Builder and our Crop Image option, however you can always use the native replace image feature in WordPress.
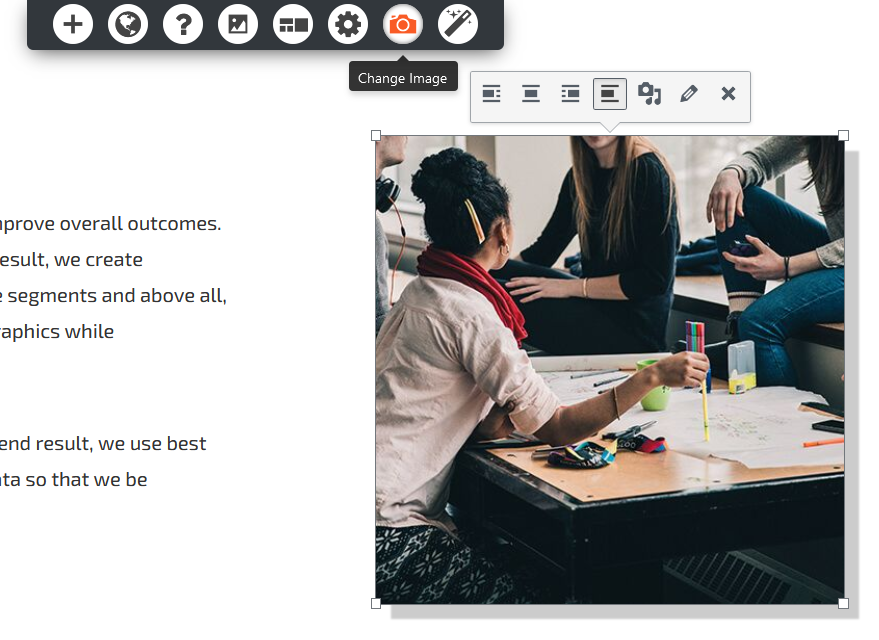
- Click on the image you want to Edit or Replace
- Click the Camera Icon that is added to the DropTab
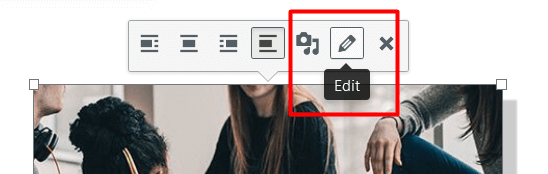
- Or, you can use the WordPress Image Editor edit pencil icon
- Either way, you will end up in the Media Library. From here, select the image you wish to replace it with
- Adjust the Image Details as needed, these options are explained later in this article
- Click Replace
Next you will learn how to crop the image.
How to Crop Images in WordPress
Crop an Image Already in the Media Library
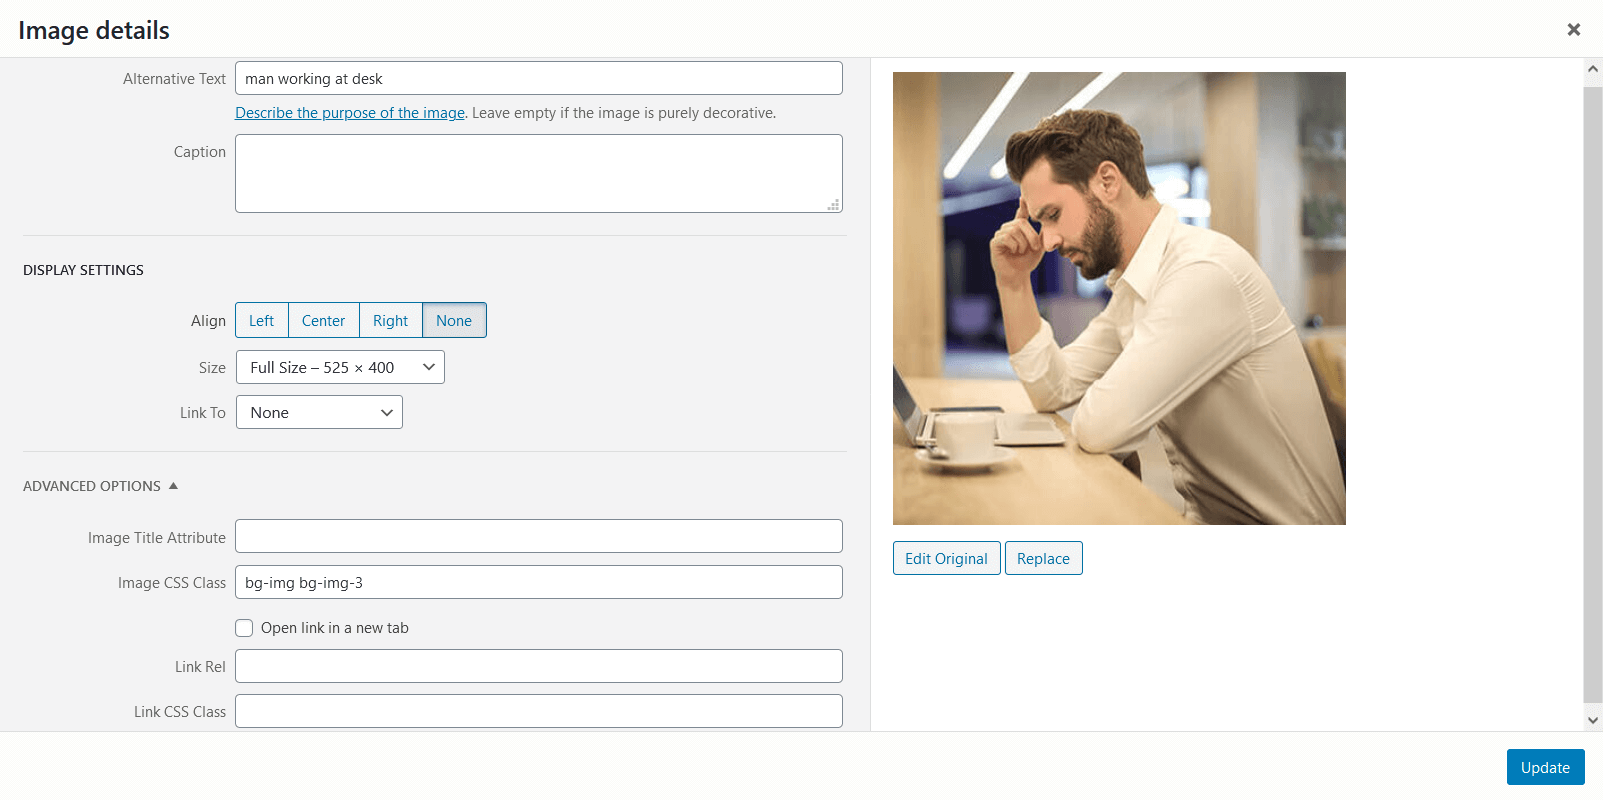
If you want to crop an image previously uploaded to your Media Library, click the edit pencil icon above the image to open the Image Details.
From here, click the Edit Original button under the image.
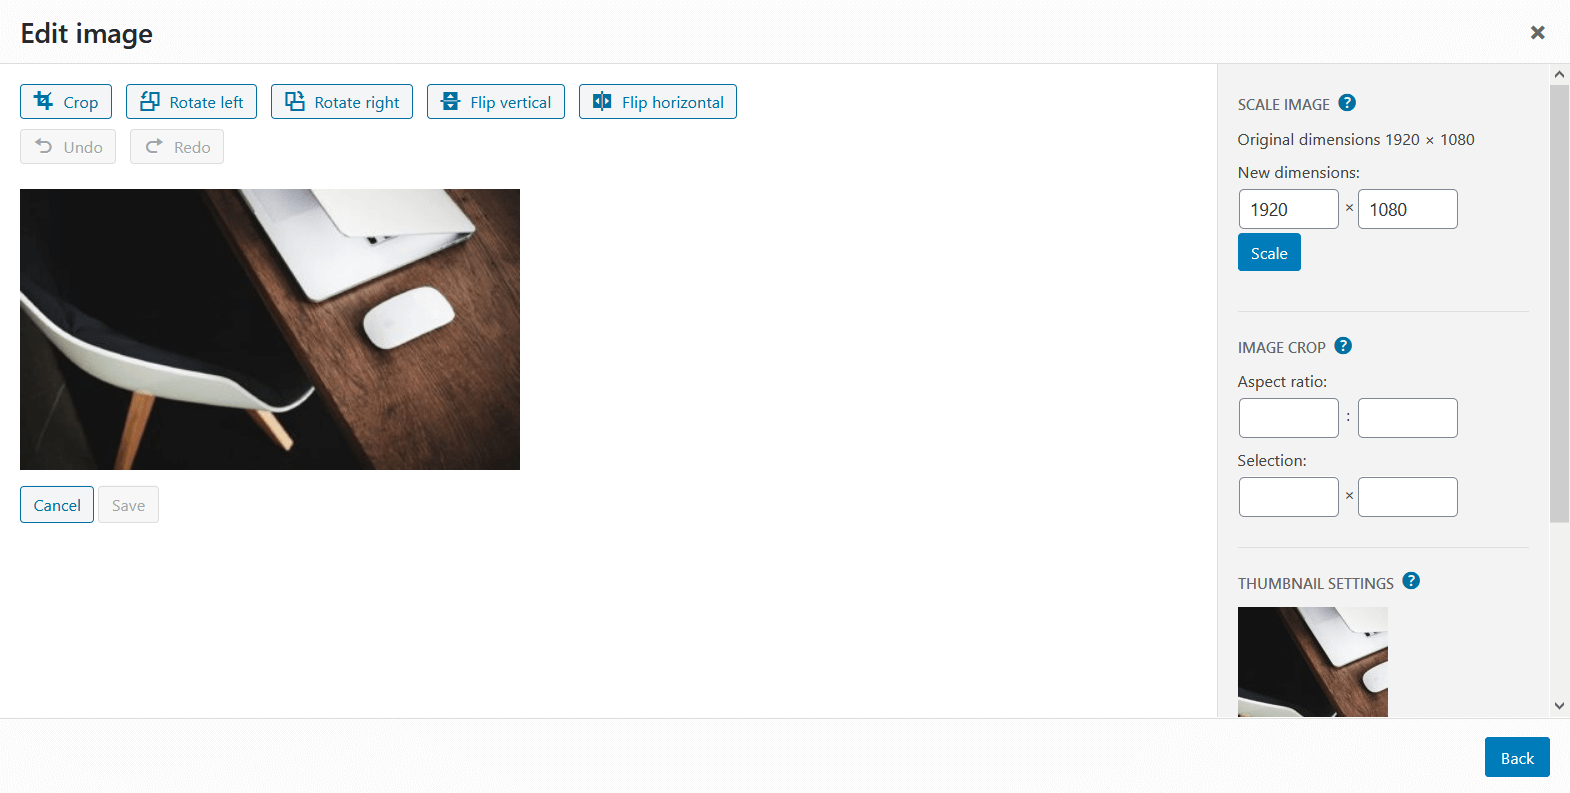
This is where you can adjust the image as needed. Be sure to click the blue Save button under the image when done, then click the blue Back button in the lower right to close the panel.
Crop an Image While Uploading
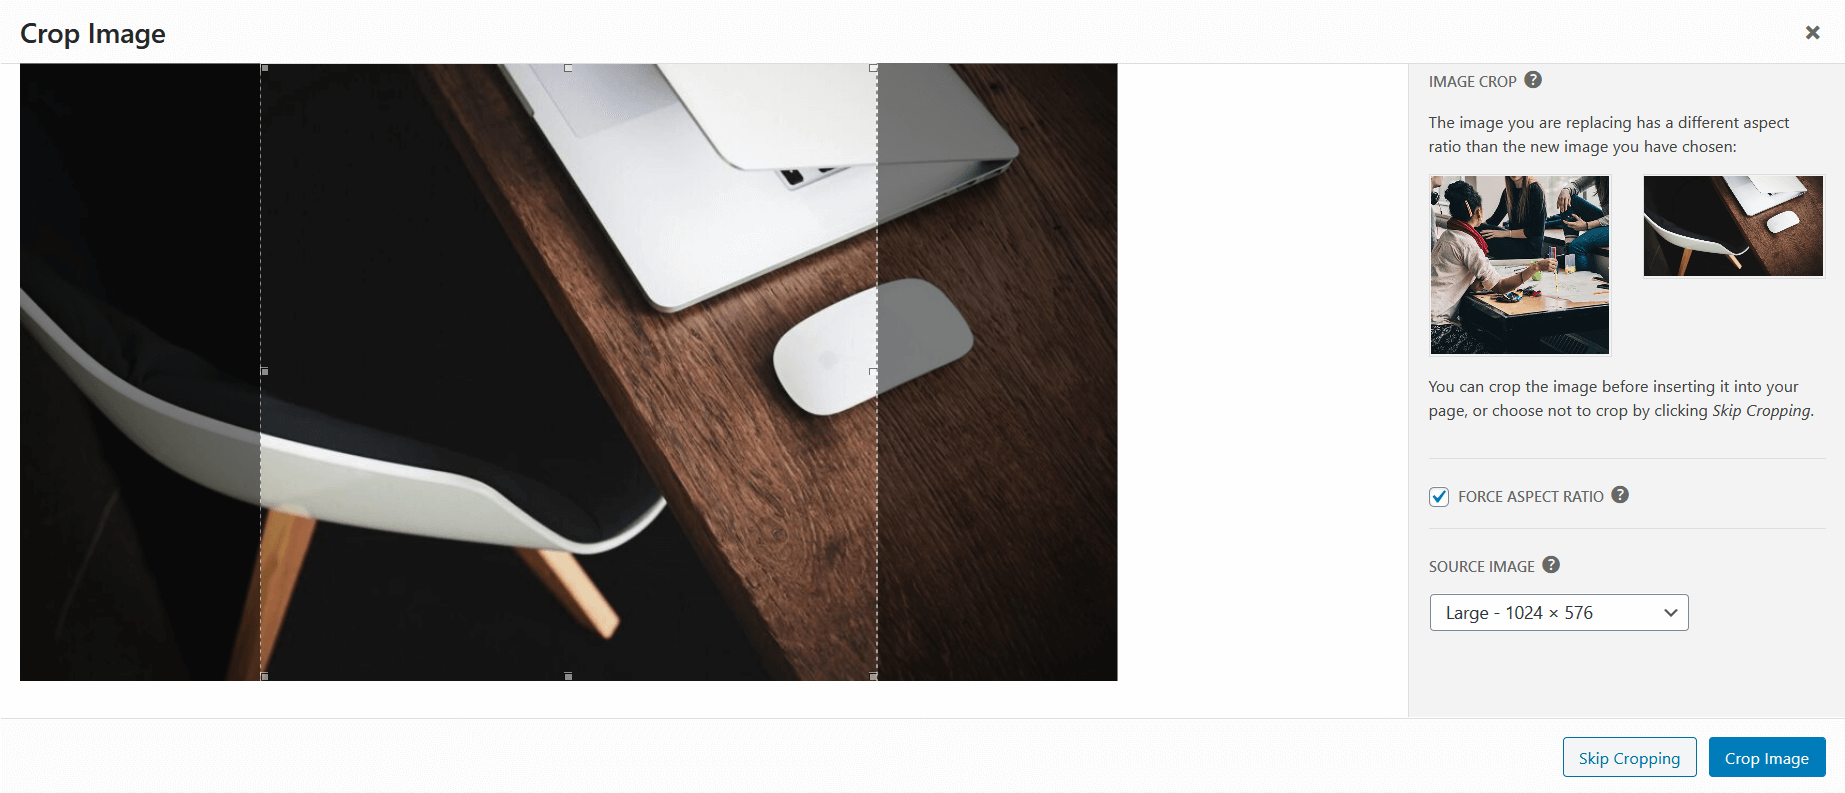
When replacing an image with the Post and Page Builder, you can crop images while uploading. This feature maintains the aspect ratio, which means you can quickly swap images without harming your layout. To use the Post and Page Builder cropping tool, first click the image and then click the camera icon in the DropTab.
After selecting or uploading a new image, if the dimensions are different than the image you are replacing, you will see a Crop Image screen, as shown below. By default the Force Aspect Ratio box is checked to ensure your layout isn’t thrown off. You can always uncheck the box to replace the image without cropping and use the new image dimensions.
How to Update the Image Details
What is Alternative Text?
Each image’s alternative text, or alt text for short, displays on the page while the image finishes loading. They are read by screen readers and also help with website SEO. It’s highly recommended to include alt text on all images.
Add an Image Caption
You may give each image a caption if you would like. Each theme will display an image caption differently.
Change Image Alignment
- Left – image appears on the left of the theme container boundary and other content will wrap around the image
- Center – image will be in the middle of the screen, in its own row
- Right – image appears on the right side of the theme container edge and other content will wrap around the image
- None – the image will be in it’s own row on the left side of the screen. Other content will not wrap around the image
Choose Image Size
WordPress Core has max image dimensions for each size, which are listed below, but some themes may override these defaults. When you upload an image, WordPress automatically creates a version of the image in each of these sizes. The size of the final image for Thumbnail, Medium, Medium Large, and Large will vary depending on the height of the original image.
- Thumbnail – 150px by 150px
- Medium – 300px by 300px
- Medium Large – 768px by 768px
- Large – 1024px by 1024px
- Full – actual size of uploaded image. Be careful how wide of an image you upload, take the size of your theme’s container into account. Using a large image increases page load speed.
Update Image Links
- Media File – the image will open larger on the screen, in the same window
- Attachment Page – the image will show on its own page, with the Image Title used as the page title
- Custom URL – you can add any link to an image, either on or off site
- None
Advanced Options in Image Details
Image Title Attribute
This text appears when a user hovers over the image.
Image CSS Class
Any custom CSS added here will be added to the image itself.
Link Rel
This advanced feature is used to control how image links are used for SEO purposes. Any standard HTML link rel attributes can be used.
Link CSS Class
These classes will apply to the image link.
Image Design
BoldGrid includes design shape options for images. The following steps will explain how to add custom designs to your images.
- Click on the image you want to change
- In the Drop Tab toolbar, select the Gear icon labeled Image Design
- You will see a list of Sample Designs to choose from or click Customize Design to create your own
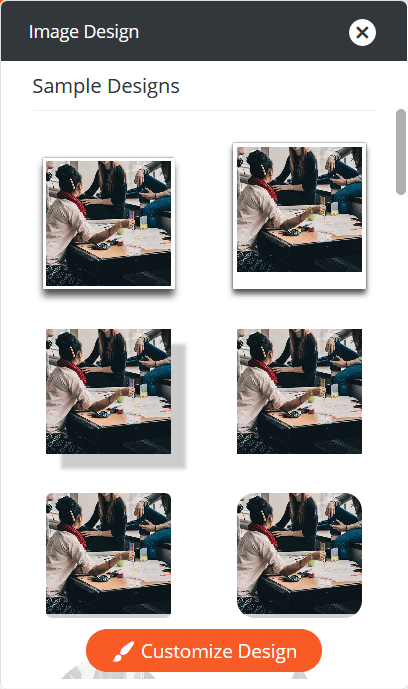
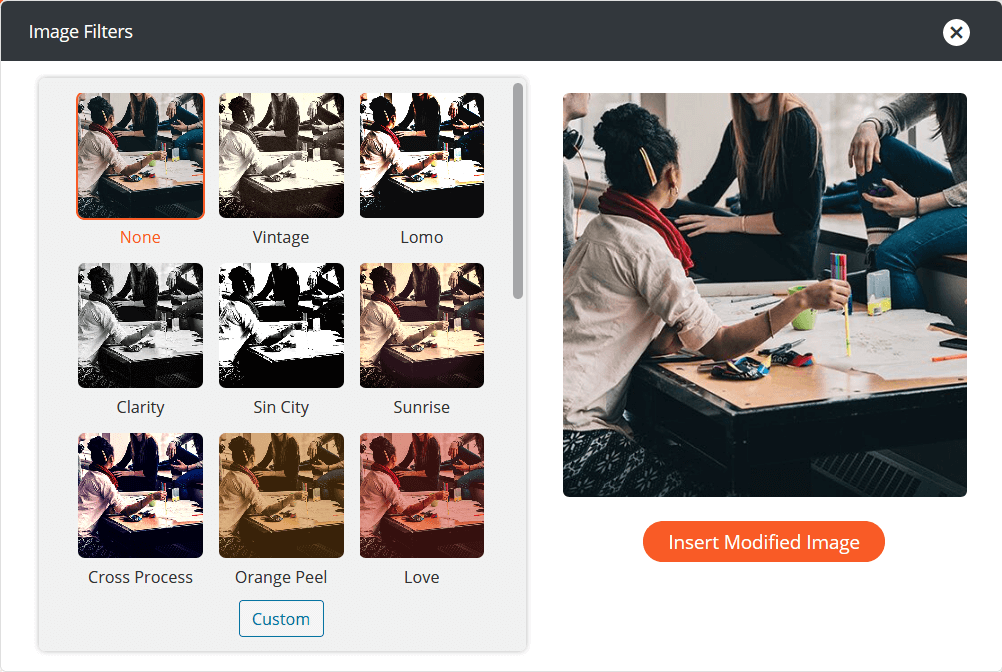
Image Filters
BoldGrid offers Image Filters that allow you to change the way your images appear. This is helpful for making images work with your selected color scheme without opening an external image editing program.
- Click on the image you want to change
- In the Drop Tab toolbar, select the Magic Wand icon labeled Image Filters
- You will see a list of Filters to choose from
- Click Custom to create your own unique filter
WebP Images
As of WordPress 5.7, you can upload WebP format images into the media library just like a jpg, png, or pdf file. WebP images are on average 30% smaller than jpeg and 26% smaller than png images in file size, without losing image quality. Most modern browsers support WebP, including Chrome, Firefox, Edge, and Opera.
There are many free online tools available for converting images to WebP. If you are converting less than 25 per day, Cloud Convert is a good option. Depending on the size of your site, it may be worthwhile to convert and re-upload all your images. Otherwise you’ll need a plugin active to serve WebP images instead of the file format uploaded to the Media Library.
FAQs
How do I make the image be full-size in the attachment page?
By default, WordPress uses the medium image size on the attachment pages. In order to change this, you’ll need to either use the Code Snippets Plugin or use a child theme to create a custom filter. You can paste this code into a Code Snippet or into your Child Theme’s functions.php file to accomplish this:
function bgsc_full_attachment_size( $attachment_content ) {
 if (is_attachment()) { //only change image size on attachment pages
 return sprintf( '<p>%s</p>', wp_get_attachment_link( 0, 'full', false) ); //Change 'full' to 'large' if needed
 }
 }
 add_filter( 'prepend_attachment', 'bgsc_full_attachment_size', 10, 1);
How do I set up my images so text is displayed when one scrolls over it?
The easiest way to show text on an image while hovering is to add an Image Title Attribute, however the styling of this text will vary per theme. If you’re looking for a more polished effect, you can use Custom CSS to further fine tune your design. Here’s some example code:
figure.hover-caption-display {
 position: relative;
 overflow: hidden;
 }
 figure.hover-caption-display > figcaption {
 position: absolute;
 left: 0px;
 right: 0px;
 height: 30px;
 line-height: 30px;
 bottom: -60px;
 text-align: center;
 background: rgba( 256,256,256,.8 );
 color: #000;
 transition: bottom 500ms;}
 figure.hover-caption-display:hover > figcaption {
 bottom: 40%;
 transition: bottom 500ms; }
Congratulations!
You now know how to work with all the image options available from the Post and Page Builder, BoldGrid’s WordPress page builder. Next, you may want to learn how to make a slider.
SIGNUP FOR
BOLDGRID CENTRAL
200+ Design Templates + 1 Kick-ass SuperTheme
6 WordPress Plugins + 2 Essential Services
Everything you need to build and manage WordPress websites in one Central place.
Hairstyles says:
You’ve the most impressive websites.
Brandon says:
Thank you! We’re so happy you’re pleased with our WordPress Theme and plugins!
Andy says:
Is there a way (or could there be a way) for images to be a percent width of the column and still keep captions? If I manually change the size to width=”50%” in the image it removes the captions.
I’m starting with:
[caption id="attachment_4110" align="alignright" width="300"] DIC forms vs. pH[/caption]
How do I convert to 50% width instead of fixed pixel size and still keep the captions?
Brandon says:
Hi Andy! I’m sure we can help you out with this, are you able to start a new forum topic and link to a page on your site where you’re working with images and captions. We’ll inspect your elements and give you our best suggestions on how we’d go about resolving your concern.
Thanks Andy, looking forward to helping out!
Andy says:
Hi Brandon. I couldn’t make a new post in the forum. When I tried I got the error “are you sure you want to do that?”
But the question issue is:
I want to insert an image, but instead of picking a pixel-based size, I want to specify a percent width. This is doable for just the image itself, but not without messing up the shortcode that handles the captions. Is there a way to set a captioned image to a fixed percent width?
I made a test page that illustrates the issue: https://niade.com/boldgrid-test-page/
Brandon says:
Hi Andy,
I’m not sure why you weren’t able to create a new forum topic. We tested the form a few times to make sure it was working and it seems to be functional. If you’re using the Post and Page Builder you can click the image and select the Gear icon that appears in the Tiny Editor widow. Click Customize Design to bring up the design options and you have the choice adjust the padding and margin of your image using pixels or percentages.
I hope this is what you’re for. Please try creating a new topic for us again if you have further questions, thanks a lot!
Andy says:
Thanks Brandon, but this isn’t what I’m looking for. The above changes the appearance of an image but doesn’t change the size of the image on the displayed page. Any other suggestions?
I can’t create a new forum topic. I still get “Error: Are you sure you wanted to do that?” (see the bottom of https://niade.com/boldgrid-test-page/ for a screenshot of the error)
Brandon says:
Hi Andy,
The form, is dependent on all fields being completed correctly and I think you may be missing something. But no worries, you should be able to get your desired effect using custom CSS. We have a short video you can follow on how to set this up. What you’d need to do is add a custom class to your image blocks then use the custom css editor inside of your Crio/WordPress customizer to apply your changes with custom CSS.
CeeCee says:
How do I: create a row with say 4 columns and have the same size image in each column without resizing each image? in one of the blocks im using im able to just click and replace with my own images and it maintains the same size even without needing to crop but id like to recreate that without needing this block.
Brandon says:
Hi CeeCee, that is a very good question! If you start with a single column and image you can hover over that column within your section to bring up the blue “Column” icons. Click the “3 bar” icon to bring up your column option and click clone. Each time you clone a column it should create a duplicate equal sized column within the section. At that point you should be able to go in and swap out your images and content.
I hope this helps!
Max says:
Keep up the good work!
IanT says:
Hi, how do i make an image get bigger when I hover over it?
Jesse says:
Hello Ian-
This type of hover effect isn’t included in-the-box with Post and Page Builder, but you can accomplish it with a free plugin like Image Hover Effects Ultimate.
Stephen says:
How do I do the following: user clicks on an image and a large image is displayed (and stay on the same page).
TIA
Jesse says:
Hello Stephen-

This behavior is typically called a Lightbox, and there are a lot of different plugins you can use to accomplish that. On this website, we’re using Responsive Lightbox & gallery, which looks like this (click on the image to see):
Brian says:
How do I crop a single use of an image? Seems like it should be obvious, but I cannot find the thing I need to do it.
I’m building a photo gallery, and want to have a cropped version of one of the photos as a larger image, then several rows of thumbnails. How do I crop that larger image without cropping the original media file?
Jesse says:
Hi Brian-
Check out this forum post where another user had the same request to have two versions of one photo cropped differently.
Here’s the video I made to help them out:
Paul says:
How to link an image to an external site? Say I have an image of a book cover and want to link to the publishers site? I went into Edit the image but did not seen an option as i would for turning text into a link. Thanks… Paul. Also, is it possible to feed an external blog onto it’s own page in my site? Or the posting having to occur first on my site? The idea would be that the posting I make on, say, Medium would also show up on my site’s blog page. Thanks for all the help…
Jesse says:
Hello Paul-
Probably the easiest way to accomplish this is to click on the image in the editor, and use the link shortcut Ctrl-K (or Cmd-K on a mac) and paste the link into the pop-up box that comes up. Alternatively, you can click on the image and click the Edit/Pencil icon. That will bring up the Image Details screen, where you’ll find the “Link To” option. Select Link To: Custom URL from the drop-down selection menu, and paste the URL into the new field that shows up.
Craig says:
hi, how do I move an image further down the page? I have a column with 1 image above another and want the bottom one moved further down. there is nowhere i can click to place the cursor and click enter for paragraph.
If i click and drag the image disappears. Thanks
Jesse says:
Hello Craig,
I took a few moments to answer your question in a video. Take a look:
Carolyn says:
how do I set up my images so that the page name it is linking to is displayed when one scrolls over it?
Jesse says:
Hi Carolyn-

That’s a great question. One easy way is to simply use the “Image Title Attribute” which will appear when a user hovers over it (hover over this image to see what it looks like):
If you’re looking for a more polished effect, you can use Custom CSS to make your image links look great. Here’s a video I created to walk you through that process:
Here’s the CSS code I used in the video:
figure.hover-caption-display {position: relative;
overflow: hidden;
}
figure.hover-caption-display > figcaption {
position: absolute;
left: 0px;
right: 0px;
height: 30px;
line-height: 30px;
bottom: -60px;
text-align: center;
background: rgba( 256,256,256,.8 );
color: #000;
transition: bottom 500ms;}
figure.hover-caption-display:hover > figcaption {
bottom: 40%;
transition: bottom 500ms; }
E says:
I tried to follow your advice in this post, but could not achieve what I wanted. I want the images on the page to be thumbnail-sized, but when a viewer clicks on the image, it would take them to an attachment page with a full-sized image.
I tried changing Attachment Display Settings like you say above. I selected Size to be Full Size. What happened was the image inserted into the page was full size, but in the attachment page it was still thumbnail-sized. Which was the opposite of what I wanted.
How do I make the image be full-size in the attachment page?
Thanks!
Jesse says:
Hello E-
Thanks for the great question. By default, WordPress uses the medium image size on the attachment pages- which is to say that they’re 300 pixels wide for most themes. In order to change this, you’ll need to either use the Code Snippets Plugin or use a child theme to create a custom filter. You can paste this code into a Code Snippet or into your Child Theme’s functions.php file to accomplish this:
function bgsc_full_attachment_size( $attachment_content ) {if (is_attachment()) { //only change image size on attachment pages
return sprintf( '<p>%s</p>', wp_get_attachment_link( 0, 'full', false) ); //Change 'full' to 'large' if needed
}
}
add_filter( 'prepend_attachment', 'bgsc_full_attachment_size', 10, 1);
Zusu says:
That is not what I am looking for. What I want to know is how to make the image non-clickable. in the BG Sandbox that happens automatically, but on the site it does not. Right now all my images are clickable — going to their media page and I do not want that. thank you.
Jesse says:
Hello Zusu-


You can change your image links from “Media Page” to “None” by editing the image, and changing the “Link To” field. Here’s an example screenshot: