What is a CDN?
A Content Delivery Network (CDN) is a network of servers distributed geographically around the world that work together to deliver web content to end users quickly and efficiently. CDNs store cached versions of website files, such as images, videos, and scripts, in multiple locations so that users can access them from the server closest to their location. This results in faster load times and a better user experience.
What is an FSD CDN?
A Full Site Delivery (FSD) CDN is a type of CDN that not only caches static files but also serves entire web pages. This means that the CDN acts as a proxy server, retrieving web pages from the origin server, caching them, and delivering them to end users. FSD CDNs can speed up website load times by reducing the time it takes for the server to generate and deliver the HTML content of a page.
In this test, using the W3 Total Cache Full Site Delivery (FSD) feature added a 98.58% performance enhancement to the Average Server Response Time! Review the testing results to see how.
Upgrade to W3 Total Cache Pro and improve your PageSpeed Scores today!
Why is the CDN important for WordPress websites?
A Content Delivery Network (CDN) is important for several reasons:
Faster website loading times: By caching and delivering web content from servers located closer to the end-user, CDNs reduce the time it takes for a website to load. This can improve the user experience, reduce bounce rates, and increase engagement and conversions.
Improved website availability: CDNs can distribute website traffic across multiple servers, reducing the risk of website downtime due to server overload or failure. This can improve website availability and ensure that users can access your website at all times.
Reduced server load: CDNs can offload traffic from the origin server, reducing the load on the server and improving its performance. This can be especially important for high-traffic websites or websites that experience sudden spikes in traffic.
Better SEO: Website loading times are a key factor in search engine rankings. By improving website loading times with a CDN, you can improve your website’s search engine rankings and visibility.
Global reach: CDNs have servers located around the world, making it easier to serve web content to users in different geographic locations. This can improve website performance and user experience for users in different parts of the world.
Overall, a CDN is important for improving website performance, availability, and global reach. By using a CDN, you can deliver web content quickly and efficiently to users around the world, improving the user experience and ensuring that your website is always available.
How to set up an FSD CDN in W3 Total Cache
The steps to setup FSD vary based on which provider you’re using. As an example, review the Bunny FSD setup guide here.
How to confirm that the website is served from the CDN?
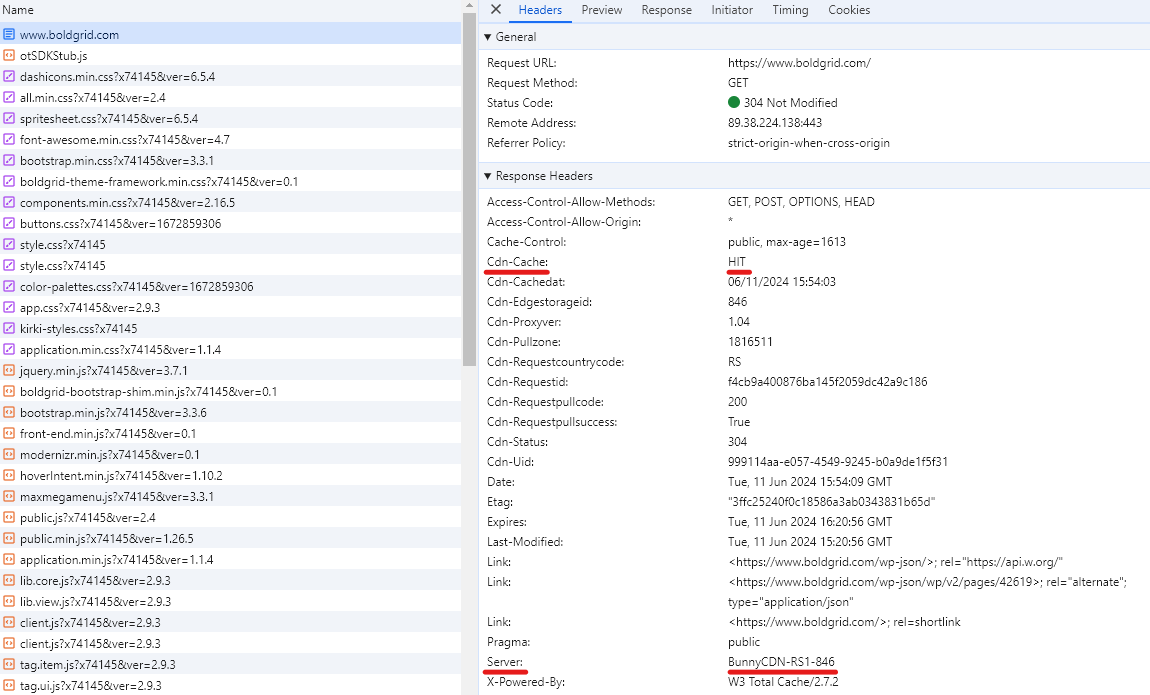
After the setup, and after you have saved all settings and purged the cache, open the website in a new window, inspect the source, go to the network tab, and check the Remote address of the website which should be updated accordingly depending on the CDN Provider you are subscribed with. Also, the server header is updated. In the examples below, you can see how the website that is fully served by the Bunny CDN can be confirmed.
W3 Total Cache
You haven't seen fast until you've tried PRO
Full Site CDN + Additional Caching Options
Advanced Caching Statistics, Purge Logs and More
Everything you need to scale your WordPress Website and improve your PageSpeed.
Mario says:
Hello,
i working with bunny.net as cdn providers and have 2 questions.
1. Works the FSD only with the nameservers from bunny.net or can i use NS from other providers too?
2. Update Nameserver Records in your setup guide: Do you mean a cname entry?
thanks
Adam says:
Hi, is it possible to use Microsoft CDN for Full Site Delivery if we purchase a pro license?
We are using WordPress on Azure App Service https://azuremarketplace.microsoft.com/en-us/marketplace/apps/WordPress.WordPress?tab=Overview
Marko says:
Hello Adam,
Thank you for your question!
The FSD can be set up with the providers that are offering a Full site delivery, meaning serving the entire website from the CDN and not just static assets using a rewrite.
As I can see the Azured does not offer this. Can you please share any information to confirm this?