What is minification?
In a narrow meaning, minification means optimizing your CSS, JS files as well as feeds and HTML code by removing any characters which are not necessary from the source code. For example, line breaks, extra whitespace, comments are removed. And it decreases the size of these files or code and lets your website load faster.
Apart from minification itself, some other operations with. CSS and .JS files can be considered under the minification section in the W3 Total Cache plugin.
For example, moving calls to CSS and JS files to a different part of the page; inlining the JS and CSS code into HTML code. It helps render the page faster. However, this is not technically a minification, but optimization.
Minification is the most error-prone setting in many cases because it depends on a particular configuration of your WordPress site’s software
W3 Total Cache does have an Auto mode for minification, however, in some cases, Auto minify can break styling or the functionality of your website, and it can be very hard to find which particular JS or CSS file might be responsible for that and exclude it from being minified.
For that reason, W3 Total Cache also has a Manual minify option.
Customize your performance with CSS and JS manual Minification with W3 Total Cache Pro.
Difference between Auto and Manual minify
In Auto mode, W3 takes care to identify all the files that it can minify and combine. Whether this mode works or not, ultimately depends on the scripts and stylesheets used by the theme and plugins that active in WordPress. While many scripts and stylesheets work perfectly well on minify, some cause trouble.
When minify Auto mode adversely impacts the look and feel of the site, then the only option is to switch to Minify Manual Mode. Manual mode allows the user to add the JS and CSS files manually and in proper order thus avoiding any files that may break the styling or functionality of the website.
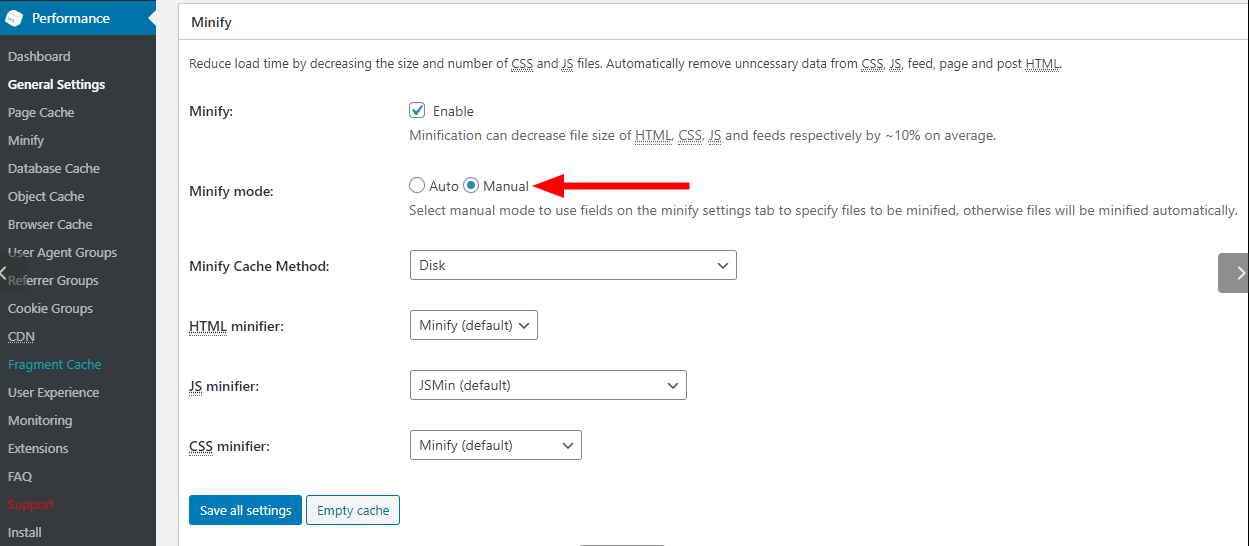
How to enable Manual minify?
Enabling Manual minify mode is simple. Please note that after enabling Manual mode, you also have to add the files to minify, so simply enabling it will not mean that the files are minified.
To enable Manual Minify, go to Performance>General Settings, Scroll down to the Minify section, select Manual minify, select the desired Minify Cache Method (Disk, Redis, Memcached), select the Enable box and make sure to save all settings.
JS minify settings
Before adding the files, we first need to configure the JS minify section in Performance>Minify>JS
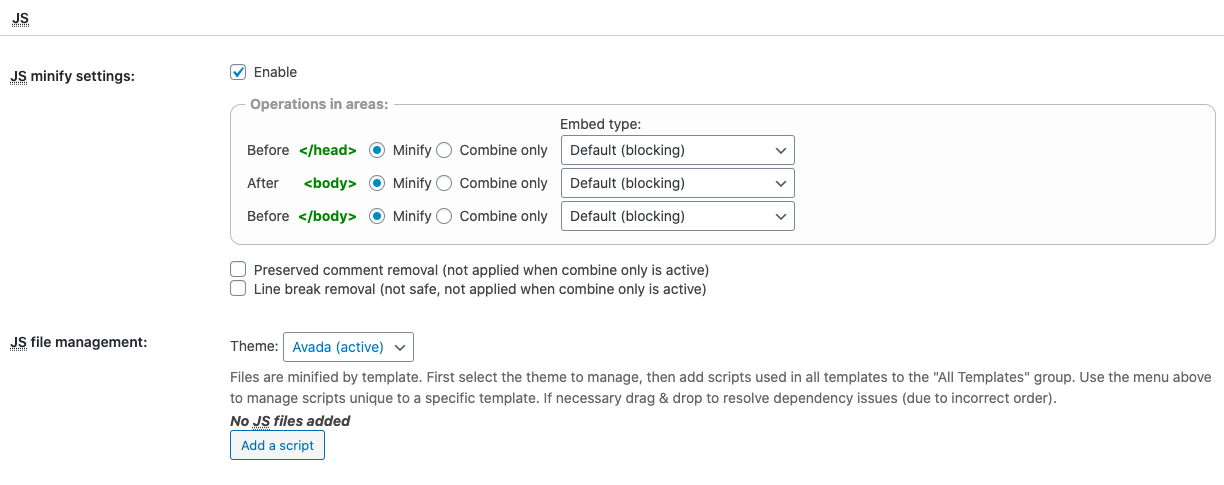
JS minify – Enable
You can choose different methods and embed type for scripts Before </head>, After <Body> and Before </body>
Choose to Minify scripts or combine
Choose Embed type:
- Default (blocking)
- Non-blocking using “defer” (Use to eliminate render-blocking JS)
- Non-blocking using ”async” (Use to eliminate render-blocking JS)
Under JS File Management, make sure to select the current theme you are using.
What’s the difference between Async and Defer?
Both methods will eliminate render-blocking, but there are some pros and cons to each method.
Async will allow the page to continue rendering while the JavaScript is downloaded, and the script will be executed as soon as it has finished loading. This is the fastest way to load your scripts. However it might result in errors similar to jQuery is not defined. That’s because if a small script depends on jQuery (or another library), it may load faster than the library and execute immediately.
Defer will allow your page to continue rendering, but wait until the entire document has been loaded to begin execution. It also executes the scripts in the order in which they were called. This can help you avoid dependency issues if you take care to load libraries before their dependents, but does come at a small performance cost, and it can contribute to Cumulative Layout Shift if your scripts affect the layout of your document.
CSS Minify settings
Also, make sure to configure CSS Minify settings:
- CSS Minify settings – Enable
- Combine Only – Choose if you want to combine CSS only without minifying them
- Eliminate Render-blocking CSS by moving it to HTTP body – Does as it suggests. Minified/combined CSS scripts are moved to HTTP body (Available after upgrading to Pro)
- @import handling – Select “Process” from a dropdown menu
- CSS FIle management: Select the current theme you are using.
What’s next? How to add the files to minify?
As mentioned before, after you enabled the Manual minify, you need to add JS and CSS files to minify.
You can do it by testing the website on Gtmerix, check the JS/CSS minify suggestions, and copy/paste the URL.
This may be very time consuming so W3 Total Cache has a help wizard that lists all the files available for minifying. Simply selecting the file by checking the box next to it will allow you to easily add the files to minify.
For this you need to go to Performance>Minify, and click on the help wizard button just above the general sub-box:
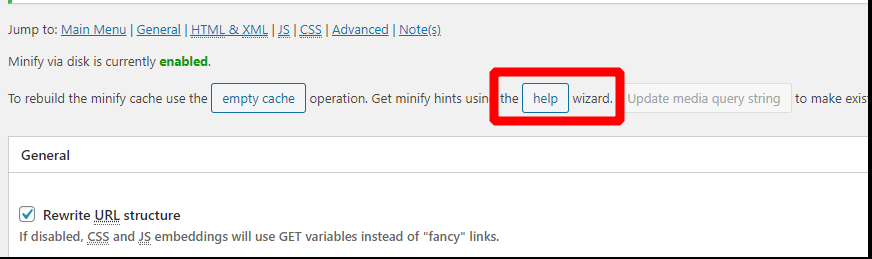 After clicking on the help button, the Minify: Help Wizard will popup, offering you all the JS/CSS files available for minify.
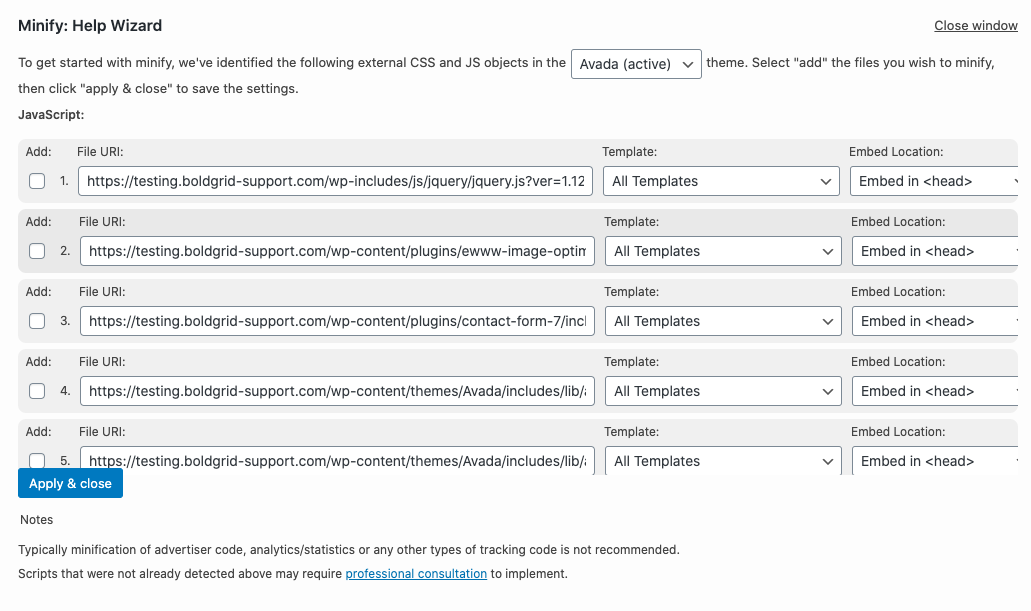
There are a couple of ways you can proceed with adding the files
Initially, select all JavaScript files and click Apply to add the file URL to JS file management section and save the changes. W3 Total Cache will prompt us to empty the page cache and minify cache. Clear the cache and view the site.
In the case of site misbehavior after the minify, remove all JS files from the list and try to add them one by one, excluding the problematic files. In certain cases, we may have to drag and drop the files listed in the JS file management section and reorder them if a file depends on another. After the JavaScript, repeat the process for CSS files.
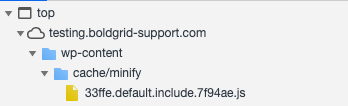
The result should be a single minified JS and CSS file in your wp-content/cache/minify folder:
Useful advice
- Avoid selecting script URL’s which are contained “.min.css”, “.min.js” name at the end. Because they are already optimized and may lead to breaking style and performance.
- Try re-ordering the scripts in case of dependency injection.
- JQuery files need to load before the dependent file
- If you see a specific file that was added is not minified, try removing the query string e.g. ?asdf if exists.
- Always make sure to check your website after you add each file to minify, save all settings, and purge the cache and make sure there are no breaking on the website or functionality issues.
W3 Total Cache
You haven't seen fast until you've tried PRO
Full Site CDN + Additional Caching Options
Advanced Caching Statistics, Purge Logs and More
Everything you need to scale your WordPress Website and improve your PageSpeed.