W3 Total Cache easier than ever to set up, thanks to the new cache Setup Guide Wizard. When you first install and activate W3 Total Cache, you’ll see the cache setup guide when you navigate to a page in the Performance menu for the first time. If you need to find it again, you can reach it at any time by navigating to Performance > Setup Guide.
If you’re an experienced W3 Total Cache user, feel free to skip the wizard by clicking the Skip button.
When you first see the Wizard, choose to opt-in or decline usage tracking. If you opt in, anonymous data will be sent to us so we can improve the Plugin for all W3 Total Cache users. However, feel free to opt out of usage tracking if you’d prefer to.
Step 1: Page Cache
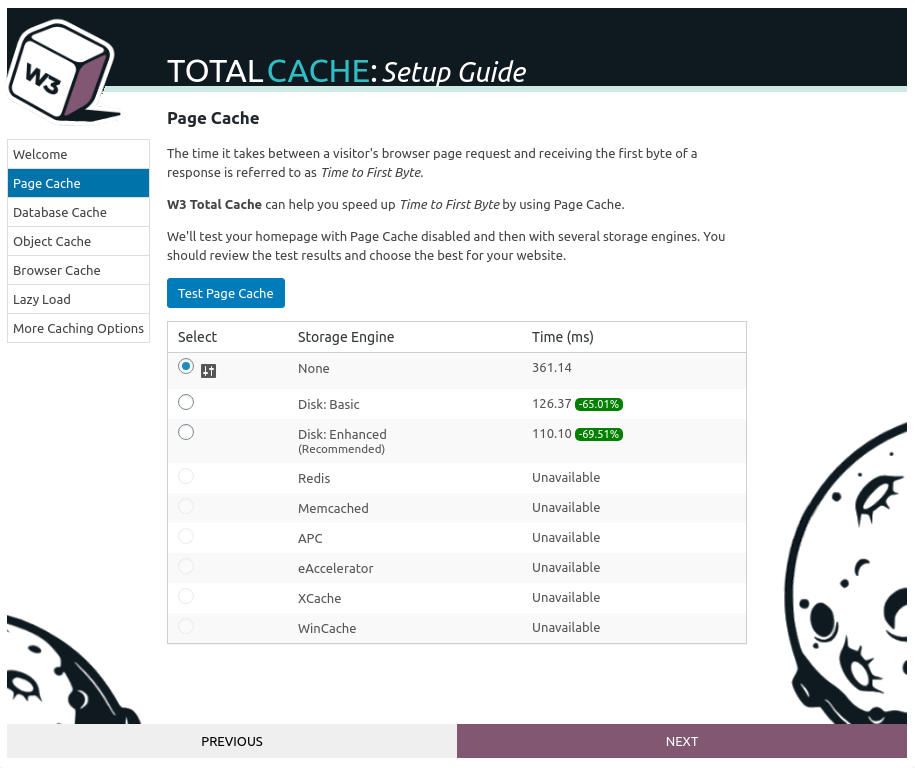 Page Cache can make an enormous difference in the speed of your website, particularly when you measure the Time to First Byte (TTFB). This is the amount of time in between when a user navigates to your website and when your server makes its first response back to the user.
Page Cache speeds this up by keeping a “snapshot” of your page, which can be served to the user immediately without spending time processing PHP code.
Click on Test Page Cache to get started. The Wizard will measure the TTFB without Page Cache enabled, then test it with the available caching methods on your server. For most servers and websites, enabling Page Cache via the Disk Enhanced method will be the best.
Select your Page Cache method of choice, and then click Next.
Step 2: Database Cache
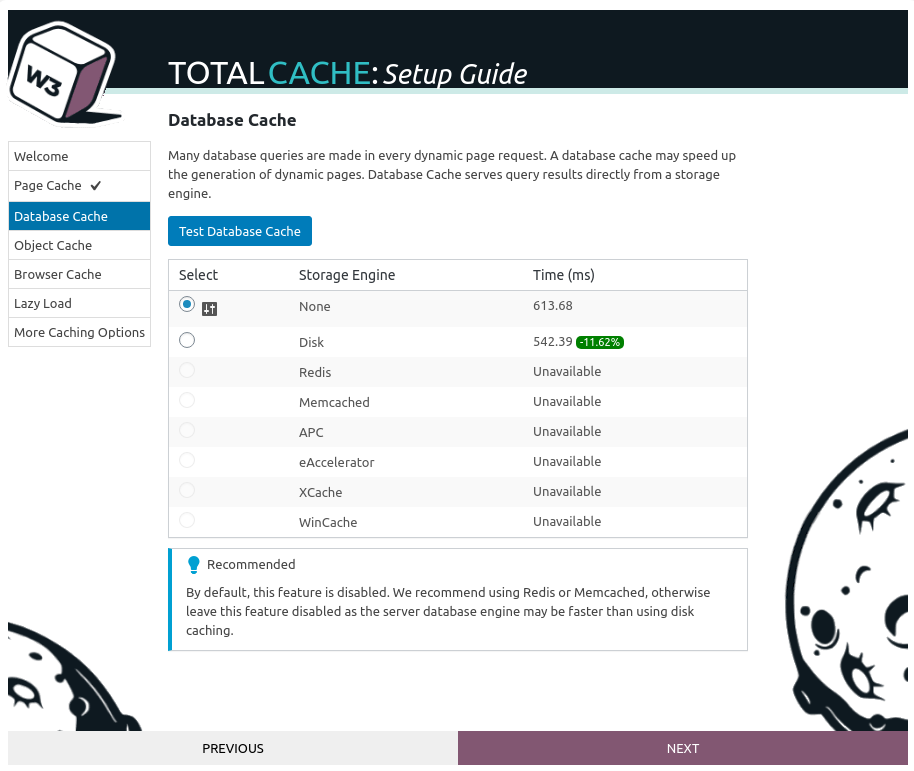 Database cache can also help improve your site’s speed. Every time a page on your website is visited, the content, links, menus, and other parts of your page are queried from the database. Keeping a cached copy of query results can improve speed, especially for sites with a large amount of dynamic content on each page.
However, modern databases are very fast, so this may not always improve performance. For this reason, it’s recommended to leave database caching disabled for most users.
Click on Test Database Cache to proceed with the test. If you see a large improvement in speed, you might consider enabling database caching, particularly if you have a memory-based caching service like Redis or Memcached.
Click on Next to continue to step 3.
Step 3: Object Cache
 WordPress uses “objects,” or common chunks of your site, to speed up processing. WordPress caches these objects to built your pages, but doesn’t save those cached objects for use on future page loads.
Click on Test Object Cache to see the results. For most servers, using Disk will give a significant savings. If you have a memory-based caching service like Redis or Memcached, you may see an even better performance.
Enable the caching method of your choice, and click Next to continue to step 4.
Step 4: Browser Cache
Browser Caching is already enabled by default. Browser cache helps your returning users and users visiting more than one page on your site by saving copies of your website’s stylesheets, images, and other assets on their own devices.
It accomplishes this by setting a Time to Live for your site’s assets, otherwise known as a Max Age. Once your users view your page, they won’t have to re-download the assets again for the duration of the Max Age.
Leave this setting enabled, and click Next to continue to step 5.
Step 5: Lazy Load
Lazy loading images speeds up your site by only loading the images that appear on your visitors’ screen. As the user scrolls down your page, images are loaded only when they come into the view. Since images can make up a large portion of your website’s total file size, this makes the initial load time a great deal faster, especially for longer pages with lots of images.
Recent versions of WordPress Core includes lazy-loading by default now, but rely on a browser-based implementation that isn’t supported by all browsers.
Enable this setting, and click Next to proceed to the last step of the Wizard.
Step 6: Cache Setup Summary
On the final step, you’ll see all of the settings you’ve configured so far in the Cache Setup Wizard. For most websites, this is all you’ll need to do! There’s a ton more settings you can continue to configure, so click on Dashboard to continue optimizing your site.
We hope you found the setup guide useful. Next, you may want to read about how to improve Core Web Vitals or how to speed up WordPress with one of the best WordPress caching plugins.
W3 Total Cache
You haven't seen fast until you've tried PRO
Full Site CDN + Additional Caching Options
Advanced Caching Statistics, Purge Logs and More
Everything you need to scale your WordPress Website and improve your PageSpeed.
Jorge says:
nunca lo he probado; pero es importante configurar para el tema tratado para optimizar mi web.