This guide is for those that are new to performance optimization, and we will explain how to test your site to see how these options improve performance yourself. Discovering how to speed up wordpress site load time is an important step in optimizing your WordPress website, as faster load times can lead to improved visitor engagement and higher search rankings. A great way to accomplish this type of optimization for WordPress is to use W3 Total Cache. The following guide will walk you through configuring the fewest settings with the highest impact.
Speed Up Your WordPress Website.
A Difference of Just 100ms in Page Load Speeds Can Cause a Visitor to Prefer Your Competitor’s Website.
Where do I start?
First, you should install W3 Total Cache. If you already have it installed, then you can skip this step and begin testing your site to get a baseline. Once that is done, you can use this guide to configure the plugin to speed up your website. We will be running a test after we configure the plugin, to see how much W3TC has improved the sites performance with just the minimum settings.
Testing your WordPress Websites Performance
There are a number of tools that you can use to test and monitor your websites performance, and today we will use Google PageSpeed Insights to gather a baseline before we begin.
Once everything has been tested, it is time to start setting your caching up. Make sure you save a copy of these tests or write the scores and load times down, because you will want to compare them to your finished results to see how much you have improved.
Below are the results from the website I am using this guide to configure.
| Mobile Test | Desktop Test |
|---|---|
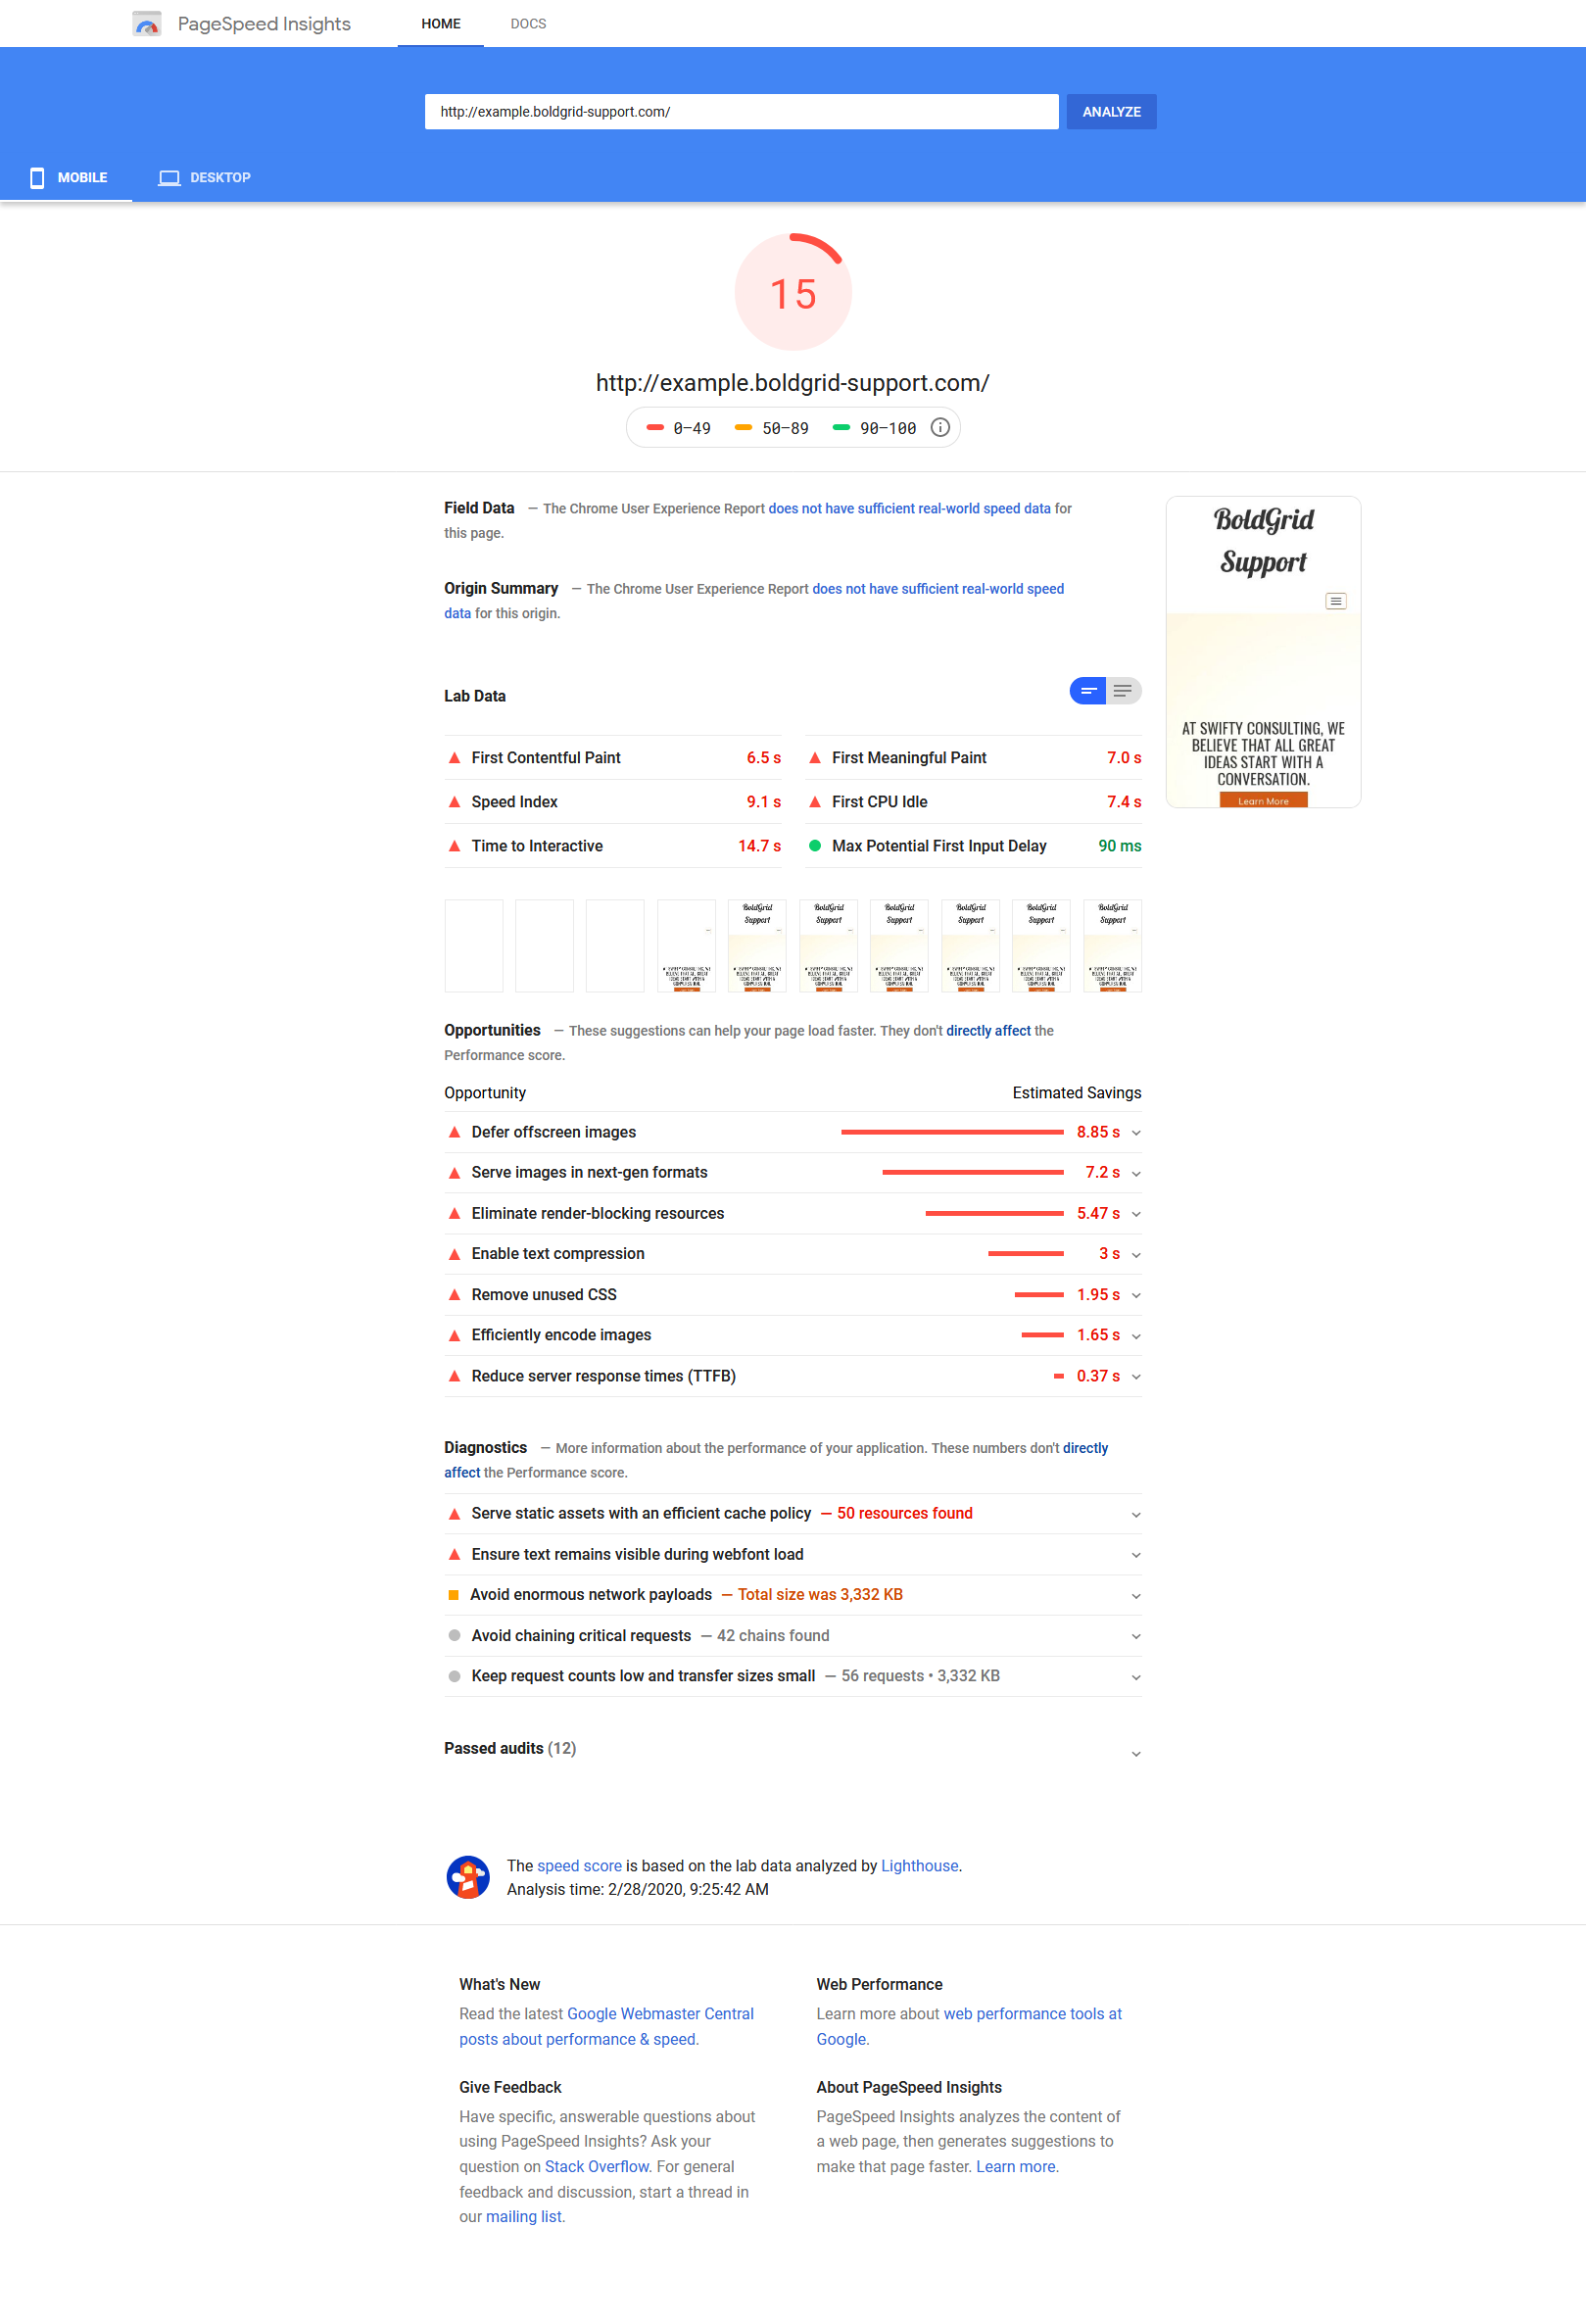 |  |
As you can see, the results are not amazing. With no caching setup, and just a regular WordPress website with just a few images, we have a 15 for Mobile with a 14.7 second full page load. For Desktop we have a 68 with a 2.3 second full page load. Not horrible, but not ideal in this world of mobile devices either.
W3 Total Cache: General Settings
If you’re WordPress hosting account is shared hosting, then this will likely be the only place you need to configure settings. There are some other settings that can provide a bit of a boost, but for the context of this article we are just sticking to the basics to get your WordPress website going faster than your competitors.
Preview Mode
Use preview mode to test configuration scenarios prior to releasing them (deploy) on the actual site. Preview mode remains active even after deploying settings until the feature is disabled.
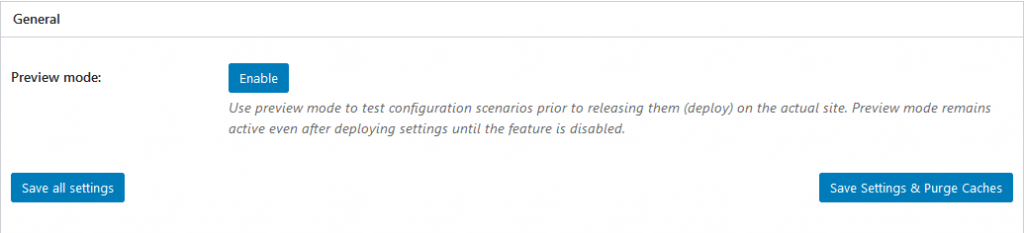
Once you activate preview mode, your site will not be affected if you make a bad choice in setting up your cache, and you can test your configuration before deploying it to your live site.

Now it’s time for the fun part! We will walk through the options, and give recommendations on best practices to get you running as fast as you need.
Page Cache
Page cache is one of the most impactful optimizations you can make for your WordPress website. By nature, WordPress is a dynamic content management system, so every time you visit a page, a bunch of PHP code has to run and contact the database, get the entry it is looking for, then compile it into HTML for your visit. Page Caching is when your site makes an HTML version of the page to show everyone, and the dynamic portion of your website doesnt have to run for each and every visit.
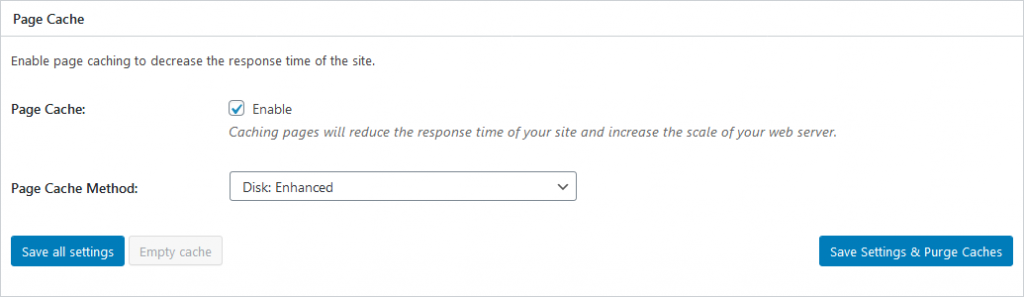
You will want to select Disk: Enhanced for this, to ensure the best compatibility on most Shared Hosting environments. Select Enable, and Click Save all settings. This will start the process of getting your page cache built.
Minify
Minify is a process in which unused characters are removed from HTML, Javascript and CSS files. Most of them are just white space characters, so it makes the code really small and usually on one line. Depending on your theme or styles needed for your website, this could be problematic for you. To make sure it is not, we suggest using preview mode when enabling it, to ensure it does not cause issues with your website before deploying to production, or your live version.
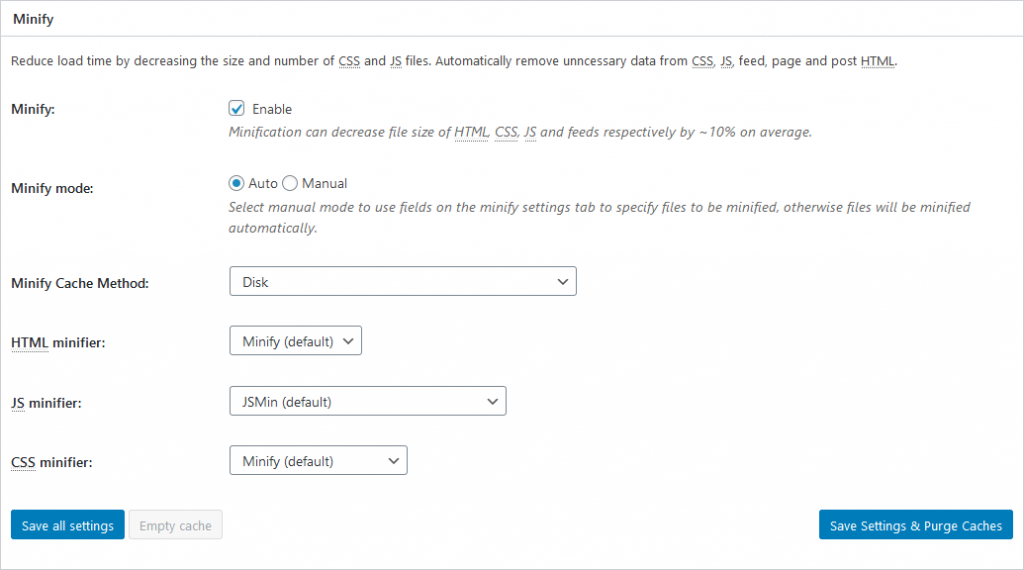
Once you select Enable, you can close the popup that warns you of the problems you can possibly experience with minification. From here, click Save all settings.
Opcode Cache
Opcode cache is a method of caching that saves precompiled script bytecode in a server’s memory, allowing duplicate requests to run much faster than their first attempt because the output is saved. This is not something you have control over in W3 Total Cache, because it is enabled on the server level. If you wish to have it added and it is not there, you may need to upgrade to a VPS or Dedicated server. The following is a screenshot of what it looks like when it is available. If it is not, we recommend you contact your hosting provider, to see what would be needed to run your site on a server with Zend Opcache.
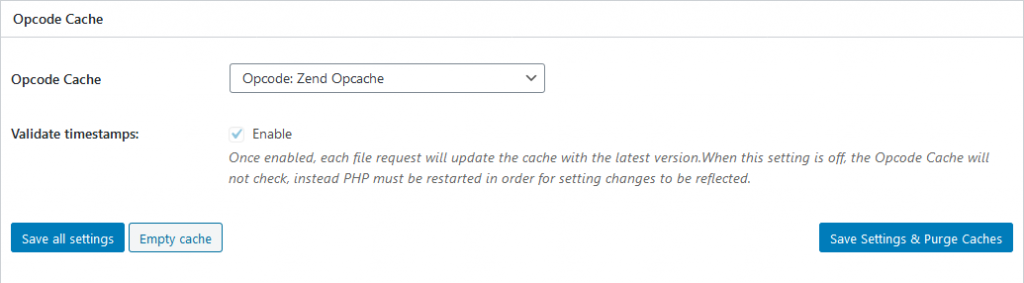
NOTE: If you have PHP-FPM available, this may cause the setting to show “Not Available” in W3 Total Cache. Don’t worry! This is because the Apache module is not visible to PHP when PHP-FPM is running, but it should still be working correctly in the background.
Database Cache
Database Caching assists with freeing up MySQL server resources taken by serving repeated queries that are returning the exact same data each time, so that it has more power to handle real dynamic data requests when they happen.
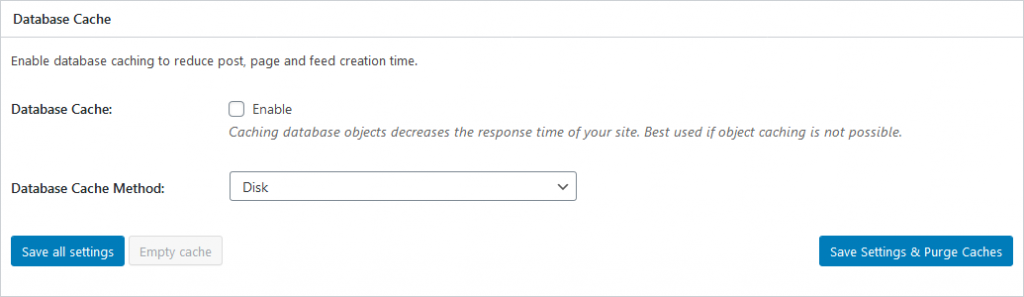
In most cases, you will want to set this to disk, but feel free to look at the database cache method drop down, to see if one of the other storage systems are available to use. Later, you can try experimenting with this on and off, to see which option works best for your site and hosting environment.
Object Cache
Page Caching can greatly help to reduce the response time of a site through caching static pages, there are still many non-cached requests for Objects. Object Caching will help improve performance by caching these Objects. The idea behind Object Caching is that WordPress Core, themes, and plugins may store data that is frequently repeated, and rarely changed in an object store. The reason this is done, is so these objects will not have to be retrieved and processed on each request. Object Caching will reduce the total number of database queries required for each page, and because the server does not have to rebuild these objects of data your response time will decrease by proxy.
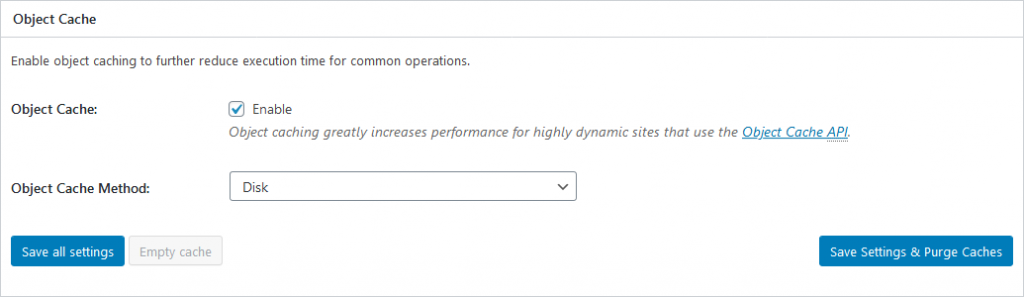
Select enable, then check to see what your options are for Object Cache Method. Once you select the method, click Save all settings. Later, you should try experimenting with this setting both on and off, to see which option works best for your site and hosting environment.
Browser Cache
Every time you visit a website in your browser, it dowloads HTML, CSS, JS and other assets like images. Browser cache is basically you informing the browser how long it should store those things locally, so that the next time you visit the site it loads instantly.
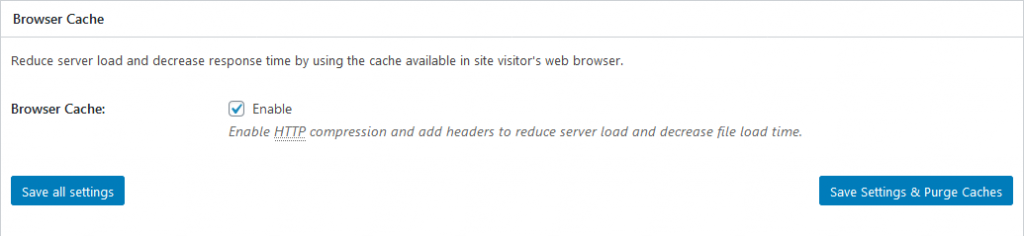
Select Browser Cache here if it is not enabled, and click Save all Settings.
CDN
A content delivery network (CDN) is a network of servers that work in conjunction with your website to accelerate your content around the globe. The free version of W3 Total Cache offers CDN objects, which can be easily stored on a CDN such as StackPath, AWS or many, many others. If you want to use full site delivery, then you will want to upgrade to W3 Total Cache Pro, and you will be able to configure the CDN to store whole copies of your cached pages.
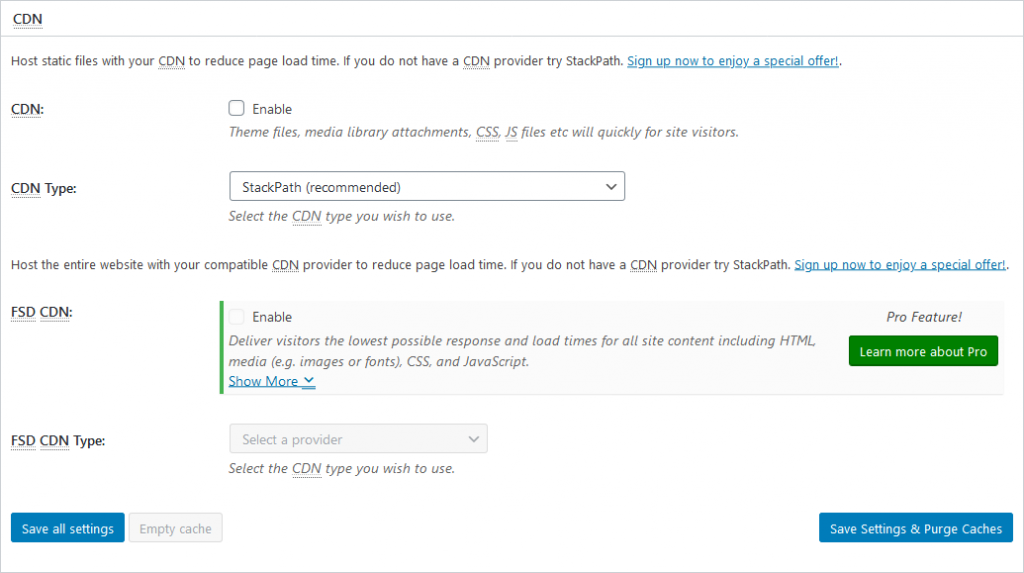
If you do not have a CDN at this time, feel free to skip this section. If you wish to try a CDN out, W3 Total Cache has partnered with StackPath, and you can try them out with a free trial for 30 days by clicking the link shown. Setting your CDN up is as simple as clicking a button and logging into StackPath from the W3 Total Cache Dashboard to authorize the service, which you can find in Performance → CDN.
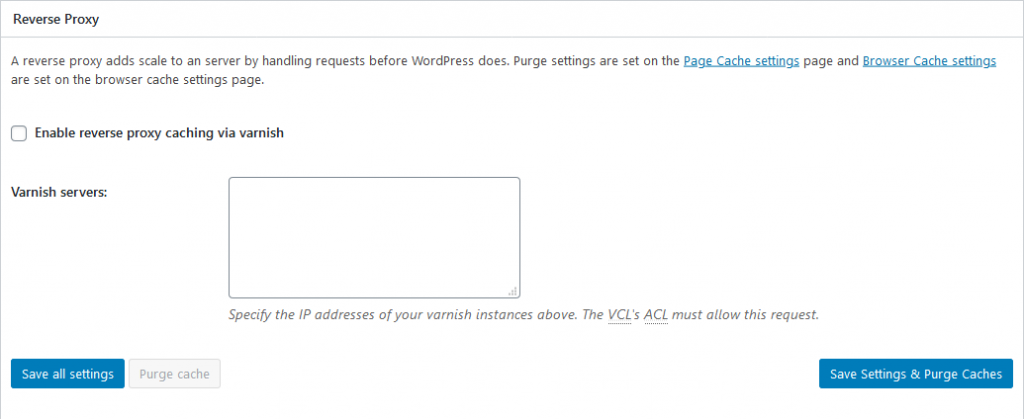
Reverse Proxy
A reverse proxy will allow the server to handle requests prior to WordPress processing them. In a shared hosting environment, it is not likely you will need this setting.
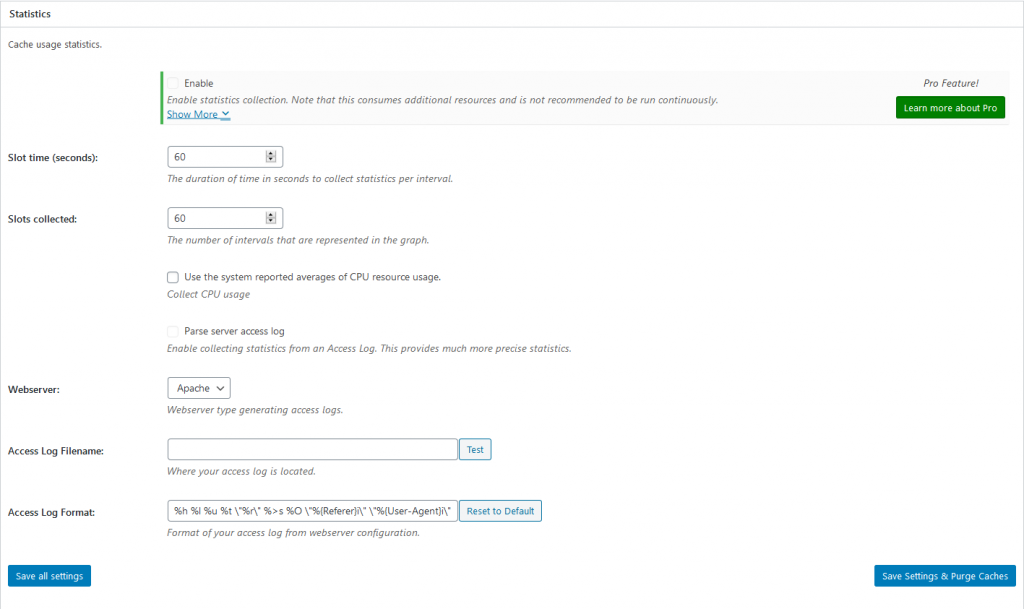
Statistics
Statistics for W3 Total Cache is advanced analytics for your WordPress and server cache that allow you to track the size, time and hit/miss ratio of each type of cache, giving you the information needed to gain maximum performance. This is a pro feature, so unless you have opted to upgrade, you do not need to do anything in this section.
Fragment Cache
This is a pro feature, so unless you have opted to upgrade, you do not need to do anything in this section.

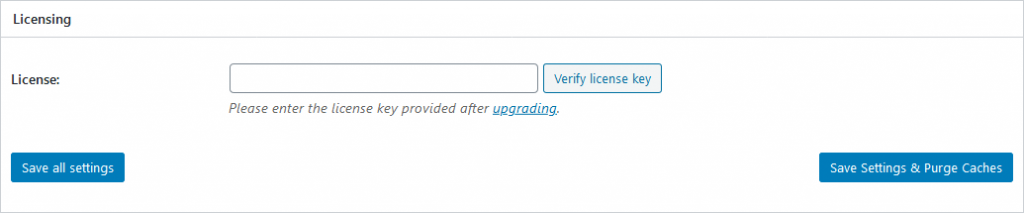
Licensing
This is where you would license your W3 Total Cache Pro Extension, if you have upgraded. If not, feel free to skip this section.
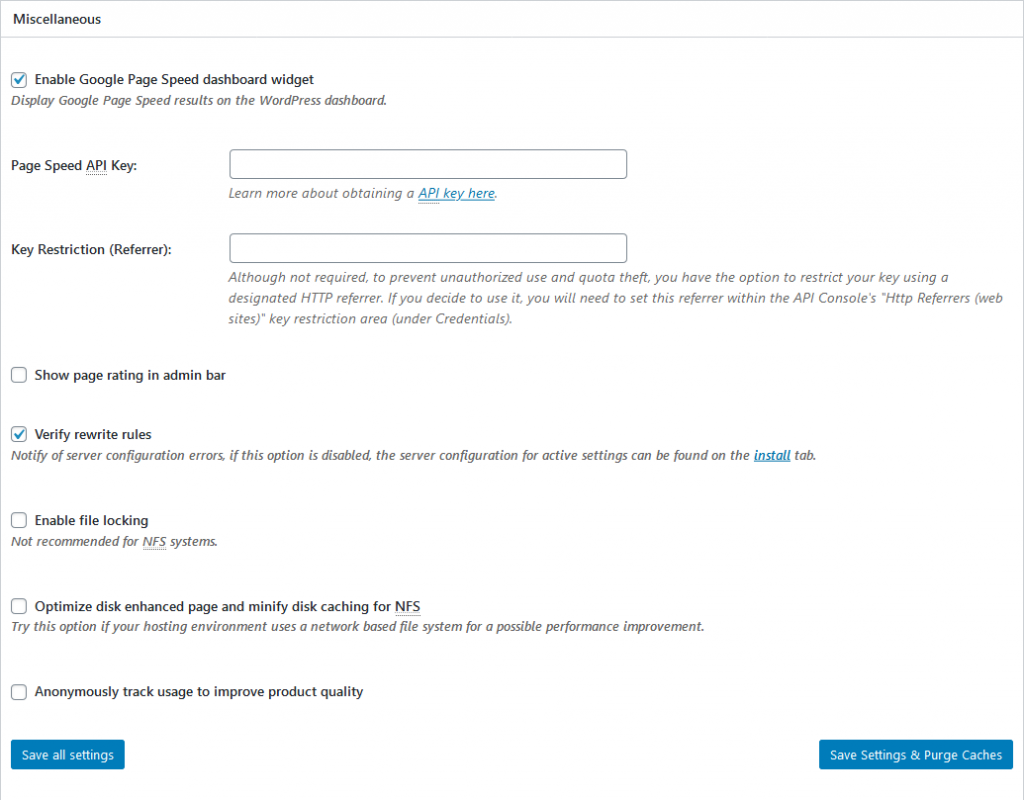
Miscellaneous
In the miscellaneous section, you can enable the Google PageSpeed Insights Dashboard Widget, which also has an option for setting up a page rating in the admin bar to allow you to keep track of your pagespeed throughout your site. We have a setup guide to walk you through this, if you are interested in having those metrics available to you at a glance. There are a few other options, but for shared hosting environments, we recommend leaving them be.
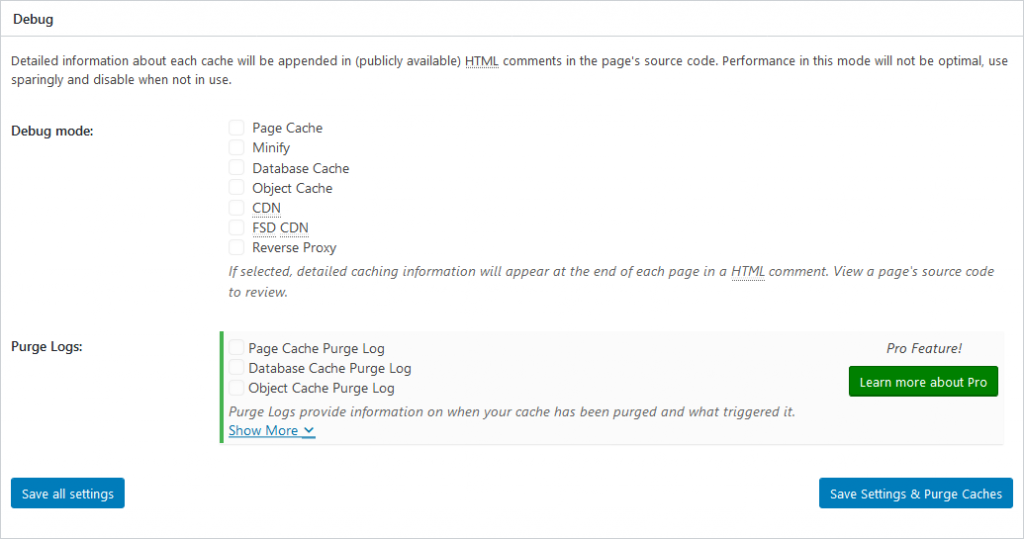
Debug
W3 Total Cache has a debug system that will append HTML comments to your page’s source code allowing you to track down issues with your configuration. This mode is to be used sparingly, as performance will be degraded due to the demand it puts on your server to populate the additional information. This is not something you will need to enable now, since we are just configuring the plugin initially. Once you become more familiar with all of the other configurations available, this tool will become much handier in your arsenal.
Import / Export
Once you have reached the end of this page, you should click Save Settings & Purge Caches, so you can check out how much you have optimized your WordPress site.
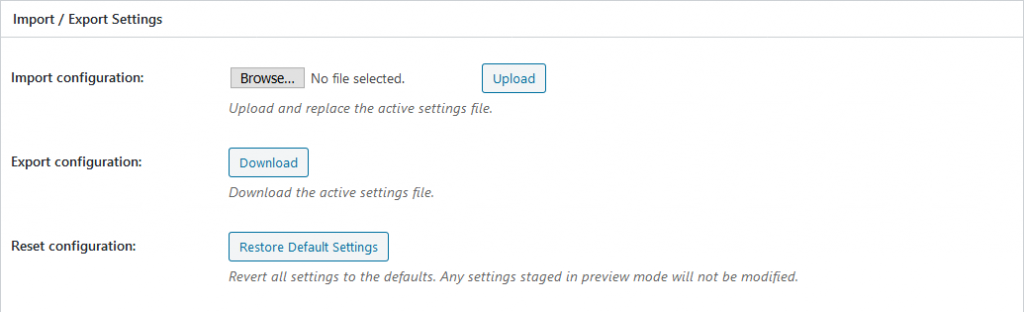
After you have saved your configuration, it is recommended that you take a backup of it so in the case you need to quickly restore it in the future. Clicking Download will begin the process, just be sure you remember where you save it on your local computer.
Deploy Your Changes
If you used preview mode at the beginning of this article, it is time to preview your site. You can do so by clicking Preview in the admin notice at the top of the page. If you did not use Preview Mode, you can skip this as your site is configured.
Congratulations! You have now configured the basics for W3 Total Cache. Now we are going to run another test, to compare to the original baseline we began with.
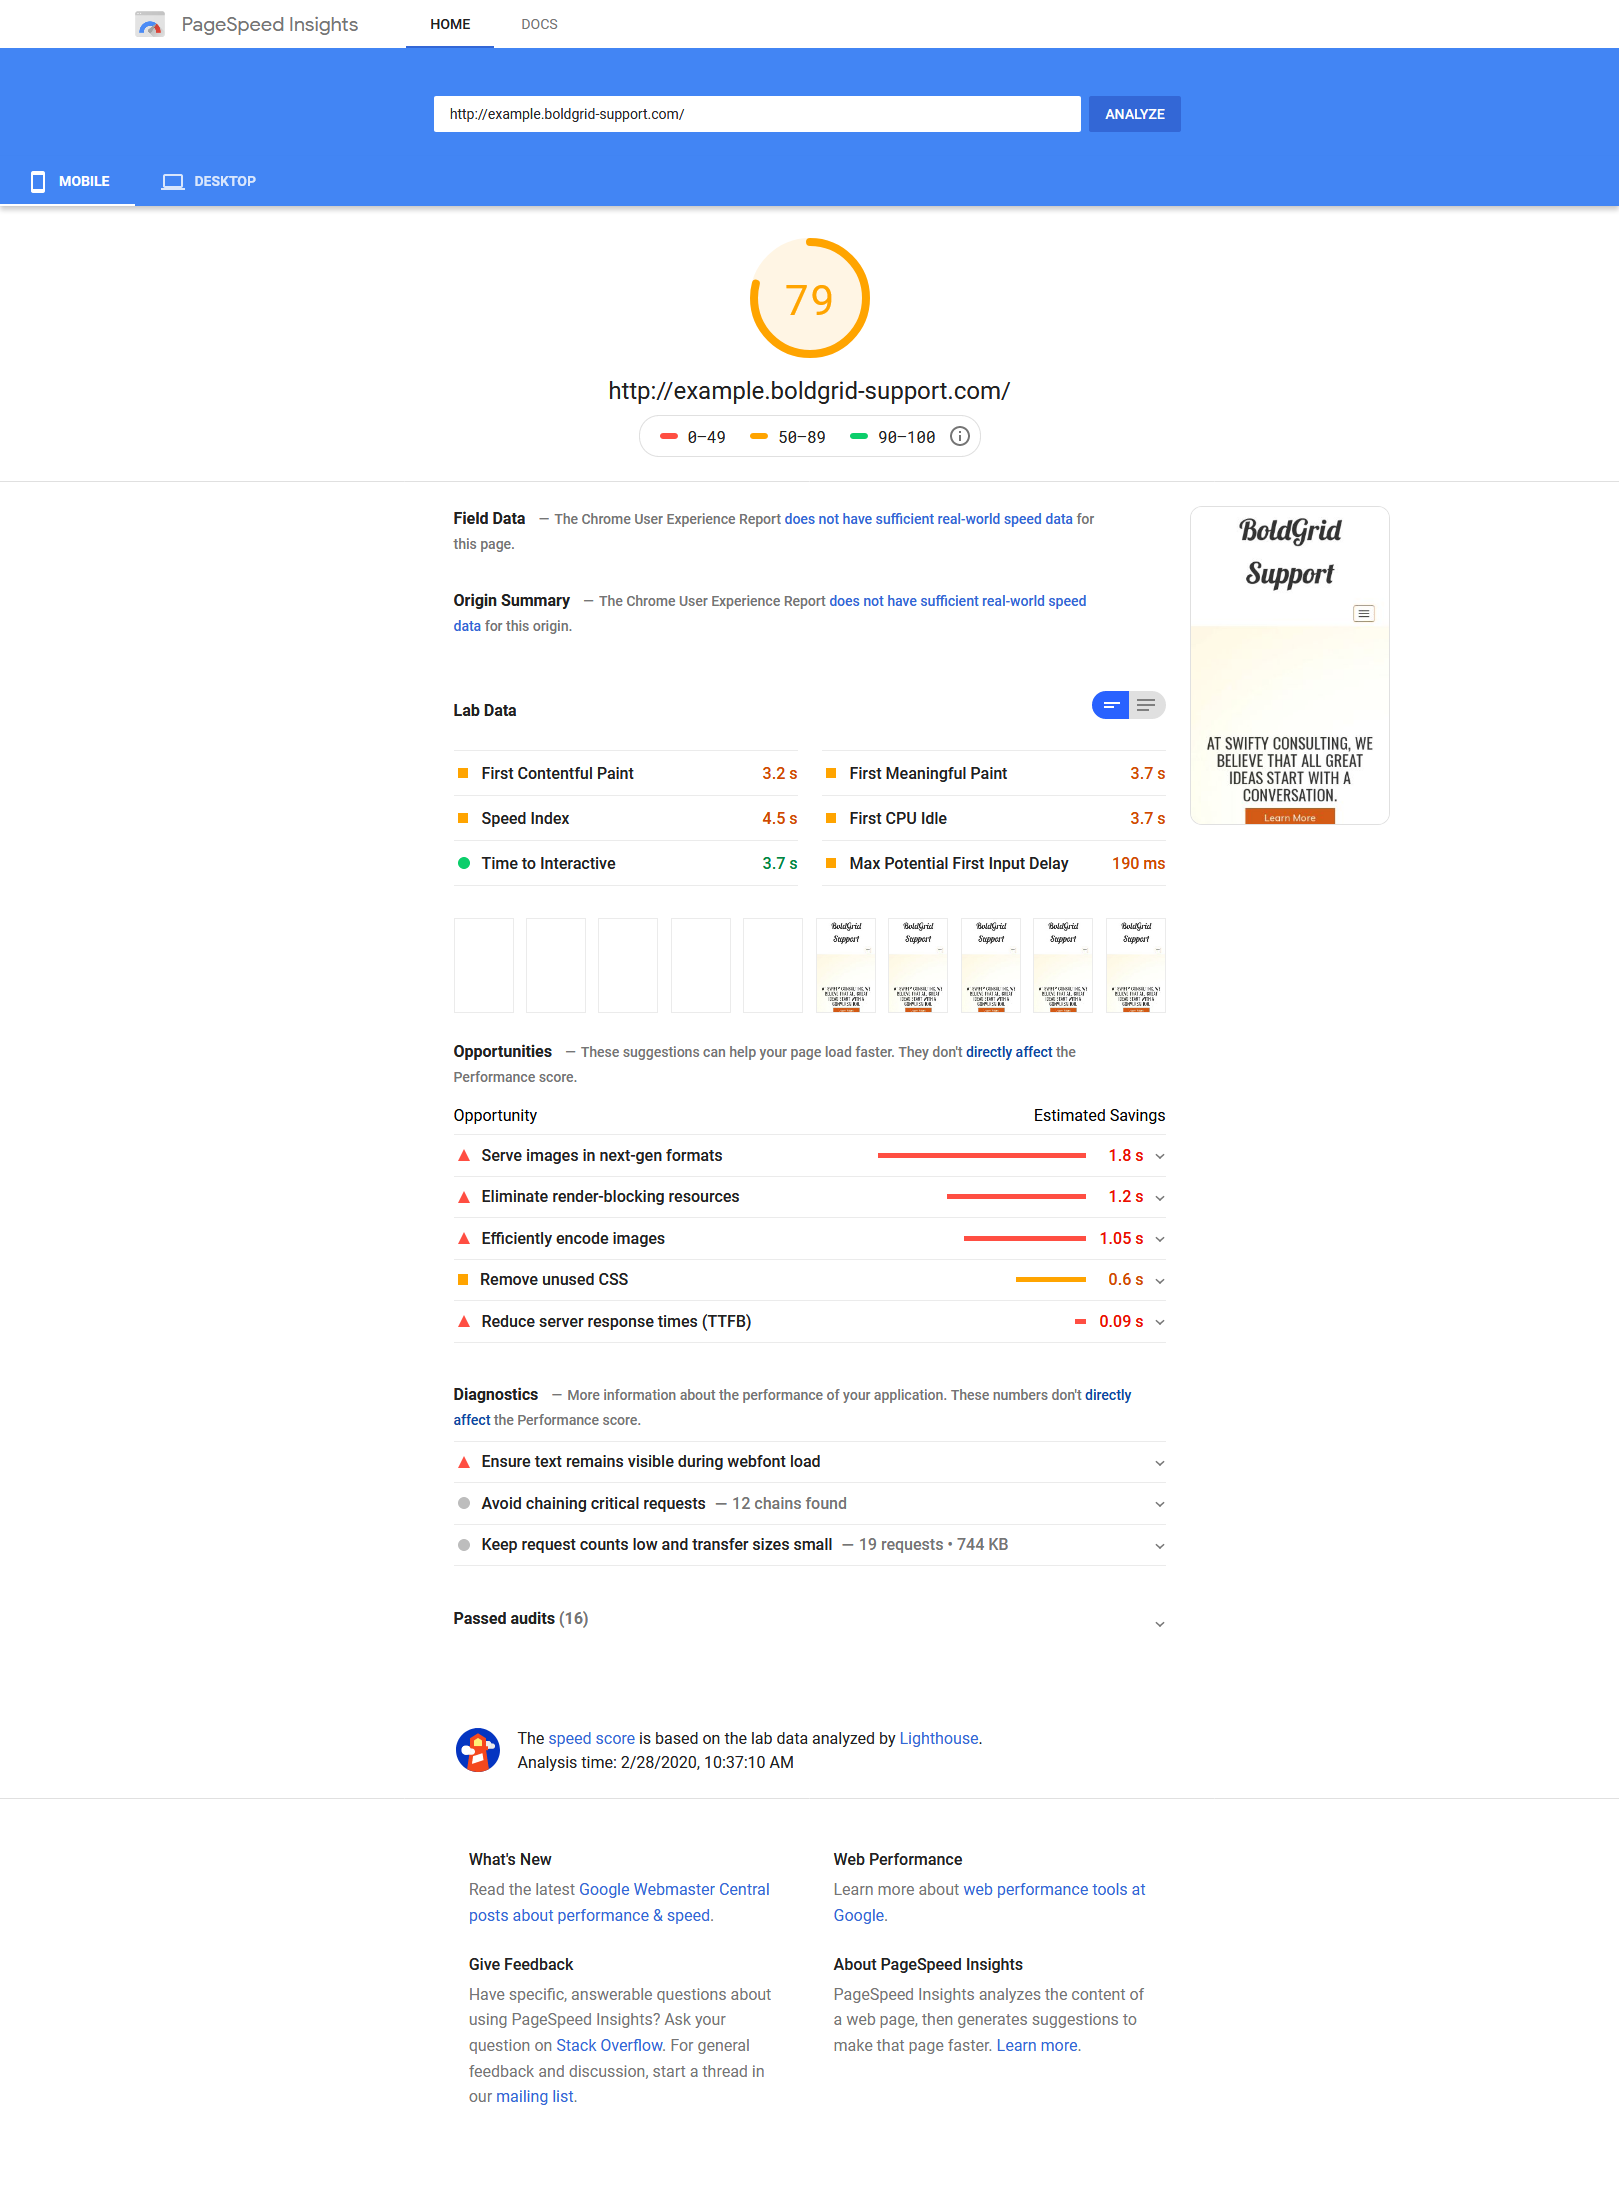
The Final Performance Test
After configuring W3 Total Cache, it is time to check our progress. You can see from the results there was a huge improvement, and now the site is much faster than before we began. We were able to get a much better score for both Desktop – a 90 with a 1 sec page load, and Mobile ended up with a 79 and a 3 second page load time. Your users will be happy, and your conversions will show it!
| Mobile Test | Desktop Test |
|---|---|
 | 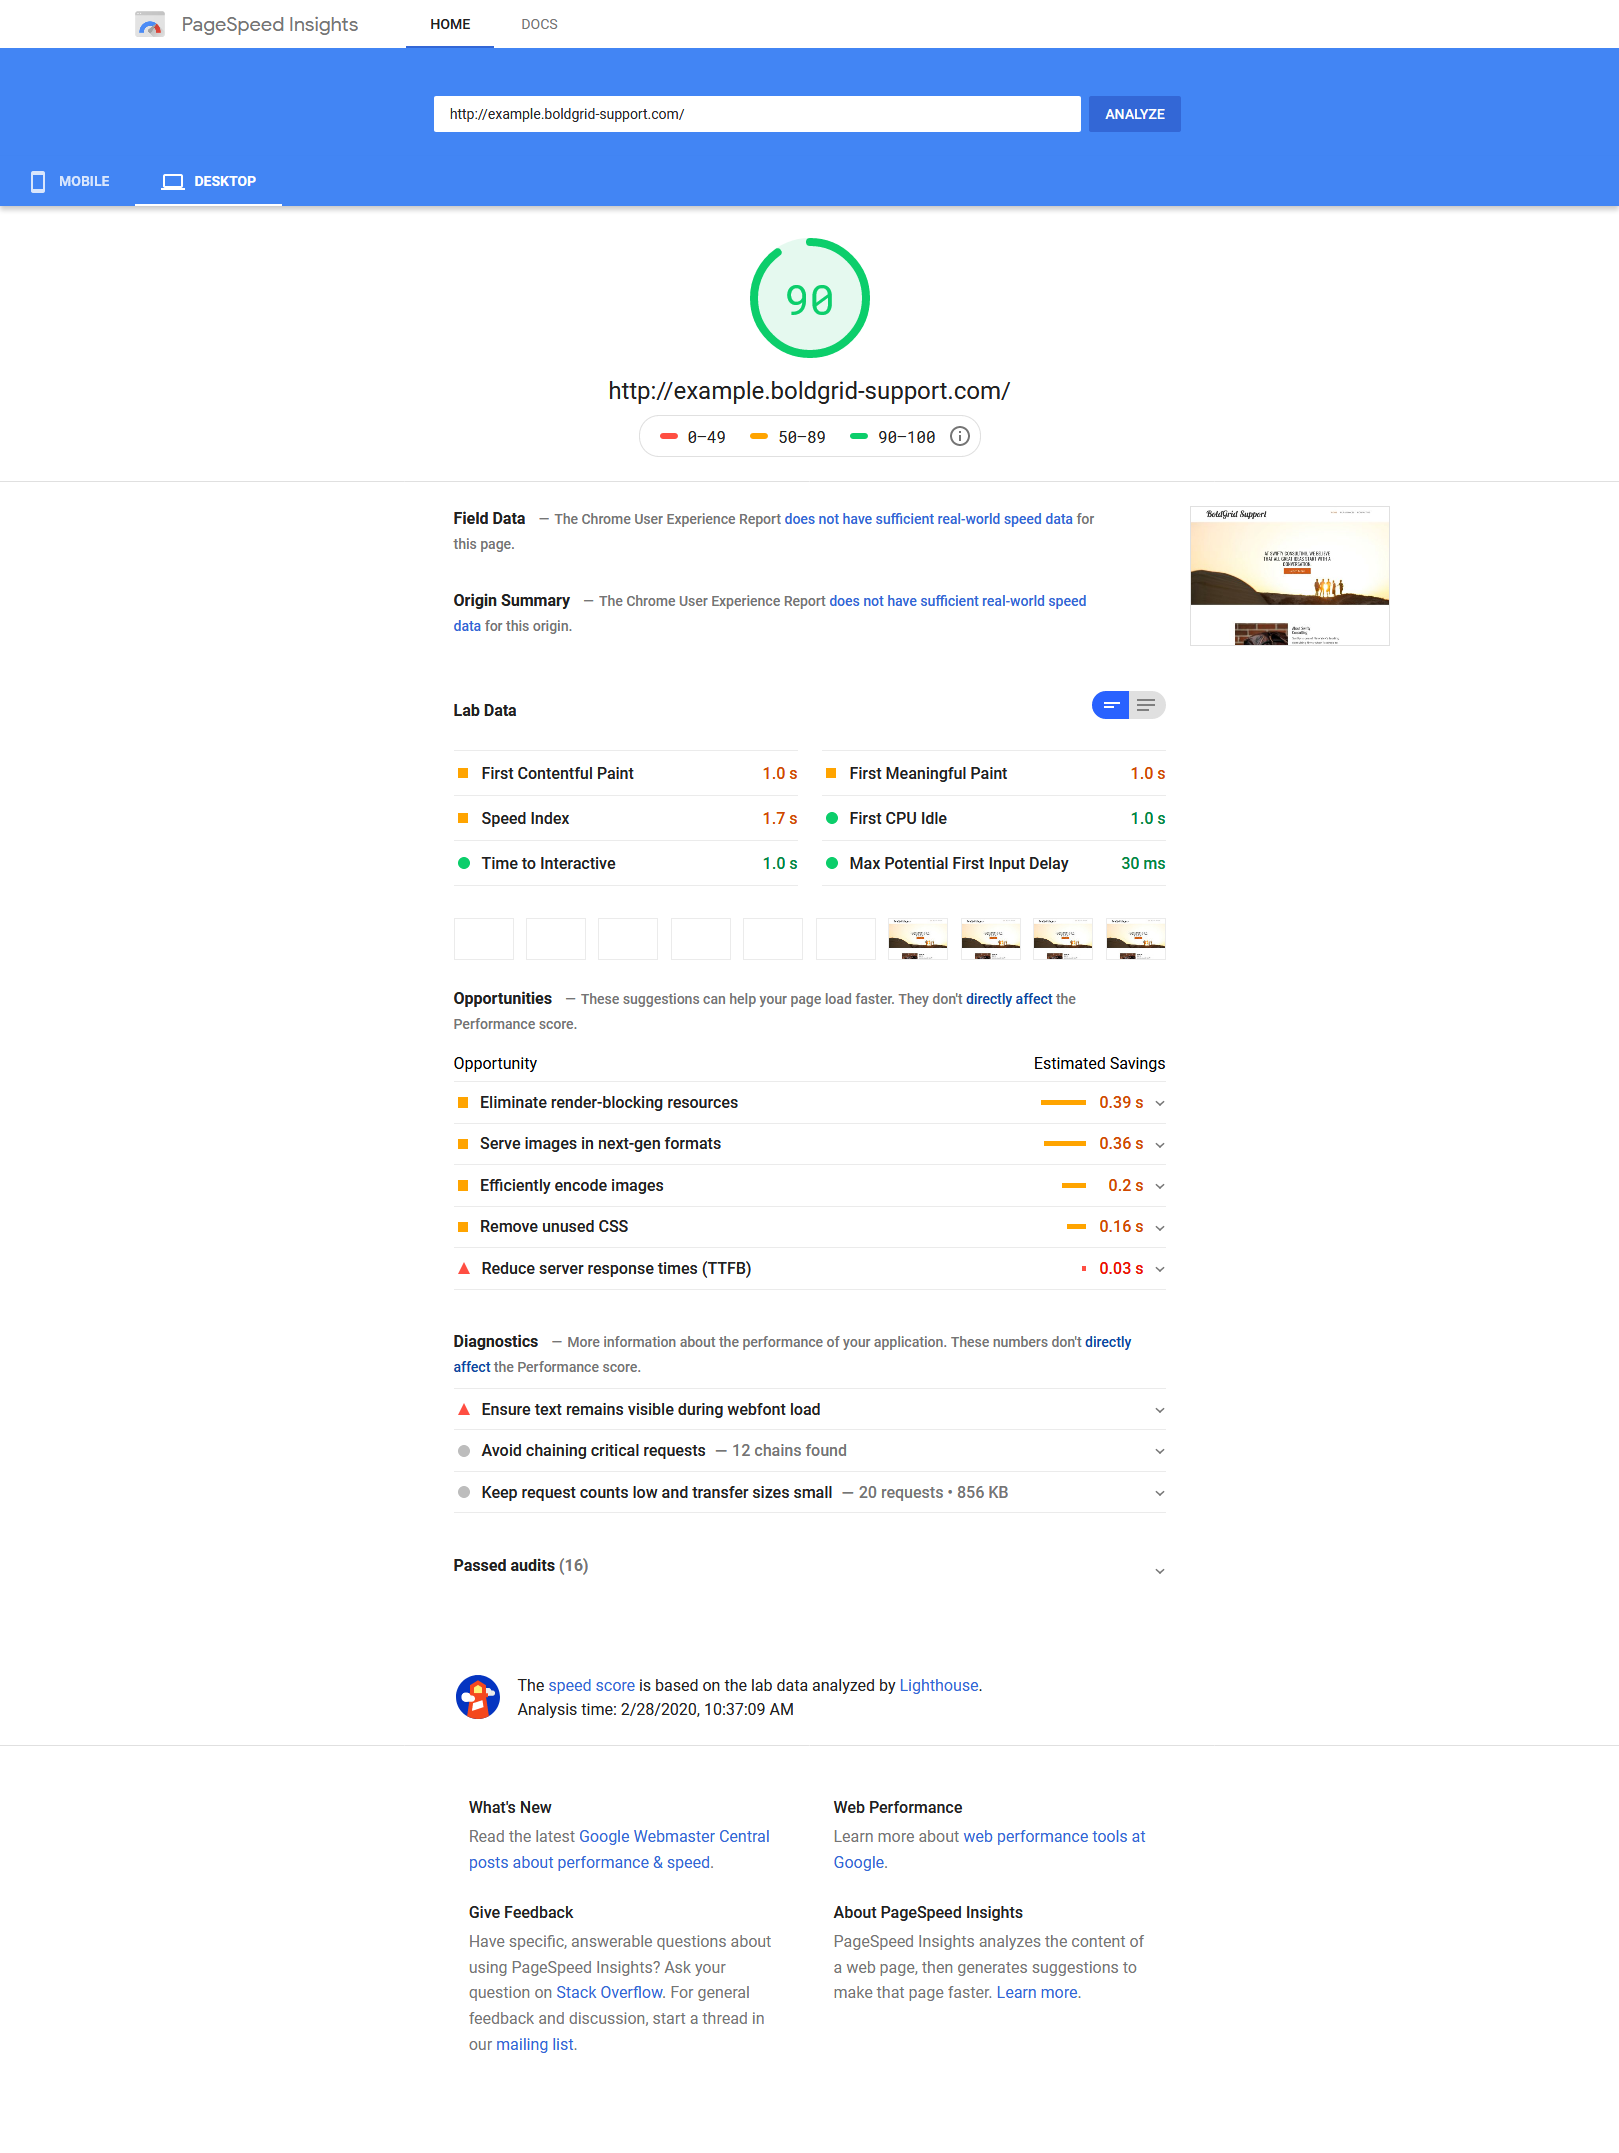 |
W3 Total Cache
You haven't seen fast until you've tried PRO
Full Site CDN + Additional Caching Options
Advanced Caching Statistics, Purge Logs and More
Everything you need to scale your WordPress Website and improve your PageSpeed.
Wayne says:
Hello!
We have Jetpack Boost installed also, should that be disabled when using W3TotalCache?
We appreciate you!,
Stephen and Wayne Hesler-Mondore
HM Design
hmprintdesign.com
Marko says:
Hello!
You should avoid using more than one plugin for the optimization to avoid conflict as some settings are doing the same thing.
I would advise only using the W3 Total Cache.
Thanks!
Staf says:
Hi,
I have started with New Relic to monitor my site end are using W3 Total Cache v0.14.1.
Do I need using the New Relic Extension and how to configure it.
Thank you in advance to inform me.
Best Regards,
Staf
Jesse says:
Hello Staf,
In order to use New Relic monitoring, you’ll need root access to your server to install the PHP Agent, so you most likely won’t be able to set this up on a Shared Hosting environment. Once you’ve installed the PHP Agent according to those instructions, you’ll just need your REST API key to enable the extension in W3 Total Cache.