What is CloudFlare?
CloudFlare is one of the biggest networks in the world, having over 200 data center locations. It is used by millions of website owners around the world, and can provide several benefits to you as a website owner as well. Their mission is very much like ours here at BoldGrid, to help improve the internet and even more so, help speed up the web.
Since 2011, W3 Total Cache and CloudFlare have been fully integrated for WordPress using the extension framework. The following WordPress tutorial will walk you through the steps needed to set up CloudFlare, and enable CloudFlare for WordPress within your Dashboard using W3TC.
Deliver your content faster with Cloudflare and W3 Total Cache Pro
Registering a Cloudflare account
To get started, you need to register an account with CloudFlare. Once that has been completed, you can begin adding your site. If you already have an account, you just need to login.
After you’ve created an account you need to add the website by clicking on + add a site.

To complete this step, you need to enter your website’s domain name, and click on add site to continue.

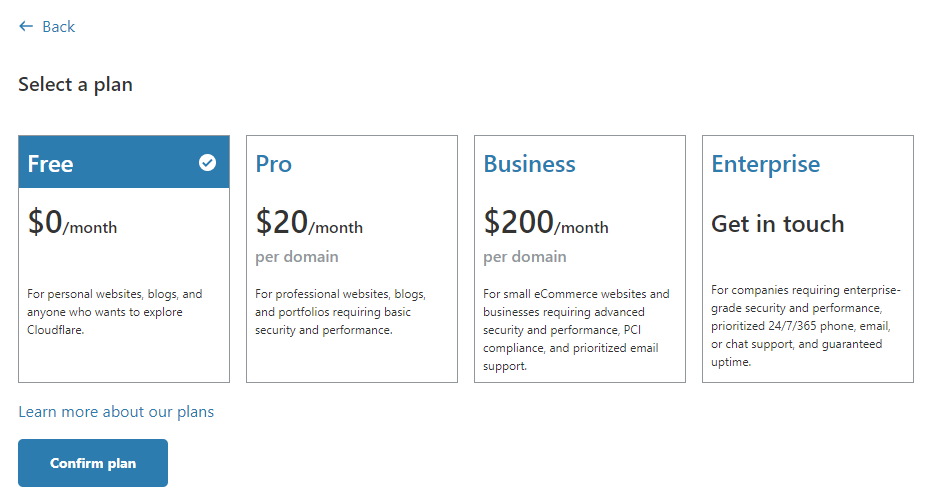
After this you will be prompted to another page to select your plan. Select your plan and confirm it. We recommend beginning with the free plan, as you can upgrade later anytime you decide.
Once you have confirmed the plan, Cloudflare will begin scanning for existing DNS records. Once that has been completed, you will be taken to another page to Review your DNS records. If you are unsure of the accuracy, it is recommended to confirm these DNS records with your web host.

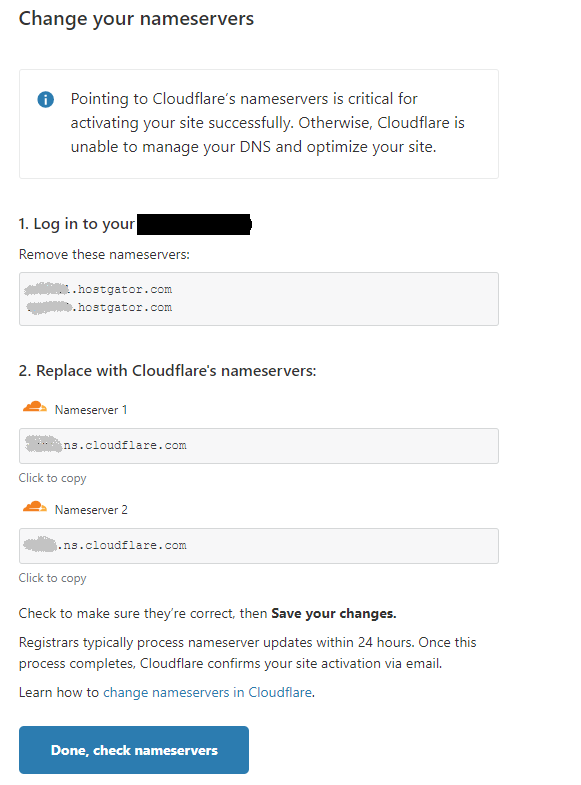
Next, you will need to change your domain nameservers. This can be done with the company who you have registered your domain with directly. Pointing to Cloudflare’s nameservers is critical for enabling CloudFlare for your WordPress website. Otherwise, Cloudflare is unable to manage your DNS and serve your website from their Content Delivery Network.
If you need assistance with changing your domain nameservers, we would recommend contacting your registrar’s support directly. Note that it may take anywhere from 1 to 24 hours for the changes to take effect completely. But don’t worry – your site should not experience any downtime.
Activating Cloudflare in W3 Total Cache
Next, to ensure that WordPress is configured optimally for CloudFlare, you will need to activate the Cloudflare extension.
- In the WordPress Dashboard, Navigate to Performance → Extensions
- Click on Activate under Cloudflare.

After the extension is activated click on the Settings to authorize the Cloudflare credentials.

Click on the Authorize to enter the email address for your Cloudflare account as well as your Cloudflare API key.
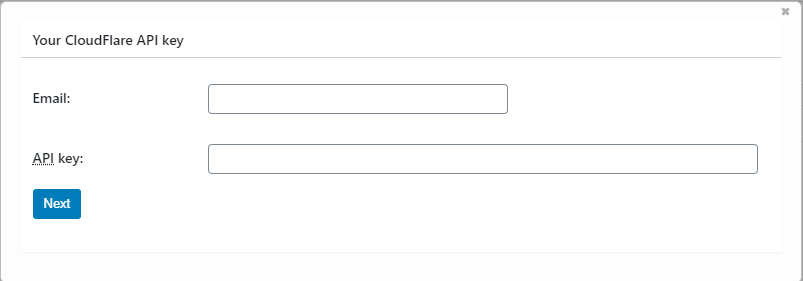
*Note that the Authorize button may not work if your Dashboard is in the language other than English. If you are experiencing any issues, please set the language to English temporarily to Authorize Cloudflare.
You can find your Cloudflare API key by going to My Account and finding the API Token section.
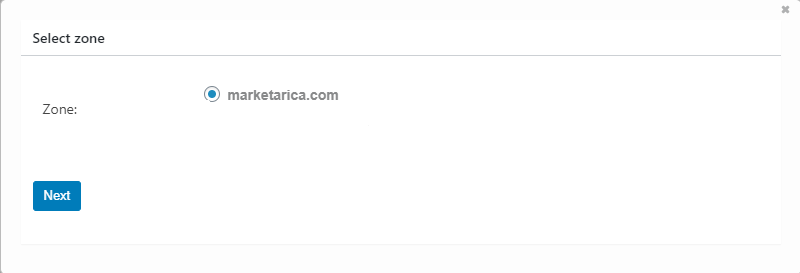
After clicking on the “next” button you will be prompted to select the zone. Click on the radio button next to your site and confirm:
Congratulations, Cloudflare is now activated. Note that if you’ve activated Cloudflare before confirming the DNS records changes it may not have an effect until DNS Propagation has completed.
WordPress CloudFlare Minify Settings
To ensure you do not have a conflict, you need to configure minify to work in either W3 Total Cache or CloudFlare. Since both methods have a different approach, they do not work well together. This includes HTML minify, Javascript minify, and CSS minification settings.
Changing CloudFlare Configuration Settings
When adjusting the CloudFlare configuration in W3 Total Cache, or purging the CloudFlare Cache, it is possible that it may take up to 24 hours for your cache to fully rebuild.
If you need assistance with configuring CloudFlare for WordPress, and wish to have our Eneterprise Level Support Team assist you, you can navigate in the WordPress Dashboard to Performance → Support and submit a plugin configuration request. It will require access to your domain registrar, WordPress Dashboard and CloudFlare account. Learn more about our W3 Total Cache Premium Support Services.
W3 Total Cache
You haven't seen fast until you've tried PRO
Full Site CDN + Additional Caching Options
Advanced Caching Statistics, Purge Logs and More
Everything you need to scale your WordPress Website and improve your PageSpeed.
Tim says:
I’m interested in W3TC Pro for a WooCommerce site. I am currently using the Cloudflare APO plugin. Based on previous comments, it seems I should deactivate the CF plugin as W3 will take over that functionality. Is that correct?
Remigio says:
what are the benefits of enabling this cloudflare extension inside w3? cache cleaning or what?
Christine says:
Thank you. I have w3 installed and Super Page Cache for Cloudflare. I just added Cloudflare through Performance+Extenstion. My TTFP is terrible. What should I reconfigure?
Marko says:
Hey Christine,
This depends on several things, so I would advise reaching out directly to us via the W3 Total Cache support channel in the plugin – Performance>Support and provide the website URL so we can check this. This way we will be able to assist you more with this.
Thanks!
Sly says:
I have followed the Cloudflare integration guide to authorize domain with Cloudflare API key, but W3 Total Cache Cloudflare Statistics widget remains greyed out and actually doesn’t get Cloudflare stats (everything is 0 bandwidth, requests, visits etc.) . The Cloud flare extension settings also aren’t aligned with settings in Cloudflare portal. So seems that W3 Total Cache extension doesn’t work at all.
Marko says:
Hey Sly,
Thank you for reaching out.
It may take some time for the widget to pull the information defending if the cache is purged and how long it was from the authorization.
You may want to give it some time.
W3TC does not cover all settings in the CF portal as some of them may be for Pro users of the Cloudflare plan.
We’ve tested this and the Extension works great and it connects W3TC with your Cloudflare.
Thanks!
stefan says:
Hi Jesse,
thanks for the great content.
I plan on using W3TC and also use the cloudflare extension.
At the moment i have the cloudflare wordpress plugin still active. How can i switch from using this and use the W3TC extension for cloudflare instead? Is there a special procedure or order of steps to be considered?
I read that it is not recommended using both of them in parallel.
any tips would be highly appreciated!
Thanks in advance
Marko says:
Hi Stefan,
The only thing you need to do is to disable the other plugin you are using to connect Cloudflare and then activate the W3TC Cloudflare extension and authorize the Cloudflare with Cloudflare’s Global API key and the email used to signup with Cloudflare.
Thanks!
Kainat says:
Hi,
I wanted to ask that i have done whole steps but still my website speed is very low
What could be the possible reason
Plz help me
Marko says:
Hello,
There can be a number of reasons for the slow website. This includes the server, the number of plugins, the theme, etc.
Please reach out to us directly via the plugin or open a new support topic.
Thanks!
Juherianto says:
Hi Jesse, thank you for your tutorial. 🙂
I have followed your guide until generating API Key on Cloudflare (in this case, I generate Global API Key). When I input the API Global API key on the Authorize button on Cloudflare extension and click Next.
The select zone box doesn’t show zone like on your tutorial. So the display on my box like Zone: (empty), then if I click Next, I can’t authorize successfully, it will keep redirecting me to that zone box again, so I can’t get it done. Is there anything wrong in this case? really appreciate for your time, looking forward to hearing from you.
Marko says:
Hello Juherianto,
As I’ve mentioned in the reply via the support channel, his means that the zone is not available. So you need to make sure that the DNS propagation is finished, meaning that the DNS is now pointing to Cloudflare. Once the propagation is done and the DNS settings updated, the zone should be available in the authorization.
Thanks!
Ernest says:
Hi Jesse, great article!
I already have my site running with Total Cache and Cloudflare, but Im having an issue with the cache and new content, Im running a newspaper site so new posts are frequently added, and this posts are not visible on the site (mostly on category pages)
I’ve installed the Cloudflare plugin and activated the Auto purge content on update (not using APO).
Does anyone have this scenario? Any suggestions?
Thank you
Jesse says:
Hi Ernest-
If you enable the Cloudflare Extension in Performance > Extensions, you won’t need to also run the Cloudflare plugin, all of the same purging functionality will be handled by W3TC.
Do you have any other caching enabled, like a proxy cache with NGINX, that may also need to be purged when you make updates?
You can also start a new Support Forum thread if you’d like to provide some more details for us to take a look at.
Christine says:
So I should disable the Cloudflare plugin while using the Cloudflare extension through W3?
Munya says:
Good day, how does this process work on a WPMU installation with distinct domains – where each domain is already registered and activated in CF as well.
Jesse says:
Hi Munya-
In order to accomplish that, you should disable the option to Use single network configuration file for all sites in the Performance > General Settings > Miscellaneous section of your menu as your network super-administrator, and then enable and configure the Cloudflare extension on each individual site.
Munya says:
Hi Jesse,
Thanks for getting back to me.
I have tried the setup as you describe & all the sites are inheriting the clouflare site of the network / primary installation.
I have disabled the extension for now and will manually manage the sites on cloudflare for now. The main feature on the extension that I love is purging the cloudflare cache on page / post change
Jesse says:
Hi Munya-
As long as you’ve disabled the Use single network configuration file for all sites option, your network sites should be able to use their own settings for the CloudFlare extension. If that’s not working for you, we’ll be happy to assist. Start a new support forum thread with the details of your configuration, and we’ll be able to help troubleshoot for you.