How to Enable the Google PageSpeed Insights Widget in W3 Total Cache
You can use W3 Total Cache to connect to the Google PageSpeed Insights API so that you can see your website’s speed and get suggestions to optimize your WordPress website even further using those scores directly from the Performance Dashboard. Not only will you get an overview of your website performance directly on your dashboard, but you can get a PageSpeed score for every page on your WordPress website from the Admin Toolbar at the top. Cool, right? Use the following instructions to create a Google PageSpeed Insights API Key and connect them to your W3 Total Cache WordPress performance plugin to get insight into your next steps for making your website pages load faster than ever before.
Speed Up Your WordPress Website.
A Difference of Just 100ms in Page Load Speeds Can Cause a Visitor to Prefer Your Competitor’s Website.
Create your Google Cloud Project
- Log into your Google Account and navigate to the Google Cloud Console located at https://console.cloud.google.com
- If this is your first Google Cloud project for your website, click on Select a Project.

- If you already have a project set up for your website, choose that project. If you have another project set up for other reasons, it’s best practice to create a new project dedicated to this website. You will thank us for this advice later.
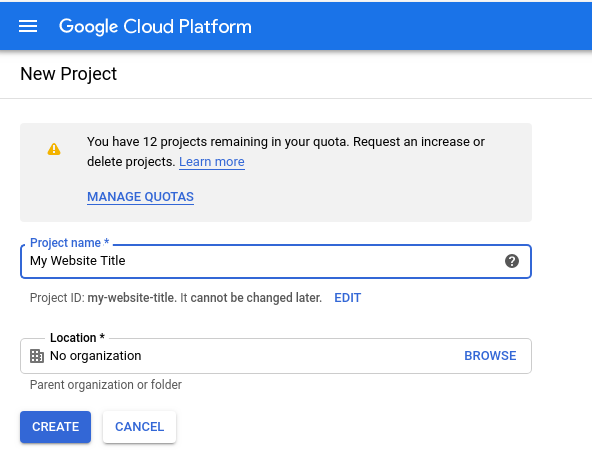
- Name your project with a name unique to this website so it is easy to understand later, and click Create.


Enable the PageSpeed Insights API
- Click on APIs and Services from the menu.
- Click Enable APIs and Services at the top of the screen.
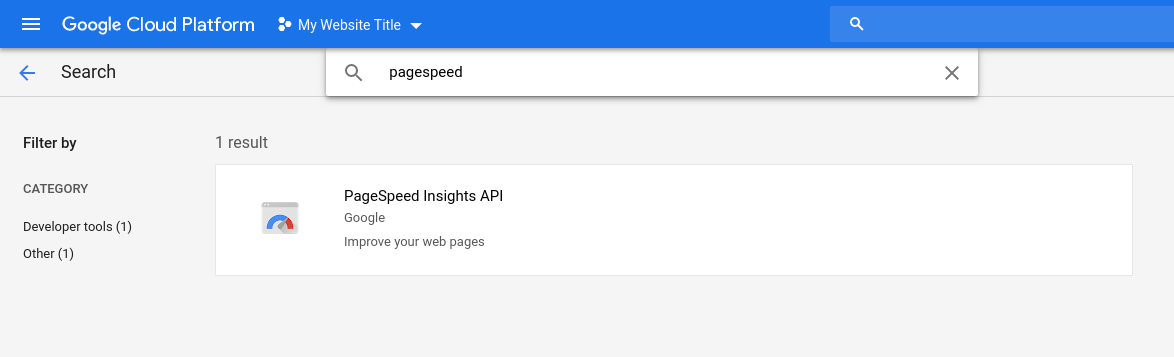
- Start typing Pagespeed into the search bar, and when it appears from the list of APIs, click PageSpeed Insights API.

- Click on Enable on the next screen.
Create Your PageSpeed Insights API Key
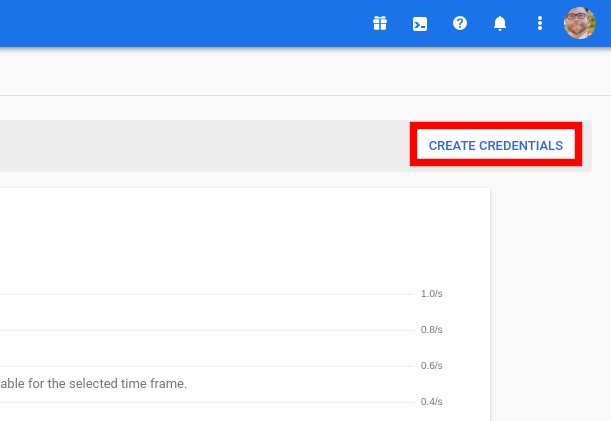
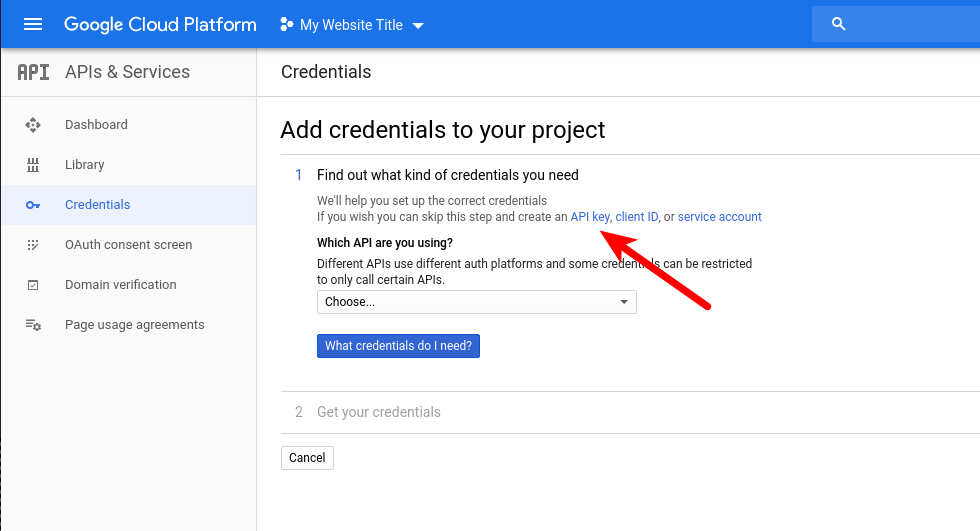
- After enabling the API, you’ll be brought to the PageSpeed Insights Overview screen. Click on Create Credentials near the top.

- Look for the option to skip this stem and create an API key.

- Optionally create a name for your API Key, and under Application Restrictions choose HTTP referrers.
- Enter your domain into the field, using wildcards and the appropriate http/https protocol, e.g. https://*.example.com/*
- Click Create and copy your new key to your clipboard.
Enter your API Key into W3 Total Cache
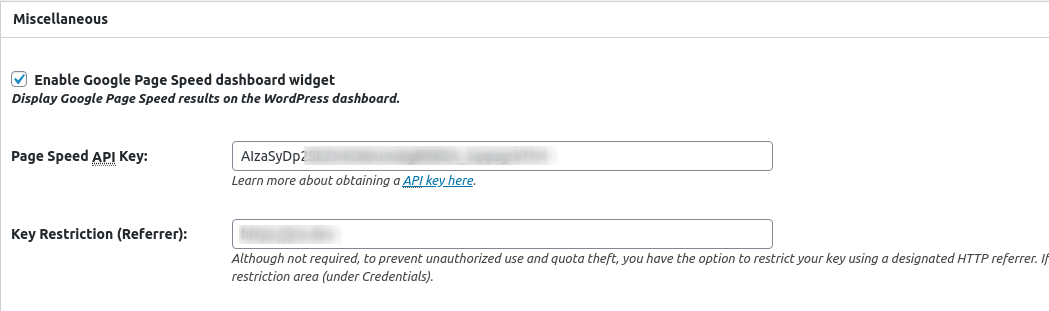
- Navigate back to your WordPress Dashboard’s Performance -> General Settings -> Miscellaneous section.
- Click Enable Google Page Speed dashboard widget and paste your API key and HTTP Referrer into the fields.

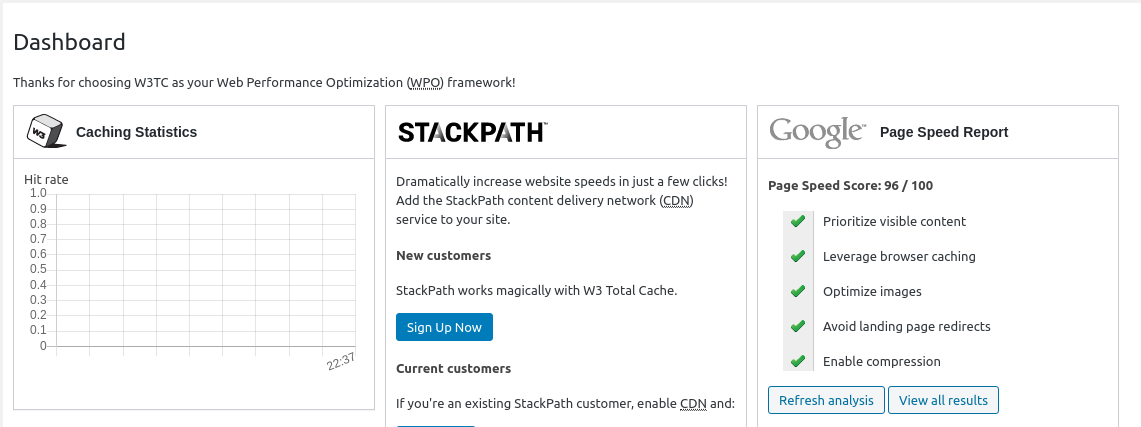
- The PageSpeed Insights widget will now be visible on your Performance -> Dashboard screen.
Congratulations! Now you know how to connect your W3 Total Cache Dashboard Widget to Google PageSpeed Insights so that you can optimize WordPress for speed even more effectively. Next, you may want to learn how to set up W3 Total Cache debugging to troubleshoot your caching configuration or learn how to set up Caching Statistics for detailed insight if you are a W3 Total Cache Pro User.
W3 Total Cache
You haven't seen fast until you've tried PRO
Full Site CDN + Additional Caching Options
Advanced Caching Statistics, Purge Logs and More
Everything you need to scale your WordPress Website and improve your PageSpeed.
Chris says:
Hi. Step 2 under “Create Your PageSpeed Insights API Key” is no longer possible as there is no option to “skip this step.” The only two options now are these:
>User data
Data belonging to a Google user, like their email address or age. User consent required. This will create an OAuth client.
>Application data
Data belonging to your own application, such as your app’s Cloud Firestore backend. This will create a service account.
James says:
I’ve installed the pro version of the total cached plugin, followed the instructions for the google pagespeed widget, but when I look at the dashboard, it’s blank! Any ideas welcome
Jesse says:
Hi James-
Probably the most common reason for this is a mismatch on the Application Restrictions > HTTP Referrers setting. Double-check the protocol (i.e. HTTP/HTTPS) and domain string (i.e. *.example.com/*) to be sure they reflect your website. Double check both the setting in W3 Total Cache as well as your Google Cloud Platform dashboard. If you’re still having trouble, please let us know in a new support forum post and we’ll be happy to help further.
Evaldas says:
Thank bro. Very useful!
Cloudi5 says:
The guidance you provided is awesome.
Max says:
Hi guys!
Ive followed the guide but i am also getting the unable to fetch results error, any ideas yet?
Jesse says:
Hi Max-
We’re tracking this bug on our GitHub repository and has already been fixed in the development version. We’ll be releasing an update with the fix as soon as testing is complete.
Jon says:
I have a key with no restrictions (while testing) but the dashboard widget doesn’t appear to be functioning correctly. When I click “Refresh Analysis”, it says “Unable to fetch Page Speed results.”, I can see in the Chrome Dev Tools that the network response comes back with {“error”:”API call failed”}.
Am I missing something in the config?
Jesse says:
Hi Jon-
I was able to replicate your issue on two different sites with different keys and restrictions, so I’ve reached out to the developers to see if we have a bug here. I’ll update this comment thread as soon as I have news for you.
Jesse says:
Hi Jon-
I wanted to give you an update on this, the developers are aware of the issue and are currently working on a fix: #192 Google Page Speed dashboard widget not fetching results.
MrPete says:
What is the format of the required “HTTP Referrer” in the W3TC field?
Jesse says:
This will depend on exactly how you’re using it, but in general it should be the full URL with the http/https protocol. For example, if I wanted to enable the API for all of BoldGrid’s website and its subdomains, I’d use
Here’s a resource with more examples from Google.