How to Let Your Customers Book Appointments with WordPress
WordPress Tutorials
Do you have a personal business or side hustle you want to promote? Are you struggling to manage your appointments? Create a WordPress website! Having a website is almost expected these days, and it can help you grow and manage your business more effectively.
Once you know how to let your customers book appointments on their own, without contacting you directly, your business will grow with less day to day work on your part. With a WordPress website your customers can book appointments at their convenience, 24 hours a day, not necessarily during your business hours.
While there are many different ways to create a website, WordPress is the best platform because it lets you create a website with complete ownership of your content, unlike other options that use proprietary code.
What is WordPress?
WordPress is a Content Management System (CMS). As of October 2020, WordPress runs 38% of the web. WordPress is the most popular CMS website builder on the internet. It’s easy to install and use, which has allowed WordPress to become the best choice for businesses looking to build or enhance its online presence.
WordPress also maintains a massive public repository of free themes and plugins, allowing you to expand your website in any direction you see fit. Last, but certainly not least, the popularity of WordPress and its status as open source software means there’s tons of information on the Internet on working with WordPress. Whatever problems you may have regarding your WordPress powered website is just a simple Google search away.
How to Install WordPress
Before installing WordPress you will need a domain name and personal WordPress web hosting. Then you will need to Install WordPress. Before starting the manual installation discussed below, check and see if your hosting provider offers a simplified or ‘one-click’ option to install WordPress.
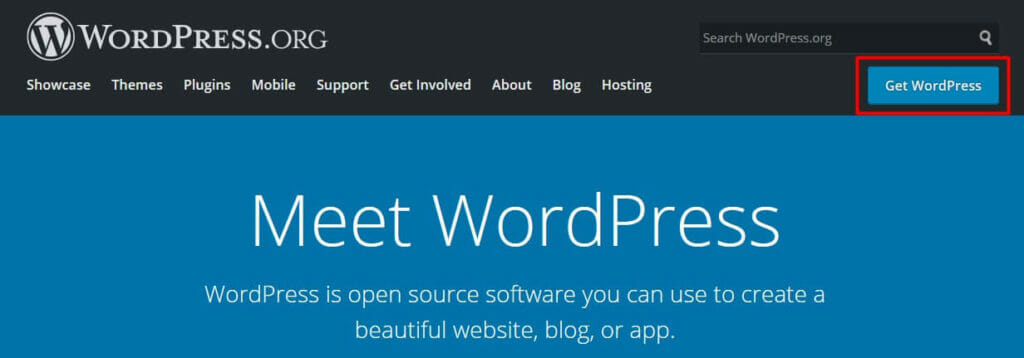
First you will need to get the WordPress core files from WordPress.org. Click the blue Get WordPress button in the upper right.
Next, click the Download WordPress button – please note it will show the latest version number, not necessarily what you see below.
Once the file starts downloading, login to your web hosting server, in our example we’re using cPanel, and open the File Manager. Navigate to your installation directory and upload the archive you downloaded from WordPress.org.
There will be WordPress zip file when the file has finished uploading. Click the zip file, then click extract to move the files out of the zip archive and onto your server.
Once the files have successfully extracted from the zip, you will see a wordpress folder like shown below:
Now we need to move the files to the main directory. Open the WordPress folder, select all files and use the Move option to take them out of the wordpress directory and place them in the appropriate folder for your installation, which in our example is public_html. Your directory name may vary based on your server setup.
Now the files are in the right spot – you’re halfway there!
Next we need to create a database for your website. The database is where all the content for your website is stored, for example text, images, and theme settings. Open the database control on your web hosting server, commonly cPanel, and create a new database and user specifically for this WordPress installation. Be sure to remember the database name, user and password you created, you will need that information later! Use the database controls to add the database user to the database will All Privileges.
Now it’s time to link that database to your website. In your web browser, go to your domain. You should see a page with a list of languages and the WordPress logo. Select your language and click Continue, then click Let’s Go on the following screen to continue with the installation.
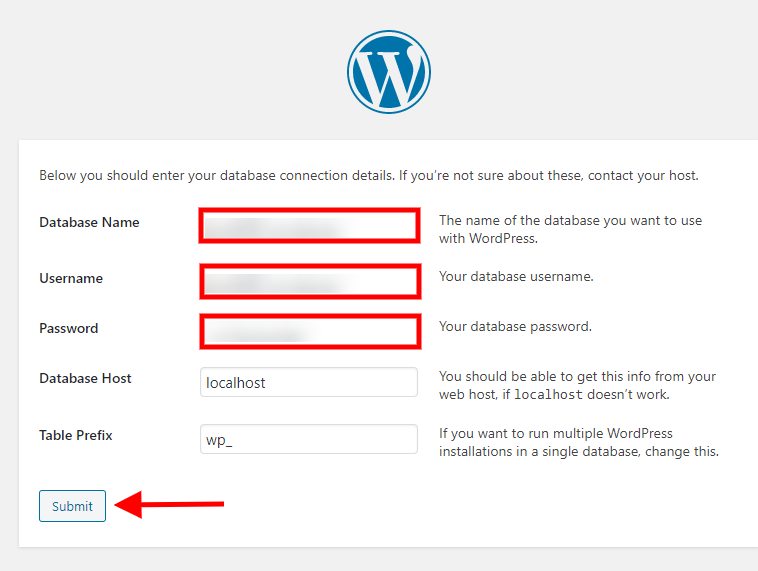
You will now see a form to enter your database name, user and password. Leave the database host and table prefix unchanged, then click Submit.
Now WordPress will validate the entered database information. Once the check is complete, you will see a button to Run the installation.
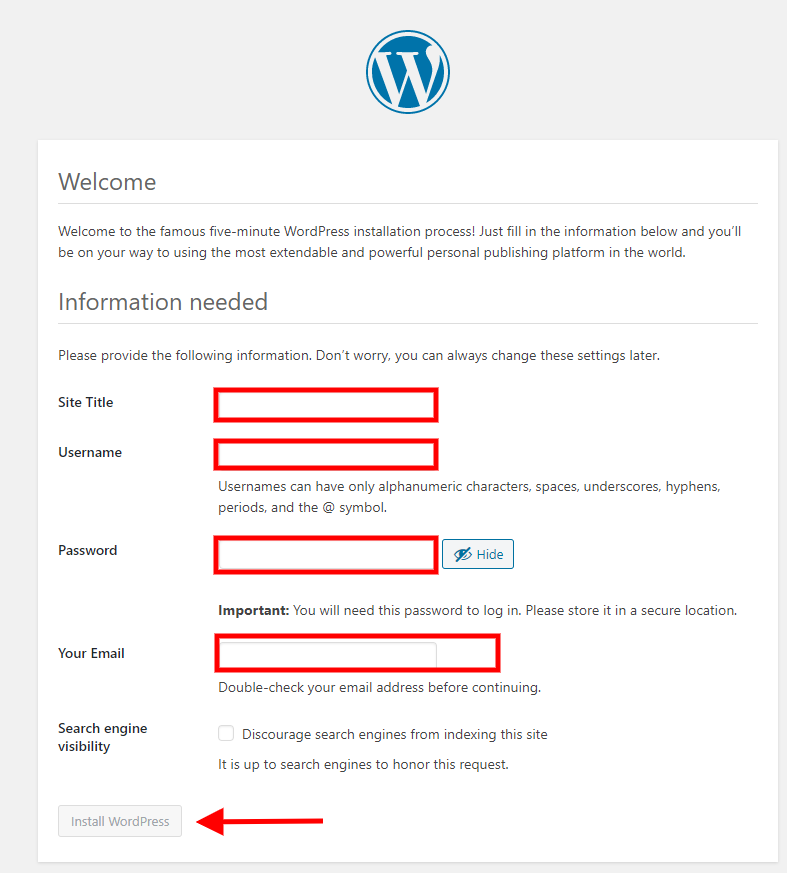
You have reached the last form! Here you can set your site title but keep in mind you can always change it later if you aren’t completely sure of your business name yet. The username created here cannot be changed, however the password and email can be changed as needed.
The last option decides if Google and other search engines will look at your site now and add it to the results, or if it should wait. We recommend checking this option so your site doesn’t go live to the public before you’re ready.
Click the gray Install WordPress button to finalize the installation process.
Congratulations! Now you have installed WordPress and can start creating the your website.
Find a WordPress Theme for Business
Now that you have WordPress installed, the next step is to pick a theme. Your WordPress theme decides the colors, fonts, and sets the general look and feel of your website and you will always have a theme active. We recommend using BoldGrid Crio, our WordPress theme for business, to create your website. BoldGrid Crio is our feature-filled WordPress SuperTheme with unique controls that allow you to have greater control over your website design than other themes.
With BoldGrid Crio you can create a custom header and footer for your website, truly making it one of a kind. BoldGrid features a unique color palette system – when you change a color in the palette, everywhere that color is used changes at once. Thousands of Google Font typography options are available, with an easy way to preview what each font looks like right from your site.
To install BoldGrid Crio, start by navigating to Appearance > Themes. Your screen will look similar to this, with all installed themes showing. Click the Add New button at the top, or the gray + icon in the outlined box.
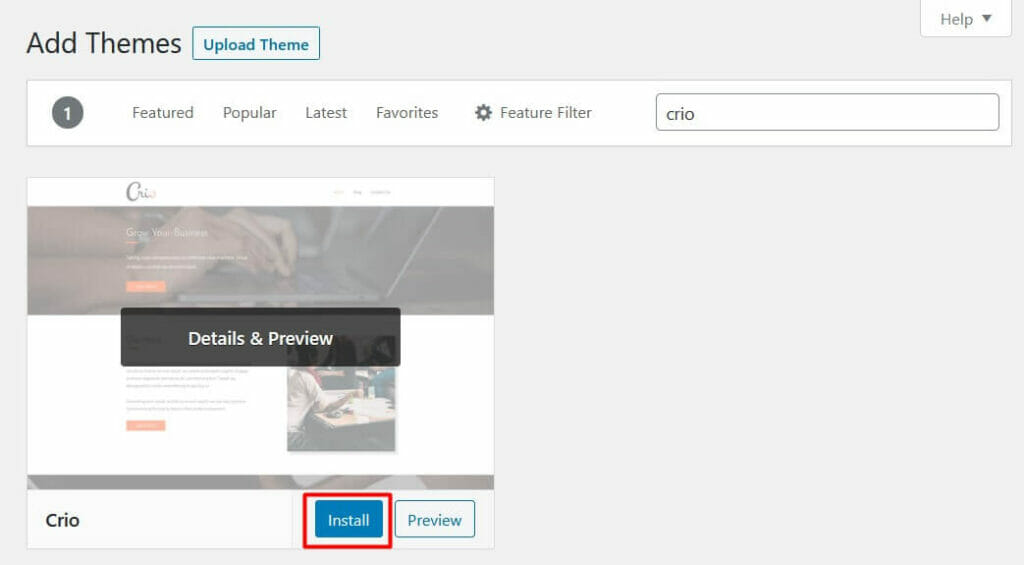
On the next screen, in the upper right you will see a search box – type Crio. Click the blue Install Now button, then the blue Activate button that appears in its place to make this the active theme used on your website.
Congratulations! You have now installed a new WordPress theme! Before you create a page you may want to go to Appearance > Customize > Colors to set your custom color palette and Customize > Fonts to choose the fonts used across your website.
Create Pages with the Post and Page Builder
BoldGrid Crio is designed to integrate with the Post and Page Builder, our WordPress page builder. It lets you create your pages easier than the way Core WordPress provides. The Post and Page Builder adds a drag and drop interface with rows and columns to arrange your content just how you want it.
While Core WordPress (the initial zip file you downloaded) provides the basic platform to get a website up and running, you will need to add what are called Plugins for additional features. The Post and Page Builder appears as a recommended plugin in your dashboard. To activate it, simply click Begin Installing Plugins from the notice at the top of your dashboard.
Next, click Install under BoldGrid Post and Page Builder. As shown below BoldGrid Easy SEO is also recommended to help with search engine optimization.
When you click install from this screen the plugin should both install and activate, but you can always go to Plugins > Installed Plugins to ensure it’s active. You will not have access to features in plugins that are not active.
How to Add a Page in WordPress
Before you create the appointment calendar you will need to create a page to put it on. We recommend letting your customers book appointments right from a Services page, so your customers know exactly what they are getting. BoldGrid has an endless supply of Service WordPress Blocks to help get you started. At a minimum we recommend having a Home and a Services page, but you may want a separate Contact page as well.
Use a WordPress Plugin to Book Appointments
Booking appointments is another action that requires a plugin. The plugin we recommend is Simply Schedule Appointments because it has a very simple interface and walks you through each step needed to get your services ready for sale.
Install the Simply Schedule Appointments Plugin
To install a plugin, in the WordPress dashboard hover on Plugins and click Add New. In the upper right you will see a search box – type Simply Schedule Appointments. You will be shown an entire page of results, make sure to select the correct one, as shown below. Click the gray Install Now button, then the blue Activate button that appears in its place.
The plugin is now installed! Click the new link Appointments in your WordPress dashboard to launch the simple setup wizard. When you enter the Appointments section for the first time you will see the screen below, click the Yes, Help Me Please! button to get started creating your appointments.
After verifying some general information about your contact information and website time and date display, you will be able to set your create your first service.
Create Your Booking Calendar
Basics
The first step is to enter the basic information for the appointment type. In our example, we have the service name as Interior Auto Detailing with a 90 minute appointment length. The slug will be automatically created based on the service name, but you can change it if you’d like. We set the calendar to show a monthly view to help customers see more available appointments. Click the Continue button when ready.
Availability
Next you decide when appointments can start. If you only want appointments to start on the hour, click the button next to 60 minutes. In our example we have appointments that can be made every half an hour, with an hour unavailable from 12pm to 1pm (for lunch) which shows as white space. This is just when the appointment will start, the end time will be based on the length of the service selected. Once the appointment has been confirmed, the calendar will automatically remove any time slots that overlap with that appointment.
Using our calendar above, once a 90 minute appointment is booked for 9:30am, the next available appointment will not be until 1pm. Since there isn’t enough time for an entire appointment at the earliest time slot – 9am – it is removed. The appointment would end at 11am but there isn’t enough time for a 90 minute appointment between 11am and 12pm when appointments are unavailable, therefore the next available time that would show to your customers is 1pm.
Once you have your availability setup, click Continue to open the next section.
Scheduling Options
Step 3 is to fine tune some scheduling options. You can set a break between appointments, perhaps for setup or transportation time, to make sure you aren’t rushing from one customer to the next. We’ve added a buffer of 30 minutes after the appointment ends to clean up between customers.
You can also decide how many days, or even hours, ahead of time appointments can be booked. We’ve decided a 1 day notice is enough for us, but increasing the number to 2 or 3 would give you a better idea of your schedule for the coming days. Same day appointments can be tricky to manage, so be careful with those.
These settings create the form your customer fills out to book the appointment, and it can be modified at any time. Click Continue when you are happy with your form.
Can I End Up Overbooked?
Nope! Once a customer has booked an appointment time, that appointment time will no longer show as available. Second checks are done in the last steps of customer booking to ensure someone else didn’t book that appointment in the last few moments. If this happens, the customer will be prompted to select a different time.
Additionally, with Simple Schedule Appointments you can set a time buffer before and after each appointment time so you can stay on time and still provide a high level of service without rushing.
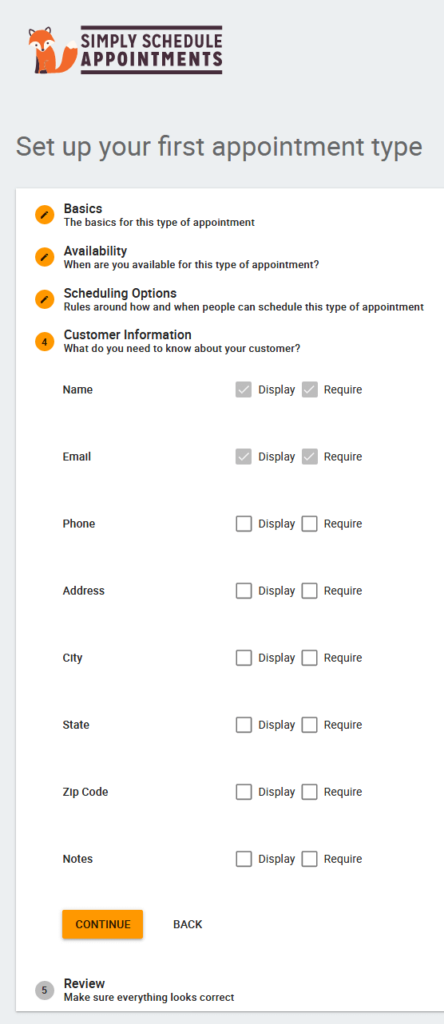
Customer Information
You’re almost there! It’s time for the last step. Here you will create the form your customer fills out to book appointments, and it can be modified later. Collecting as much data on your customer as you can without asking for too much can be a fine line. Luckily you can display more fields than are required to book the appointment and see what information your customers are willing to offer.
Both Name and Email are set to Display and Require by default, as this is the minimum information your customer needs to enter to book appointments. You can decide if the rest of the fields should be displayed, and if displayed are they required. Your customer will not have to fill out any fields that are not set to Require in order to book the appointment.
Review Appointment Details
Congratulations! You have successfully created your first service with appointment times. An overview of everything we just entered is shown here, along with the shortcode to display the calendar on your website, like on the Services page previously created.
On this final screen you have three options, you’ll want to click Go to Settings in the middle to style your booking calendar.
Style Your Booking Calendar
It’s easy to make your calendar match the look and feel of the rest of your site. From the main Simply Schedule Appointments Settings page click on Styles. Click on accent color box and you can enter the same HEX code (stars with a # sign) from the Customizer for your desired color for a consistent color scheme. You can also set the font to match your selection from the Customizer, as Google Fonts are also included here. Click the Save button at the bottom of the panel to finalize your changes.
How to Manage Appointments
By default you will get an email when an appointment is booked, but you can always click on Appointments at the top to see all your appointments. From here you can also book appointments yourself if needed to get them on your booking calendar and avoid double bookings.
How to Accept Payments
And now it’s time for the best part – getting paid!!
There are several options for accepting credit card payments in person, with Stripe and Square being two of the most popular. Mobile payment apps like Venmo, Google Pay, and Cashapp are growing in popularity and your customers may already have them installed on their phone. Including mobile payment options in the confirmation email gives a clear and easy path for customers to pay you.
If you use PayPal, we recommend adding the PayPal Buy Now Button plugin so customers can pay your easily from your website. After installing and activating the plugin, edit your Services page and add a button for each service by clicking the gray PayPal Button link next to Add Block. Use the Post and Page Builder to drag and drop each button into place. The button will take your customer to PayPal to payment information, no credit cards are saved on your website.
Congratulations!
You now have a website for your customers to book appointments easily. Next, you may want to learn more about Easy SEO, our free full-featured WordPress SEO plugin, to take full advantage of what your website can do for you.
