How to Sell Digital Products with WooCommerce
WordPress Tutorials
In this article we will show you how to create a website to sell digital products with WordPress and WooCommerce in a single day.
Why Should I Use WordPress and WooCommerce?
WordPress is a Content Management System (CMS) that is easy to install and easy to use, which has allowed WordPress to become the best choice for new businesses. As of October 2020, WordPress websites make up 38% of the web and according to Built With, WooCommerce is used by 31% of the top 1 million eCommerce websites.
WooCommerce is the industry standard self-hosted eCommerce option, which gives a robust set of eCommerce features while still giving you complete control of your customer’s information. An extensive marketplace will power any type of business, while WordPress plugins help promote online businesses and optimize for SEO.
WooCommerce is also the easiest and most flexible eCommerce tool to learn. WordPress is powered by a robust community of passionate web professionals who curate optimized themes and plugins built specially to make selling online easy.
How to Install WordPress
Before installing WordPress you will need personal WordPress web hosting and a domain name. Then you can follow these steps to Install WordPress. Your hosting provider most likely offers a simplified or ‘one-click’ option to install WordPress. Check with your web host’s documentation to see if this is available for you.
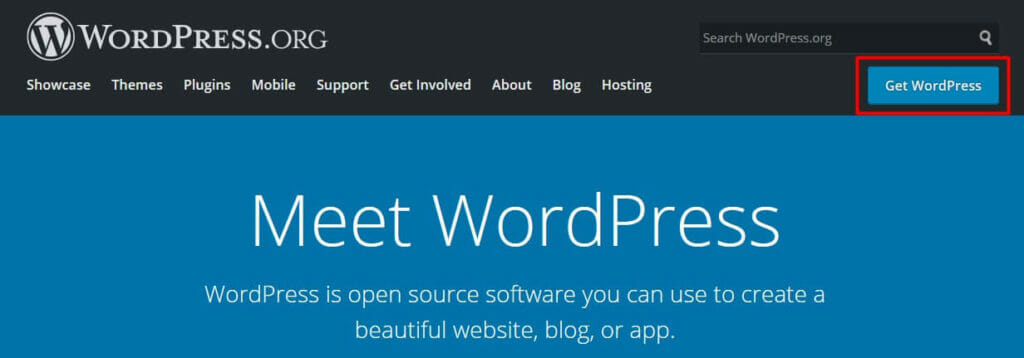
The first step to installing WordPress is to get the files from WordPress.org. Click the blue Get WordPress button in the upper right.
Next, click the Download WordPress button – please note it will show the latest version number, not necessarily what you see below.
Once the file starts downloading, login to your web hosting server, in our example we’re using cPanel, and open the File Manager. Navigate to your installation directory and upload the archive you downloaded from WordPress.org.
There will be WordPress zip file when the file has finished uploading. Click the zip file, then click extract to move the files out of the zip archive and onto your server.
Once the files have successfully extracted from the zip, you will see a wordpress folder like shown below:
Now we need to move the files to the main directory. Open the WordPress folder, select all files and use the Move option to take them out of the wordpress directory and place them in the appropriate folder for your installation, which in our example is public_html. Your directory name may vary based on your server setup.
Now the files are in the right spot – you’re halfway there!
Next we need to create a database for your website. The database is where all the content for your website is stored, for example text, images, and theme settings. Open the database control on your web hosting server, commonly cPanel, and create a new database and user specifically for this WordPress installation. Be sure to remember the database name, user and password you created, you will need that information later! Use the database controls to add the database user to the database will All Privileges.
Now it’s time to link that database to your website. In your web browser, go to your domain. You should see a page with a list of languages and the WordPress logo. Select your language and click Continue, then click Let’s Go on the following screen to continue with the installation.
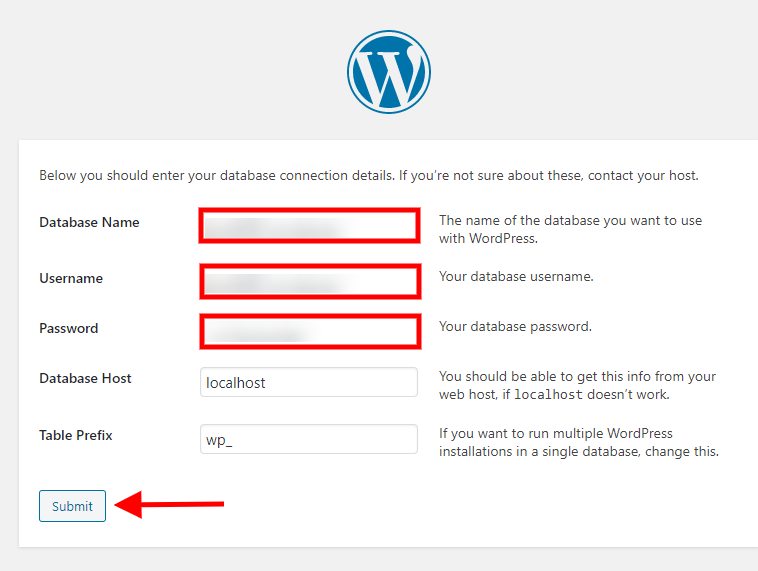
You will now see a form to enter your database name, user and password. Leave the database host and table prefix unchanged, then click Submit.
Now WordPress will validate the entered database information. Once the check is complete, you will see a button to Run the installation.
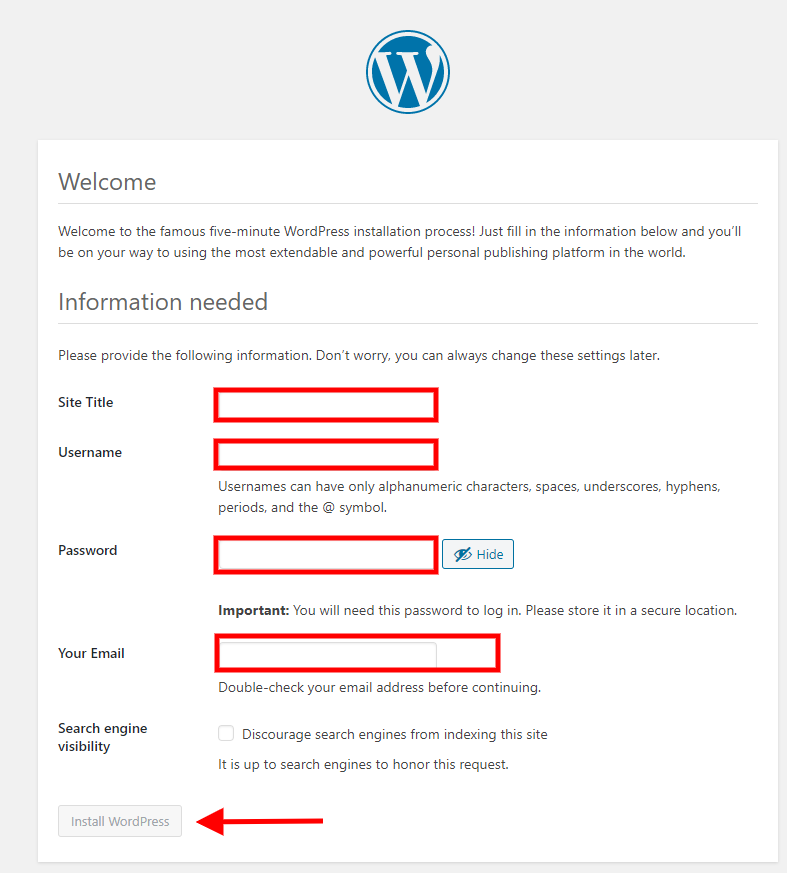
You have reached the last form! Here you can set your site title but keep in mind you can always change it later if you aren’t completely sure of your business name yet. The username created here cannot be changed, however the password and email can be changed as needed.
The last option decides if Google and other search engines will look at your site now and add it to the results, or if it should wait. We recommend checking this option so your site doesn’t go live to the public before you’re ready.
Click the gray Install WordPress button to finalize the installation process. Congratulations! Now you have installed WordPress and can start creating the your website.
Find a WordPress Theme for Business
The next step is to select a WordPress theme. Your WordPress theme decides the colors, fonts, and sets the general look and feel of your website. When starting an online store it’s important to choose the right theme, as not all WordPress themes are optimized to sell online with WooCommerce. The most recent Core WordPress theme will be active by default, but we recommend using BoldGrid Crio, a WordPress theme for business, to create your online store.
BoldGrid Crio is our WordPress SuperTheme packed with features so you can have complete control of your store’s design. Changing colors on your website is easier than ever with Crio’s unique color palette design system – one click and everywhere the color is used is updated at the same time.
You can also create a custom header and footer with BoldGrid Crio, making your online store truly unique. BoldGrid Crio includes access to thousands of Google Font choices with global font controls.
Install a WordPress Theme
Start by navigating to Appearance > Themes. Your screen will look similar to this, with all installed themes showing. Click the Add New button at the top, or the gray + icon in the outlined box.
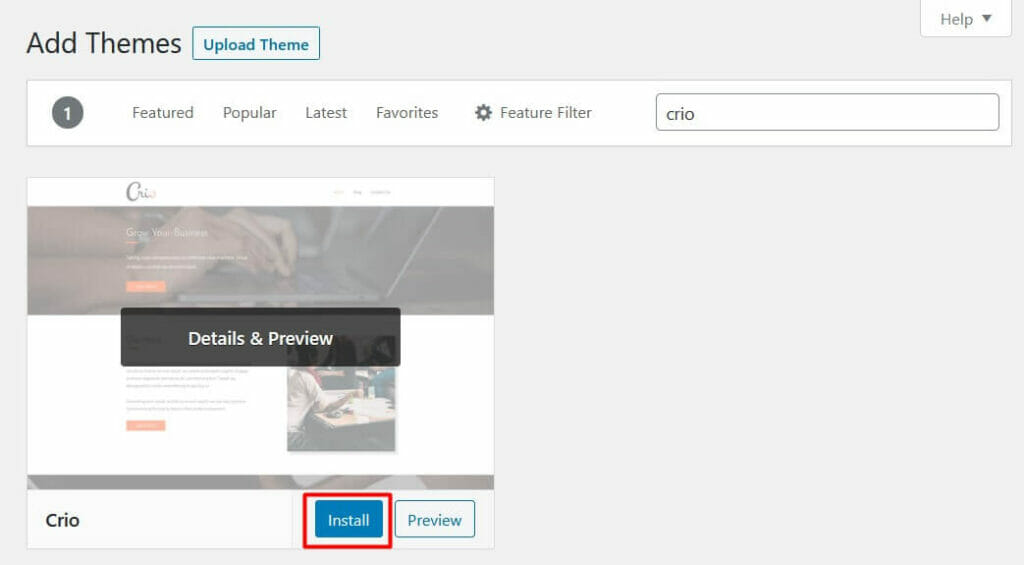
On the next screen, in the upper right you will see a search box – type Crio. Click the blue Install Now button, then the blue Activate button that appears in its place to make this the main theme used on your website.
Congratulations! You have now installed a new WordPress theme! Now it’s time to create your home page and introduce yourself to the world.
Design Your Home Page with the Post and Page Builder
BoldGrid Crio was created to perfectly integrate with the Post and Page Builder, our WordPress page builder. Create your pages easily with a drag and drop interface using the same colors and fonts selected in the Customizer.
Core WordPress (the initial zip file you downloaded and installed) is the basic system to create a website but to add additional functionality, like an online store, you will need plugins. A Plugin is a set of code that provides features not found in Core WordPress.
BoldGrid Crio includes a notice in your dashboard to install the Post and Page Builder, as it is a recommended plugin. To activate, simply click Begin Installing Plugins from the notice at the top of your dashboard.
Next, click Install under BoldGrid Post and Page Builder. You will see BoldGrid Easy SEO is also listed as a recommended plugin, it will help with search engine optimization.
After clicking Install from here, the plugin should both install and activate. If for some reason it did not activate, navigate to Plugins > Installed Plugins and click Activate under the plugin name. If a plugin is inactive, you will not have access to the features in that plugin.
Create a Page in WordPress
Before you create your online store, we recommend creating a homepage so your customers can learn more about you, and why they should purchase from you. You’ll want to add Welcome and About WordPress Blocks, and the Post and Page Builder by BoldGrid offers infinite options of each.
How to Install and Setup the WooCommerce Plugin
While WordPress has the capability of supporting an online store, this functionality is not found immediately out of the box. You will need to install another plugin, WooCommerce, to add products and make sales.
To install a plugin, in the WordPress dashboard hover on Plugins and click Add New. In the upper right you will see a search box – type WooCommerce. You will be shown an entire page of results, make sure to select the correct one, as shown below. Click the gray Install Now button, then the blue Activate button that appears in its place.
After installing and activating WooCommerce, click on WooCommerce > Home in your dashboard. This will automatically launch the setup wizard, but we are going to skip it and only focus on what you need to sell downloadable products. Click skip for now link to continue.

Enter Tax Rates
We recommend you talk to an accountant to see if you need to collect tax or ensure you are collecting the appropriate taxes. WooCommerce offers a free plugin – WooCommerce Shipping & Tax – that adds basic tax rates for you, otherwise you will have to enter them manually for each geographic area. After installing and activating this plugin, a new option for automated taxes will be available at WooCommerce > Settings > Tax, as shown below
Product Categories
Before creating your first product, you will need to add product categories to help organize your store. Go to Products > Categories in your WordPress dashboard to add new categories. One category has already been created – Uncategorized. This is the default category for all new products, and we recommend renaming it as Uncategorized doesn’t look very professional. You can drag and drop product categories to adjust the order after creation.
How to Add a New Product Category
- Choose a Name for the category, like Albums for example
- Add a Slug if you want to use something other than the full category name
- If this category is a subcategory, select the Parent category
- For example, a Albums category could go under the parent category Recordings
- Click the blue Add New Category button at the bottom and you’re done!
Sell Digital Products with WooCommerce
Now you’re ready to add products! WooCommerce includes several product types but we’re going to focus on how to sell a digital product, like a music album. Navigate to Products > Add New to get started.
Enter Product Details
WooCommerce products can have two descriptions. On the front end of your website, the Short Description appears next to the product image, and the Long Description appears below the product image. You do not need to include copy in both sections, but you can if you’d like. We recommend focusing on the short description as this is what shows to your customer immediately upon viewing the product. To read the long description, they will have to scroll down on the page.
Each product needs to be assigned to at least one Category, but it can be in multiple categories. If no category is selected, it will be added to the default category.
The Product Image is the primary image associated with the product and shows on the Shop page and as the product thumbnail. Images in the Product Gallery show below the product image on the product page.
Add Your Downloadable Product
In-between the long and short descriptions is a panel for product data. In the dropdown select Simple Product, and click the check boxes for Virtual and Downloadable to add the additional fields needed for downloadable products. Start by entering the regular price and sale price, if desired.
The Downloadable files section is where you control the download settings. The name entered here is for the file itself and will show to your customers after purchase. It can be different from the product name, and make sure it’s not too long.
The File URL is the exact link your customers will download the file from. This can be uploaded directly to your WordPress website by clicking the gray Choose file button, or copy and paste the URL from an external source.
Next there is an optional section for setting a download limit or expiration date. The Download limit will decide how many times your customer can download the file after purchase. If you want your customers to be able to re-download as many times as they’d like, leave it blank.
The Download expiry limits how long a download link is active. If you only want your customer to have access to the file for a limited period of time, enter the number of days after purchase you want them to have before losing access.
If you look under the Product data heading, you will see you are on the General tab. Click Inventory if you’d like to create a unique SKU for the item.
Below Inventory is Linked Products, the last section we will cover. Upsells and Cross-sells are available to help influence what your customer is purchasing. Upsells show on the product page, if you want to try and push your customer towards buying the upsell instead of that product. Cross-sells show at checkout to show your customer something they may have missed while browsing your store.
Once everything has been entered, scroll up to the top and click the blue Publish button. Congratulations on creating your first product! Next you’ll learn how to setup the best part of your online store – getting paid.
Accept Payments in WooCommerce
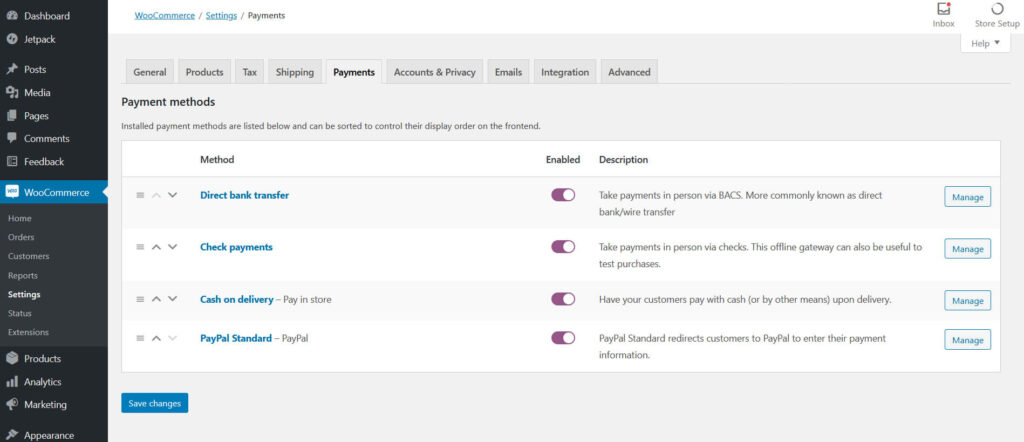
There are two default payment methods included with WooCommerce that are recommended for digital transactions.
Direct Bank Transfer
A bank transfer is more commonly known as a wire transfer, it moves money directly from one bank account to another. Your bank account info will not show publicly at checkout, it will show on the Order Received page and the confirmation email sent to the customer. We recommend disabling Guest Checkout at WooCommerce > Settings > Accounts & Privacy to help avoid spam orders.
PayPal Standard
PayPal Standard is the easiest way to take credit card payments on your website. Your customer does not need a PayPal account to pay you, and they are taken to PayPal’s secure website to enter their credit card information. This adds a level of trust for entering credit cards online.
Learn more about WooCommerce payment options.If you want to consider using other payment methods, here are some we suggest:
Final Thoughts on Selling Digital Products with WooCommerce
Congratulations! You now know how to sell digital products with WooCommerce. We hope you have found this article helpful. If you have any questions, please let us know in our WordPress User Forum.
